Crankshaft Pulse Sensor Inspection and Replacement
The DME control unit receives engine speed information from the pulse sensor located at the ring gear behind the crankshaft V-belt pulley. The second sensor on the cylinder head is the cylinder identification sensor.
INSPECTION
1. For inspection, disconnect the corresponding connector from the wiring harness. If necessary, first remove the intake manifold, as the connectors are difficult to reach.
2. Measure the resistance across the connector terminals of the corresponding sensor with an ohmmeter. Replace if necessary.
Specified value at a temperature of +20°C:
Crankshaft pulse sensor: 1.3 kΩ.
Cylinder identification sensor: between terminals 1 and 2: max. 1 Ω; between terminals 2 and 3: more than 10 MΩ.
Crankshaft Pulse Sensor Removal
PROCEDURE
1. Disconnect the pulse sensor connector.
2. Disconnect the oil line from the VANOS control unit and plug it with a clean plug.
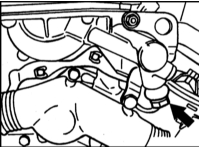
3. Disconnect the engine lifting eye. Note the cable (1) for correct reassembly later.
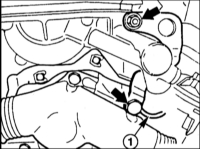
4. Remove the sensor cable from the guides. To do this, disconnect the cable sleeve from the clips and remove.
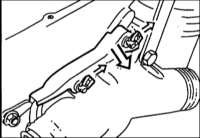
5. Unscrew the bolt at the crankshaft sprocket and remove the sensor with the cover.
INSTALLATION
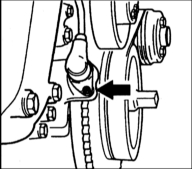
1. Insert the sensor and lightly tighten the bolt to 5 N·m.
2. Check the sensor distance from the sprocket with a feeler gauge. Specified value: 0.7 - 1.3 mm.
3. Route the connecting cable in the guides so that the wire does not rub against the V-belt. Connect the plug connection.
4. Secure the engine lifting eye.
5. Secure the oil line with new O-rings to the VANOS unit.
Cylinder Identification Sensor Removal
PROCEDURE
1. Remove the engine cover. Refer to Ignition Coil Removal and Installation.
2. The sensor is difficult to access. Therefore, first disconnect the plug connection at the VANOS unit solenoid valve and remove the valve. Refer to the accompanying illustration.
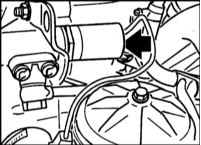
3. Disconnect the oil line from the VANOS unit and close the opening with a clean plug. See illustration 4.4.
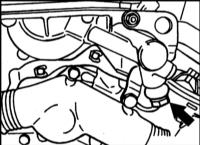
4. Unscrew the sensor mounting bolt and remove the sensor. Refer to the accompanying illustration.
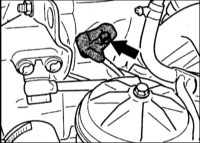
5. Disconnect the sensor plug connection.
INSTALLATION
1. Insert the sensor. Pay attention to the position of the sensor rubber seal. Replace it if necessary.
2. Tighten the sensor to 5 N·m.
3. Route and connect the sensor cable.
4. Secure the oil line with new O-rings and tighten it to 30 N·m at the VANOS unit.
5. Screw in the solenoid valve to 30 N·m in the VANOS unit. Replace a damaged gasket with a new one. Connect the valve plug connection.
6. Install the upper engine cover. Refer to Ignition Coil Removal and Installation.
Test yourself
A quick BMW 1 quiz: every answer comes with an explanation and a link to the manual page.