MULTIMEDIA
Home
In this manual: MULTIMEDIA
6steps
~36min
2/5difficulty
Done 0 of 6
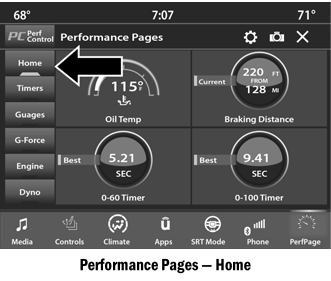
When Home is selected, a number of gauges (widgets) can be customized by the user. Follow the steps below to change a gauge. Alternatively, press directly on the gauge you wish to change, or:
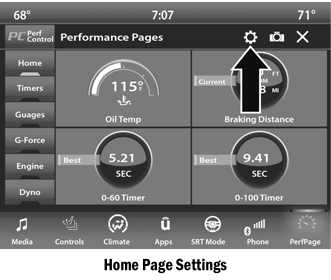
- Press the Settings button (gear icon) on the touchscreen to access the main menu for the gauges.
- Select one of the following options from the menu:
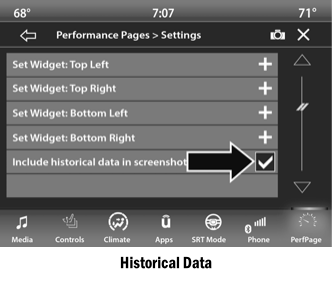
- Set Gauge: Top Left
- Set Gauge: Top Right
- Set Gauge: Bottom Left
- Set Gauge: Bottom Right
- After selecting the gauge location, select the sensor to display:
- Sensor: Oil Temperature
- Sensor: Oil Pressure
- Sensor: Coolant Temperature
- Sensor: Battery Voltage
- Gauge: Trans Temp — if equipped with automatic transmission
- Gauge: Boost Pressure — if equipped
- Gauge: Air/Fuel Ratio — if equipped
- Gauge: I/C Coolant Temperature — if equipped
- Sensor: Intake Air Temperature
- Sensor: Engine Torque
- Sensor: Engine Power
- Gauge: G-Force
- Sensor: Steering Angle
- Sensor: Current Gear
- Sensor: Current Speed
- Timer: 0–100 km/h
- Timer: 0–160 km/h
- Timer: 60 ft (20 m)
- Timer: 330 ft (100 m)
- Timer: 1/8 Mile (200 m)
- Timer: 1000 ft (300 m)
- Timer: 1/4 Mile (400 m)
- Timer: Braking Distance
- Timer: Reaction Time
Historical Data
The Historical Data feature allows you to view information about your vehicle, such as VIN, odometer reading, longitude and latitude coordinates, and more.
To activate the Historical Data feature on the touchscreen, follow these steps:
- Select the Home tab on the Performance pages. Then press the Settings icon (gear icon) in the upper right corner of the touchscreen.
- A checkbox next to "Include Historical Data on Screenshot" will appear at the bottom of the screen. Check the box to turn this feature on.
NOTE:
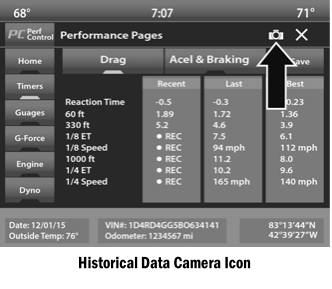
Once the checkbox is checked, the bottom bar of the screen will be replaced with historical data for your vehicle present at the time the screenshot icon was pressed.
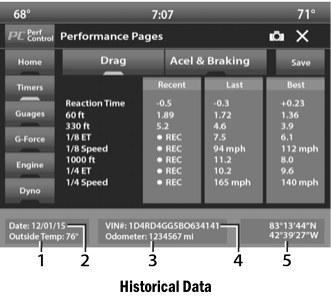
- Outside Temperature
- Date
- Odometer
- VIN
- Longitude and Latitude Coordinates
- To take a historical data screenshot, make sure a USB device is connected to the vehicle. Then press the camera icon located in the upper right corner of the touchscreen. The historical data image file will be saved to the USB drive.
Test yourself
A quick Dodge Charger quiz: every answer comes with an explanation and a link to the manual page.
Was this page helpful?