Assembly
PROCEDURE
1. Before installing the boot, wrap the splines of the drive shaft on the ball-type joint side with adhesive tape.
2. Apply grease to the drive shaft and install the boot.
Birfield CV joint grease: MS511–50
Ball-type CV joint grease: MS511–50
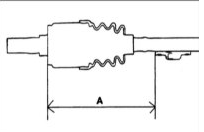
3. To install the dynamic damper, position the Birfield CV joint straight in relation to the shaft, place the damper at a distance of 301±2 mm, and secure it with the clamp.
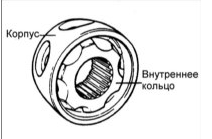
4. Apply grease to the inner race and cage. Install the cage so that the offset on the rolling surface is positioned as shown in the illustration.
Use the grease supplied with the repair kit.
5. Apply grease to the cage and the balls in the cage.
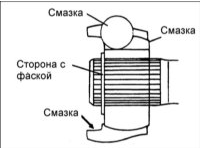
6. Install the joint as shown in the illustration and secure it with the snap ring.
7. Pack 45±5 g of grease into the outer race and install it on the drive shaft.
8. Pack 30±10 g of grease into the boot and install the boot on the joint.
Ball-type CV joint boot
Total grease quantity: 75±15 g
Joint: 45±3 g
Boot: 30±10 g
9. Secure the boot with the clamps.
10. Add to the Birfield CV joint the same amount of grease that was wiped off during joint inspection.
11. Install the boots.
12. Secure the Birfield CV joint boot with the clamps.
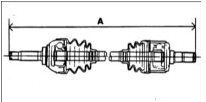
13. Secure the boots so that the length of the drive shaft meets the specified values.
Left drive shaft length:
With manual transaxle: 626.2±2 mm
With automatic transaxle: 644.9±2 mm
Right drive shaft length:
With manual transaxle: 933.2±2 mm
With automatic transaxle: 933.9±2 mm
Test yourself
A quick Hyundai Accent quiz: every answer comes with an explanation and a link to the manual page.