Suspension
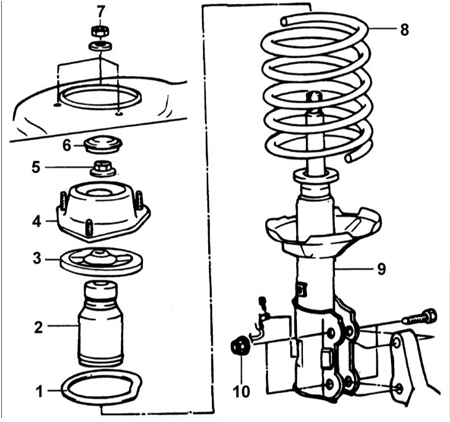
FRONT SUSPENSION STRUT ASSEMBLY
1 – lower spring seat;
2 – dust boot;
3 – upper spring seat;
4 – strut mount;
5 – self-locking nut, 60–70 N·m;
6 – dust cap;
7 – nut*, 20–30 N·m;
8 – spring;
9 – front suspension strut assembly;
10 – nut, 75–90 N·m.
* Nut marked with an asterisk must be tightened to the specified torque only after the vehicle has been set on its wheels.
Removal
PROCEDURE
1. Remove the front wheel.
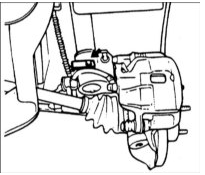
2. Disconnect the brake tube bracket from the front suspension strut.
Do not tear or damage the brake tube.
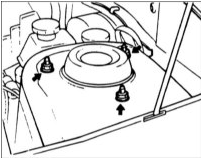
3. Remove the upper strut mounting nuts.
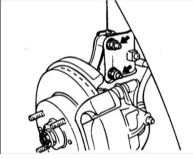
4. Remove the nuts and bolts securing the strut to the steering knuckle, then remove the strut from under the vehicle fender.
5. Install in the reverse order of removal.
Disassembly
PROCEDURE
1. Using the tip of a flat-blade screwdriver, remove the dust cap.
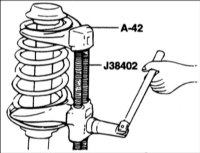
2. Using the special tool, compress the front suspension spring.
Use only a reliable tool to compress the spring.
3. Loosen the lock nut on the top of the shock absorber rod.
4. Remove the strut mount, upper spring seat, coil spring, dust boot and lower spring seat.
Inspection
PROCEDURE
1. Check the strut mount bearing for wear or damage.
2. Check the rubber parts for damage or deterioration.
3. Check the coil spring for sagging and loss of elasticity.
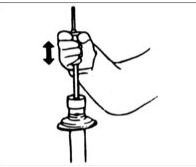
4. Check the shock absorber as follows:
a. grasp the shock absorber rod by hand and push and pull it in and out of the shock absorber several times;
b. check that the rod moves smoothly without sticking, and that the force applied to the rod does not change with each stroke;
c. make sure there are no abnormal noises when the rod moves.
Assembly
PROCEDURE
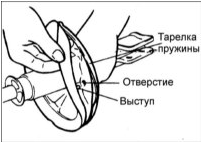
1. Install the lower spring seat so that its projections engage the holes in the spring plate.
2. Install the dust boot onto the shock absorber.
3. Using the special tool, compress the front suspension spring. After the spring is fully compressed, install it onto the shock absorber.
Install the coil spring with the marking facing the joint.
4. Fully extend the shock absorber rod and install the upper spring seat and strut mount.
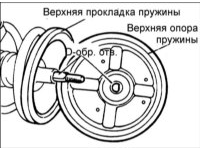
Align the D-shaped hole in the upper spring seat with the flat on the shock absorber rod.
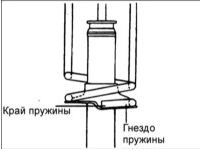
5. Correctly position the upper and lower ends of the coil spring by seating them in the recesses, then thread on the self-locking nut but do not tighten it fully.
6. Remove the spring compressor tool.
7. Tighten the self-locking nut to the specified torque.
Torque: 60–70 N·m
8. Lubricate the upper strut bearing and install the dust cap.
Make sure that lubricant does not get onto the rubber parts of the strut mount.
Test yourself
A quick Hyundai Accent quiz: every answer comes with an explanation and a link to the manual page.