Rear window
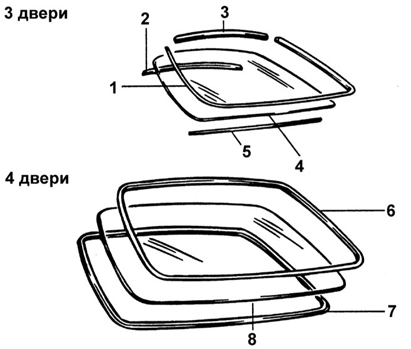
Rear Window
1 – rear window molding;
2 – rear window gasket;
3 – upper rear window molding;
4 – rear window;
5 – lower rear window gasket;
6 – rear window molding;
7 – rear window gasket;
8 – rear window.
Removal
PROCEDURE
1. Before removing the rear window, remove the following components:
– disconnect the connector from the rear window defroster;
– upper rear pillar trim;
– bolt securing the upper part of the rear seat belt;
– rear shelf.
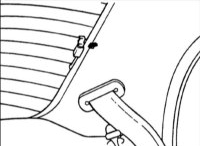
2. Remove the rear window in the same manner as the windshield.
Installation
PROCEDURE
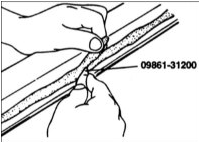
1. Using a special tool or knife, cut away the old sealant to a layer thickness of 2 mm along the entire perimeter of the flange and rear window.
Be careful not to remove more sealant than necessary, and do not damage the vehicle paint.
2. Degrease the treated surface.
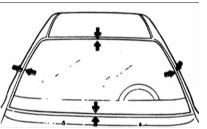
3. Place the rear window against the window opening and mark the installation positions on the body at four points.

4. Attach the rubber gasket to the inner surface of the rear window.
Sealant Layer Height
"B" – four-door vehicles:
Top: 13.5 mm
Sides: 13.5 mm
Bottom: 27 mm
"C" – three- and five-door vehicles:
Top: 23 mm
Sides: 23 mm
Bottom: 42 mm
5. Install the molding on the rear window.
6. Apply a thin layer of glass primer to the outer side of the rear window rubber gasket.

Do not touch the sealant layer with your hands.
If the sealant is touched by hand, it cannot provide a reliable bond and leaks may occur at this point after the glass is installed.
Do not apply body primer to the glass.
7. Apply a thin layer of primer over the initially applied sealant protruding along the glass perimeter. The glass must be installed within 10 min after applying the primer.
8. Load adhesive into the cartridge and apply it along the edge of the rear window.
Apply the adhesive within 5 min after applying the glass primer.
9. Using the special tool or suction cups, install the glass into the window opening in accordance with the previously made marks and press the glass against the window opening.
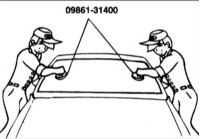
10. Using a spatula, remove excess adhesive. Fill all voids and gaps along the rear window perimeter.

11. Direct a stream of water onto the rear window and check the installation for leaks. Do not direct a high-pressure water stream onto fresh sealant.
12. If leaks are found, dry the damaged area and apply sealant.
Do not operate the vehicle for 4 hours after glass installation.
After rear window installation, support the glass for the first hour.
13. Install all previously removed components.
For 2–3 days after rear window installation, do not slam the doors.
Avoid driving on rough roads where the vehicle body is subjected to intense twisting.
Test yourself
A quick Hyundai Accent quiz: every answer comes with an explanation and a link to the manual page.