Starter Inspection (After Disassembly)
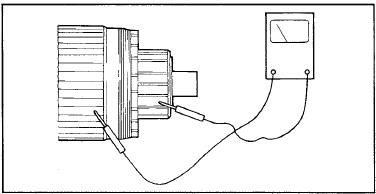
ARMATURE COIL GROUND INSPECTION
Using an ohmmeter, check that there is no continuity (resistance) between each commutator segment and the armature core. If there is continuity (resistance approaches zero), replace the starter armature.
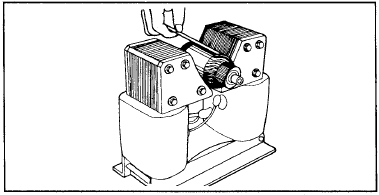
ARMATURE COIL SHORT CIRCUIT INSPECTION
Place the armature on a growler (tester for starter and generator armatures). If there are signs of a short circuit, replace the armature. If the thin steel strip located near the armature core vibrates while the armature rotates, the armature coil is shorted.
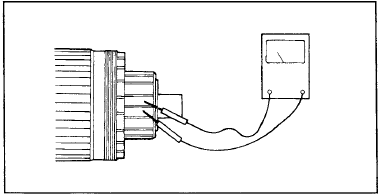
ARMATURE COIL OPEN CIRCUIT INSPECTION: Using an ohmmeter, check for continuity (resistance) between the commutator segments. If there is no continuity, the armature coil is open.
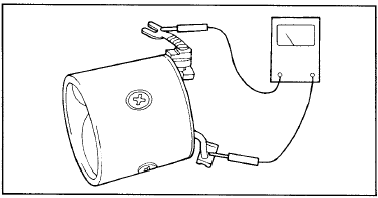
STATOR COIL OPEN CIRCUIT INSPECTION: Using an ohmmeter, check for continuity between the brush terminals. If there is no continuity, the stator coil is open. In this case, replace the yoke assembly with the stator winding.
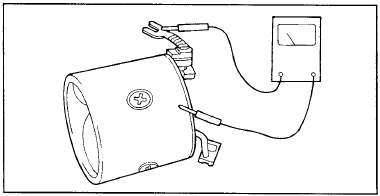
STATOR COIL GROUND INSPECTION
With the stator winding installed, use an ohmmeter to check that there is no continuity between the brush terminal (stator winding) and the starter body.
If there is continuity, replace the yoke assembly with the stator winding.
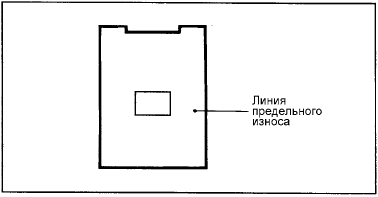
BRUSH INSPECTION
Replace brushes that are worn beyond the wear limit line.
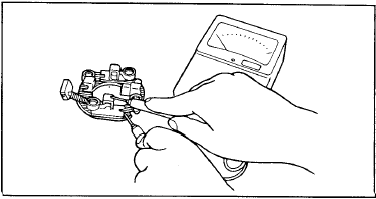
BRUSH HOLDER INSPECTION
Check that there is no continuity between the positive plate of the brush holder and the brush holder body. If there is continuity, replace the brush holder assembly.
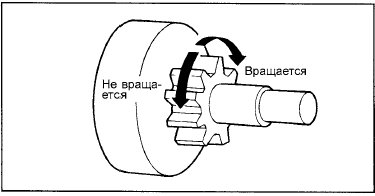
OVERRUNNING CLUTCH INSPECTION
Check the pinion gear for excessive wear or scoring. Also check the ring gear on the flywheel (manual transmission models) or the torque converter drive plate (automatic transmission models) for scoring or excessive wear.
Turn the pinion gear while holding the overrunning clutch housing. The pinion gear should turn smoothly, without binding, in one direction only, and should not turn in the opposite direction.
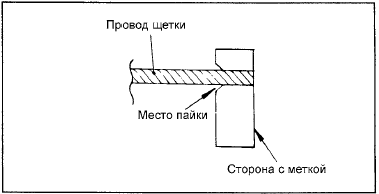
BRUSH REPLACEMENT
1. Remove the worn brush, taking care not to damage the brush lead wire.
2. Clean the end of the brush lead wire with sandpaper to ensure a strong solder joint.
3. Solder the end of the brush lead wire.
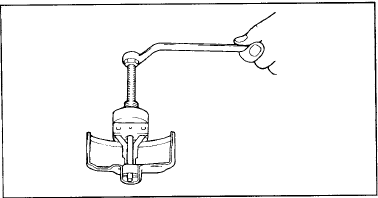
REAR BRACKET BUSHING REPLACEMENT
1. Before removing the bushing, measure and record the press-fit depth of the bushing in the bracket.
2. The bushing can be removed using a puller, as shown in the illustration.
3. Press in the new bushing so that its press-fit depth matches the value recorded in step 1.
Test yourself
A quick Hyundai Elantra CN7 quiz: every answer comes with an explanation and a link to the manual page.