Body Electrical System
Headlamp Repair Procedures
In this manual: Body Electrical System
40steps
~240min
4/5difficulty
Done 0 of 40
Inspection
- Check the battery voltage. (The low beam will turn on when battery voltage is above 9 V.)
- Check the fuse and relay.
- Check the ballast power terminals (if terminals are reversed, the low beam does not turn on).
- Securely check the bulb connector.
- Visually inspect the bulb (without filament): glass is damaged, upper and lower parts of the glass tube are damaged.
- After (1) through (5), replace the ballast and igniter (ballast assembly).
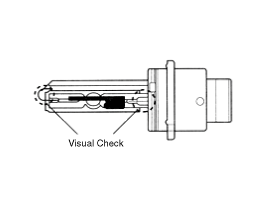
- Vibration resistant, since there is no filament.
- HID bulb has a longer service life than a halogen bulb.
- Does not operate if polarity is reversed.
- Operating input voltage: 9-16 V
Headlamp Aiming Instructions
Aim the headlamps with the correct beam setting equipment, and follow the equipment manufacturer's instructions.
|
- Inflate the tires to the specified pressure and remove all loads from the vehicle except the driver, spare tire, tools, coolant and fuel.
- The vehicle must be on a level surface.
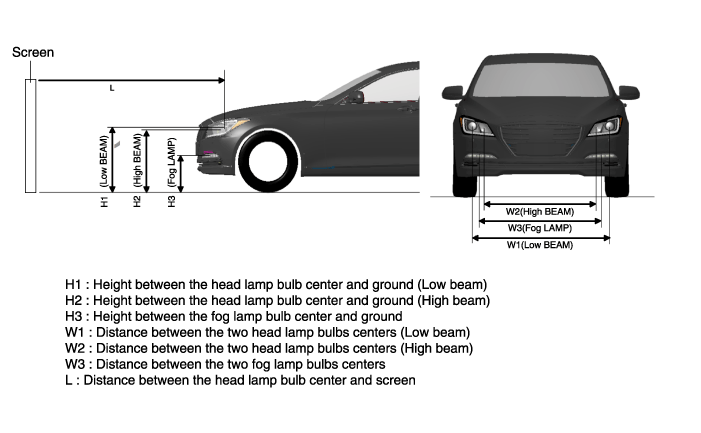
- Draw vertical lines (vertical lines passing through the respective centers of the headlamps) and a horizontal line (horizontal line passing through the center of the headlamps) on the screen.
- When the headlamp and battery are in normal condition, aim the headlamps so that the brightest part falls on the horizontal and vertical lines. Perform horizontal (High_A) and vertical (Low/High_B) low beam adjustment using the adjusting wheel.
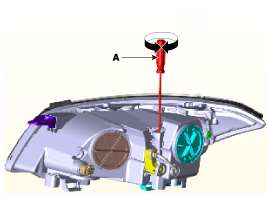
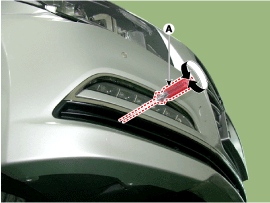
(Halogen type)

(BI function type)

(Hidden type)

- Headlamp (Low Beam)
A. With the low beam on, adjust the light-dark boundary so that it is positioned as shown in the figure below. B. If a headlamp leveling device is installed, set the headlamp leveling switch to position 0. 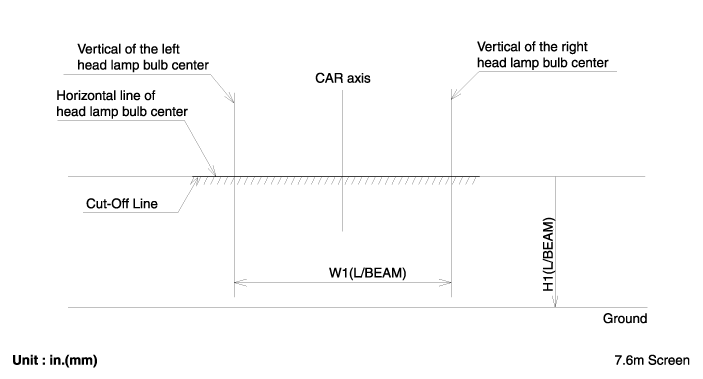
- With the front fog lamp on, adjust the light-dark boundary so that it is positioned as shown in the figure below.
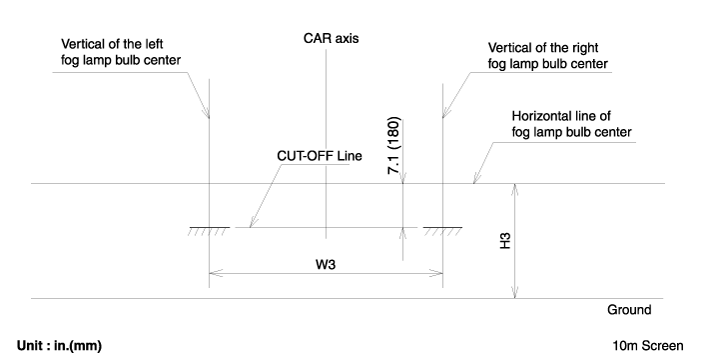
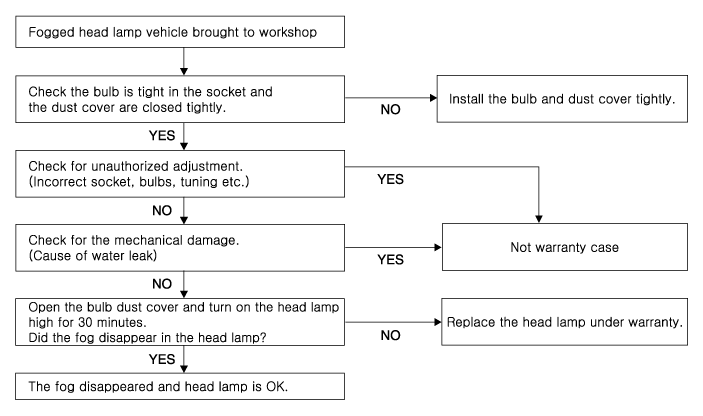
Removal
- Disconnect the negative (-) battery terminal.
- Remove the front bumper cover. (Refer to Body - "Front Bumper Cover")
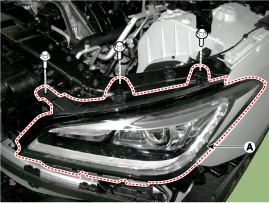
- Loosen the headlamp mounting bolts (A) (3EA).
Remove the right headlamp by disconnecting the air intake (A).
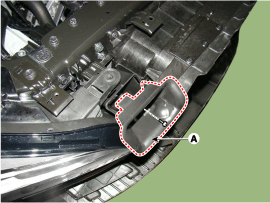
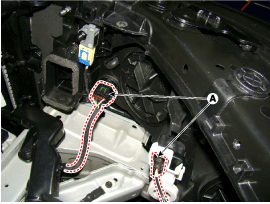
- Disconnect the headlamp connector (A) after removing the headlamp assembly.
Be careful not to damage the pin clips (A).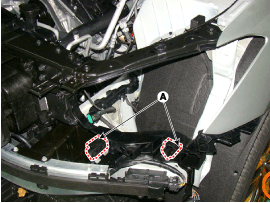
- Remove the bulb caps from the headlamp assembly by turning them counterclockwise. A: Bulb cap (high beam) B: Bulb cap (low beam)
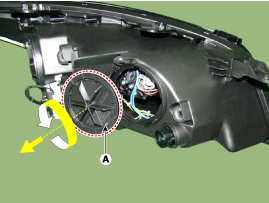
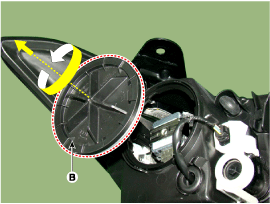
Turn off the headlamp switch to avoid high voltage. Be careful not to damage the bulb, and use only genuine bulbs.
- Do not apply excessive force, and install it correctly.
- Make sure the bulb is firmly installed.
Installation
- Install the headlamp assembly after connecting the connector.
- Install the front bumper cover.
- Connect the negative (-) battery terminal.
Replacement
Bulb (hidden)- Turn off the headlamp switch.
- Remove the bulb assembly.
- Disconnect the power connector from the bulb.
- Remove the low beam bulb cap.
- Remove the low beam headlamp (A) after loosening the mounting screws.
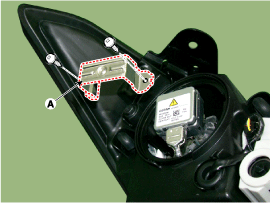
- Disconnect the igniter connector (A).
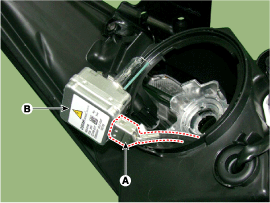
- To install, reverse the removal procedure.
Turn off the headlamp switch to avoid high voltage. Be careful not to damage the bulb, and use only genuine bulbs.- Do not apply excessive force, and install it correctly.
- Make sure the bulb is firmly installed.
- Turn off the headlamp switch.
- Remove the headlamp assembly.
- Disconnect the power connector from the bulb.
- Remove the ballast (A) after loosening the screws (4EA).
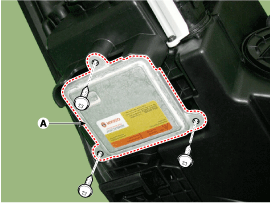
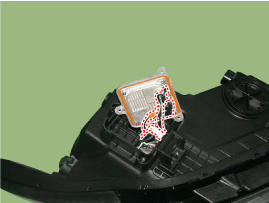
Be careful not to damage the ballast connector when disconnecting it. - To install, reverse the removal procedure.
- Turn off the headlights to avoid high voltage.
- Do not use the HID lamp on other vehicles.
- The HID lamp arc discharge generates high voltage (max. 20,000 V) and high current (12-13 A), and differs from the halogen lamp specification.
- Install the dust cover after checking the locking condition between the lamp and the socket.
- When inspecting the HID headlamp, turn the power on or off using the switch between the power source and the lamp because of the high voltage.
- Do not turn on the headlight switch with the lamp not installed, as it will generate a spark instantly.
- Turn off the headlamp power.
- Remove the lamp socket (A) and the turn signal lamp (B) from the lamp assembly.
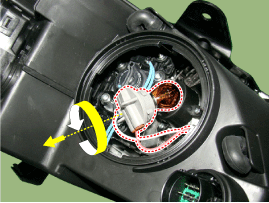
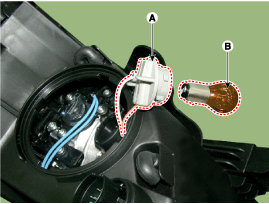
- Turn off the headlamp power.
- Remove the corner lamp bulb (A).
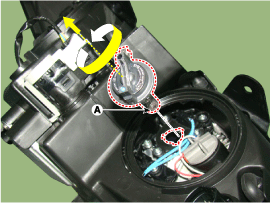
Test yourself
A quick Hyundai Genesis DH quiz: every answer comes with an explanation and a link to the manual page.
Was this page helpful?