All-Wheel Drive (AWD) System

Transfer Case Assembly Repair Procedures

6steps
~36min
2/5difficulty
02040608010063.747N·mlb·ft
Tightening torque found on this page
Done 0 of 6

Removal

When replacing the controller (ECU) and the transfer case due to changed characteristics of the friction materials inside the transfer case, the calibration data must be checked and entered.
  • No calibration procedure is required when the transfer case and ITA (ECU) are replaced at the same time.
  • If only the transfer case assembly is replaced, perform clutch learning reset in the ITA (ECU). (Refer to All Wheel Drive (AWD) System - "General Information - Repair Procedures")
  • If only the ITA (ECU) is replaced, perform backup learning and write to the new transfer case ITA (ECU) using GDS equipment. (Refer to All Wheel Drive (AWD) System - "General Information - Repair Procedures")
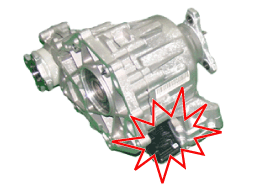
Precautions when handling the transfer case A. Prevention of ITA (Integrated Transfer Actuator) Damage 1) When transporting the transfer case
  • Be careful when lifting the transfer case with a transport package to ensure the ITA does not collide with another transfer case.
  • Be careful not to damage the ITA by contact with the floor or structure.
2) When assembling the transmission
  • Be careful not to damage the ITA by contact with the transmission, floor or structure.
B. Prevention of Oil Leakage
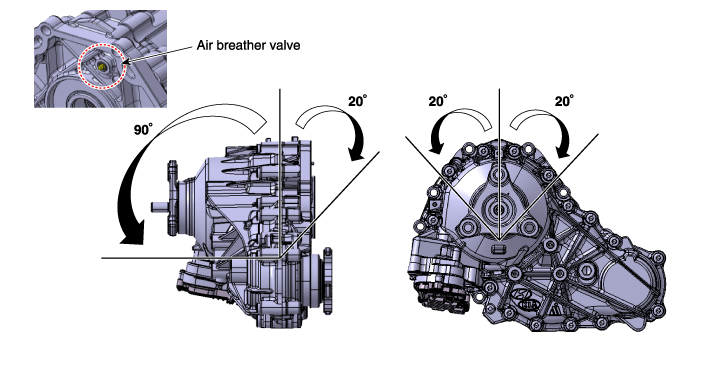
  • Even with the air valve installed, oil may leak from the assembled oil during disassembly/assembly if the transfer case cannot be held in a horizontal position. Therefore, be careful when replacing the transmission.
  1. Remove the under cover. (Refer to Engine Mechanical System - "Engine Room Under Cover")
  2. Remove the front propeller shaft. (Refer to Drive Shaft and Axle - "Propeller Shaft Assembly")
  3. Remove the rear propeller shaft. (Refer to Drive Shaft and Axle - "Propeller Shaft Assembly")
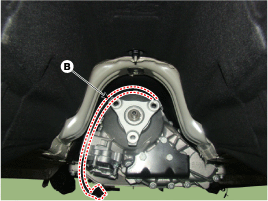
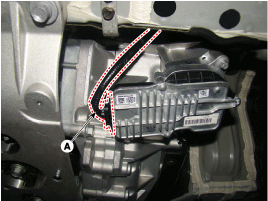
  4. Remove the wiring harness (B) secured to the transfer case after disconnecting the transfer case ECU (AWD) connector (A).
  5. Remove the crossmember (A) while supporting the transmission oil pan with a transmission jack.

    Tightening Torque: 49.0 ~ 64 N·m
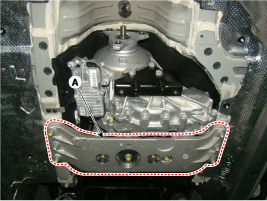
  6. Loosen the mounting bolts and remove the transfer case assembly (AWD) (A).

    Tightening torque: 29.4 ~ 41 N·m

Installation

  1. Install in the reverse order of removal.
When replacing the controller (ECU) and the transfer case due to changed characteristics of the friction materials inside the transfer case, the calibration data must be checked and entered.
  • A calibration procedure is not required when the transfer case and ITA (ECU) are replaced at the same time.
  • If only the transfer case assembly is replaced, perform clutch learning reset in the ITA (ECU). (Refer to All Wheel Drive (AWD) System - "General Information - Repair Procedures")
  • If only the ITA (ECU) is replaced, perform backup learning and write to the new transfer case ITA (ECU) using GDS equipment. (Refer to All Wheel Drive (AWD) System - "General Information - Repair Procedures")

Test yourself

A quick Hyundai Genesis DH quiz: every answer comes with an explanation and a link to the manual page.