Remove the intake manifold. (Refer to Intake and Exhaust Systems — Intake Manifold)
Remove the delivery pipe and injector. (Refer to Engine Control / Fuel System - "Delivery Pipe")
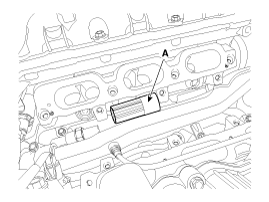
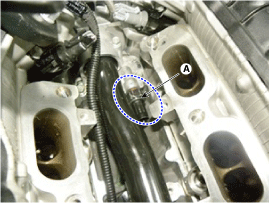
Disconnect the connector, then remove the oil pressure sensor (A).
Tightening Torque: 14.7 – 22 N·m
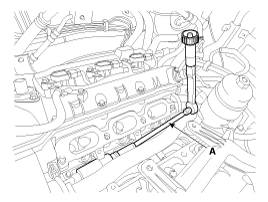
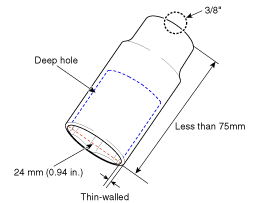
When removing and installing the oil pressure sensor, use a deep socket as shown in the illustration below. - 3/8" (24 mm) thin-wall deep socket with a length of less than 75 mm.[Oil Pressure Switch Removal Tool Location]24 mm deep socket1/2 in. to 3/8 in. adapter (only when using a 1/2 in. deep socket)3/8 in. universal joint3/8 in. extensionSocket Wrench [Tool Installation Sequence] 1. Insert the 24 mm deep socket (A) onto the oil pressure sensor.2. After connecting the other tools as shown in the illustration above, insert the tools (A) into the socket.
Install in the reverse order of removal.
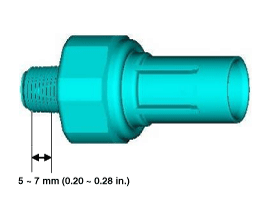
When installing, apply sealant to the threaded portion.
Sealed Lock: THREE BOND 2403 Thickness: 0.2 ~ 0.4 mm (0.008 ~ 0.016 in.)
Inspection
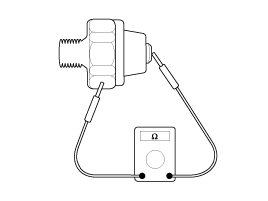
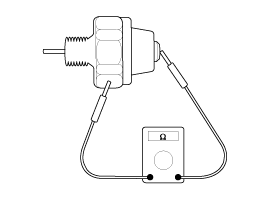
Using an ohmmeter, check continuity between the terminal and the body. If there is no continuity, replace the oil pressure sensor.
Check continuity between the terminal and the body while pressing the thin wire. If there is continuity even when the thin wire is pressed, replace the switch.
If there is no continuity when 50 kPa (7 psi) of pressure is applied through the oil passage, the switch is operating correctly. Check for air leakage. If air leaks, the diaphragm is damaged. Replace it.
?
Test yourself
A quick Kia Cadenza VG Owner's Manual quiz: every answer comes with an explanation and a link to the manual page.

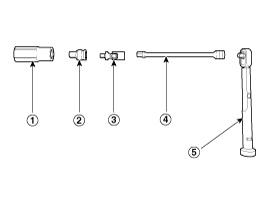
 24 mm deep socket
 1/2 in. to 3/8 in. adapter (only when using a 1/2 in. deep socket)
 3/8 in. universal joint
 3/8 in. extension
 Socket Wrench [Tool Installation Sequence] 1. Insert the 24 mm deep socket (A) onto the oil pressure sensor.