Generator
Specifications
Specification
| Item | Specification | ||
| Rated Voltage | 13.5 V, 130 A | ||
| Operating Speed | 1000–18,000 rpm | ||
| Pin | 3 (C, L, FR) | ||
| Pulley Type | Alternator pulley | ||
| Voltage Regulator | Built-in IC regulator type | ||
| Regulator set voltage (internal mode) | 14.55 ± 0.3 V | ||
| Regulator set voltage (external mode) | C terminal | Frequency (Hz) | 115-500 |
| Voltage (V) | High: 3.3–3.7 Low: 1.3–1.7 |
||
| Signal Type | PWM | ||
| FR terminal | Frequency (Hz) | 212 - 288 | |
| Current (mA) | 2,7 - 7 | ||
| Signal Type | PWM | ||
Components and Component Location
Components
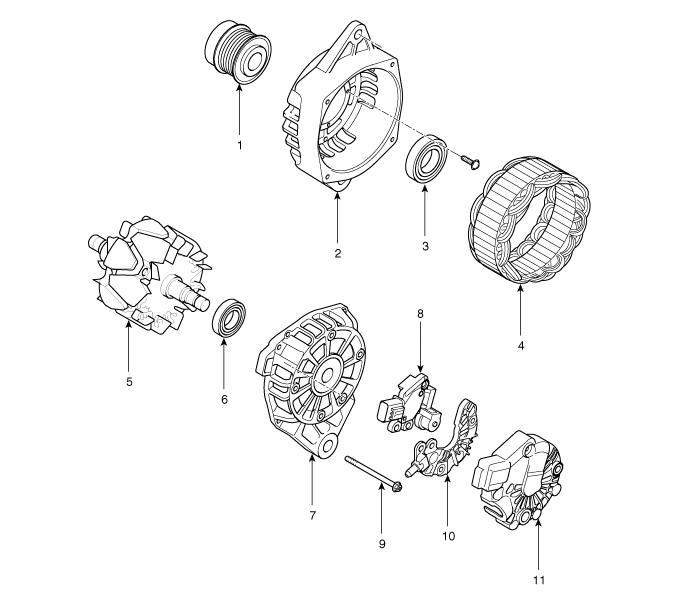
| 1. OAD (Overrunning Alternator Decoupler) 2. Front Housing 3. Front Bearing 4. Stator 5. Rotor 6. Rear Bearing |
7. Rear Housing 8. Regulator Assembly 9. Through Bolt 10. Rectifier Assembly 11. Rear Cover |
Description and Operation
Description
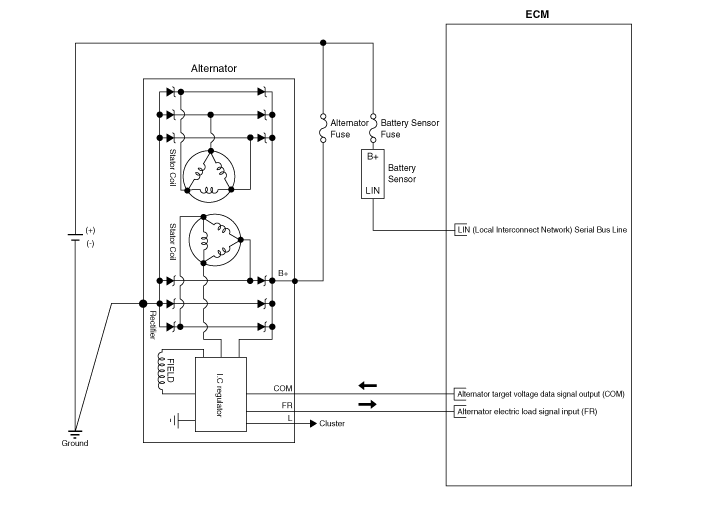
The AC generator has eight built-in diodes, each of which converts alternating current to direct current.
Therefore, direct current appears at the generator "B" terminal.
In addition, the charging voltage of this generator is controlled by the battery voltage sensing system.
The generator is regulated by the battery voltage sensing system.
The main components of the generator are the rotor, stator, rectifier, capacitor, brushes, bearings, and the drive pulley for the poly-V belt.
The brush holder contains a built-in electronic voltage regulator.
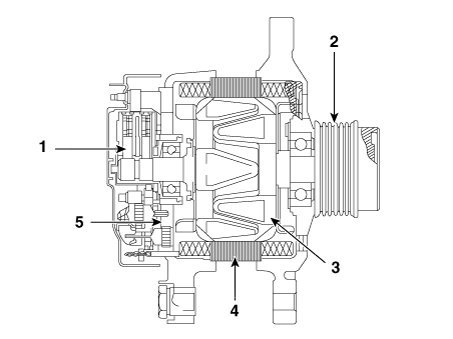
2. OAD (Overrunning Alternator Decoupler)
3. Rotor
4. Stator
5. Rectifier
Circuit Diagrams
Wiring Diagram
Repair Procedures
Removal and Installation
Turn the ignition switch OFF and disconnect the negative (-) battery terminal.
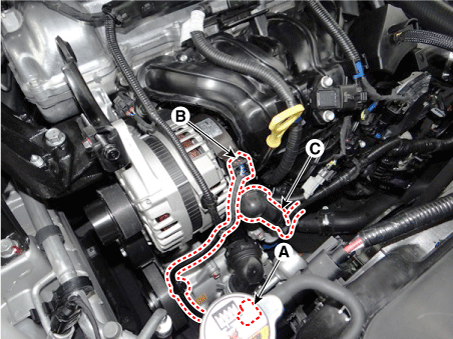
Disconnect the air compressor connector (A) and the generator connector (B), and disconnect the cable from the generator "B" terminal (C).
Generator "B" terminal mounting nut:
9,8–11.8 N·m
Remove the drive belt.
(Refer to Engine Mechanical System - "Drive Belt")
Remove the alternator (A).
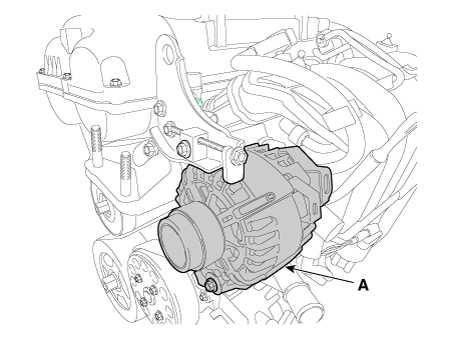
Install in the reverse order of removal.
Disassembly
Remove the generator.
(Refer to Charging System - "Generator")
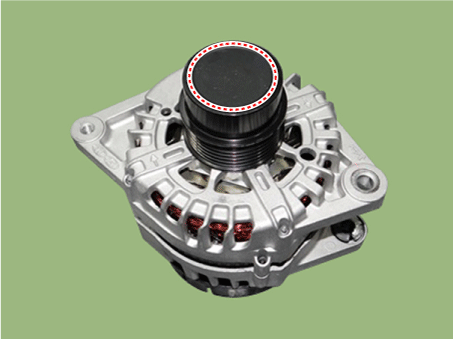
Remove the OAD (Overrunning Alternator Decoupler) cap (A).
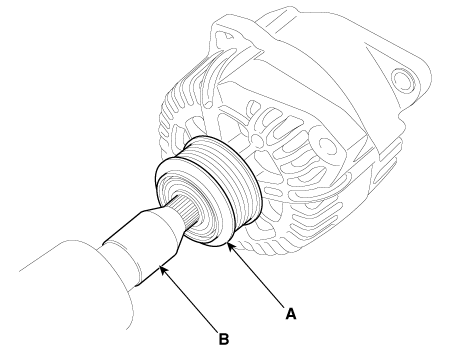
Remove the OAD pulley (overrunning alternator decoupler) (A) using the special service tool.
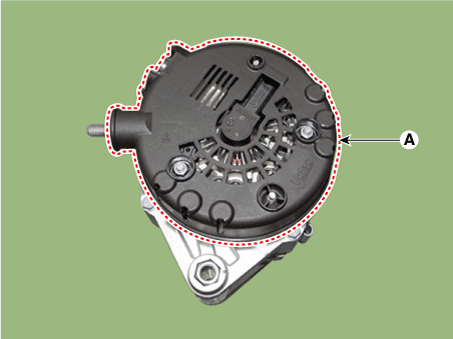
Remove the rear cover (A) after removing the nuts.
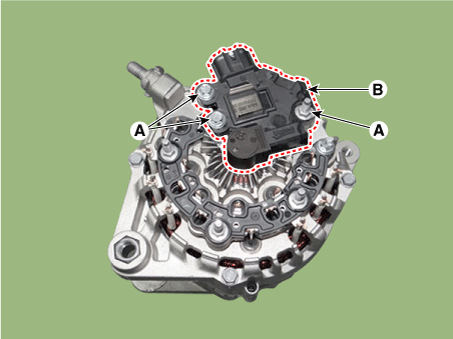
Remove the mounting bolts (A) and the regulator assembly (B).
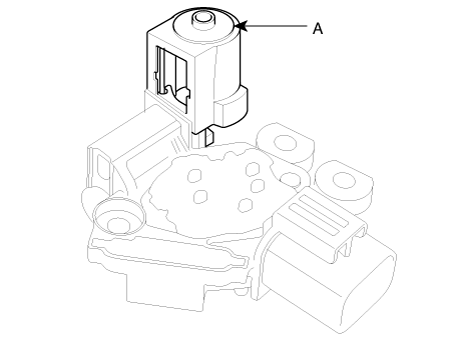
Remove the slip ring guide (A) by pulling it.
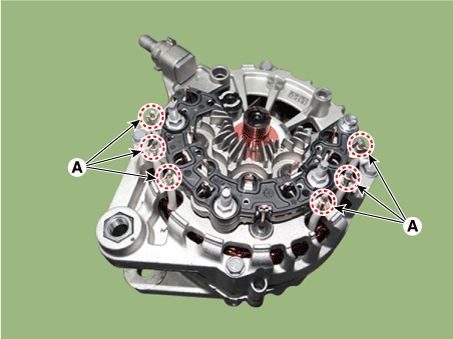
Unsolder the 3 stator wires (A).
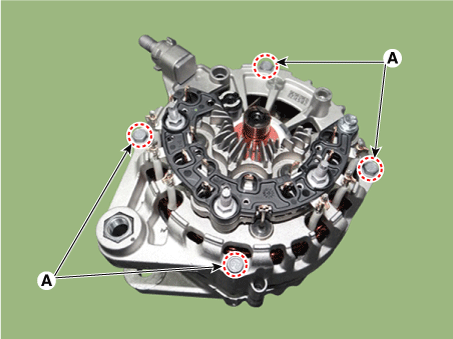
Remove the 4 through bolts (A).
Separate the rotor (A) and the bracket (B).
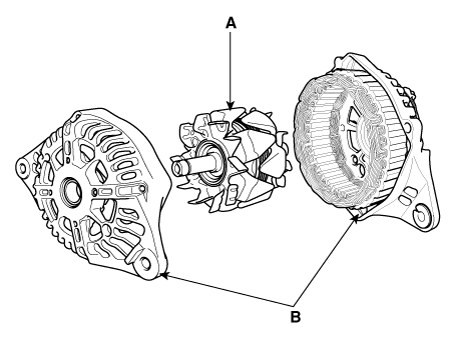
Installation
Assemble in the reverse order of disassembly.
Inspection
[Rotor]
Check that there is continuity between the slip rings (C).
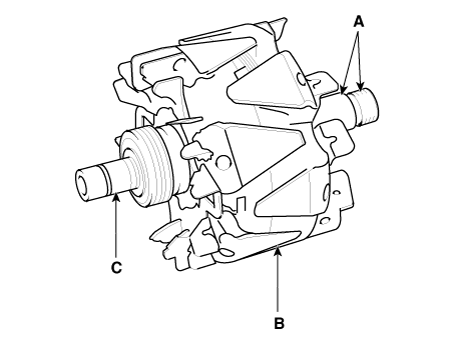
Make sure there is no continuity between the slip rings and the rotor (B) or the rotor shaft (A).
If the rotor fails the continuity check, replace the generator.
[Stator]
Check for continuity between each pair of wires (A).
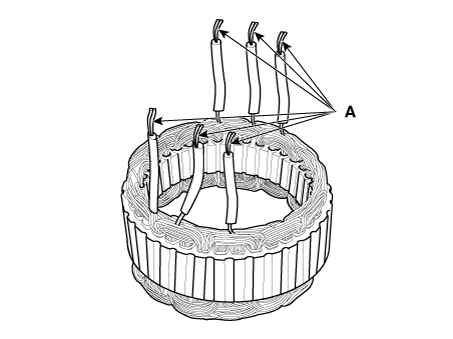
Make sure there is no continuity between each terminal and the coil core.
If the coil fails the continuity check, replace the generator.
Test yourself
A quick Kia Forte BD quiz: every answer comes with an explanation and a link to the manual page.