DCT (Dual Clutch Transmission)
Components and Component Location
Components
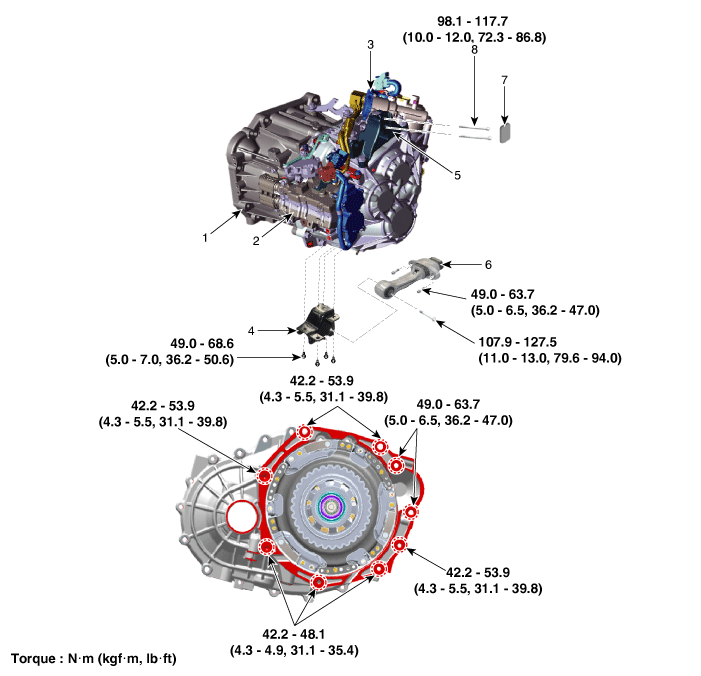
| 1. DCT (Dual Clutch Transmission) Assembly 2. Clutch Actuator Assembly 3. Reduction Gear Actuator Assembly 4. Support Link Bracket |
5. DCT Support Bracket 6. Roller Link Bracket 7. Dust Boot 8. Support Bracket Mounting Bolt |
Video Clip


Removal
Remove the air cleaner assembly and air duct.
(Refer to Engine Mechanical System - "Air Cleaner")
Remove the battery and battery tray.
(Refer to Engine Electrical System - Battery)
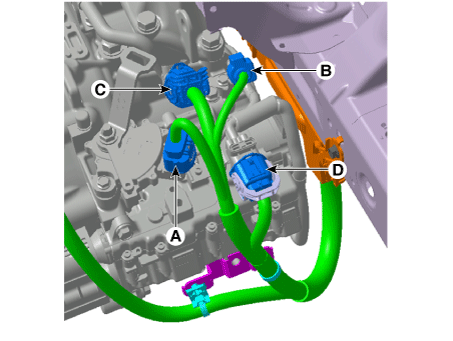
Disconnect the connectors (A, B, C, D) shown in the illustration below.
A. Inhibitor Switch Connector
B. Input Shaft Speed Sensor Connector
C. Gear Actuator Solenoid Connector
D. Clutch Actuator Connector
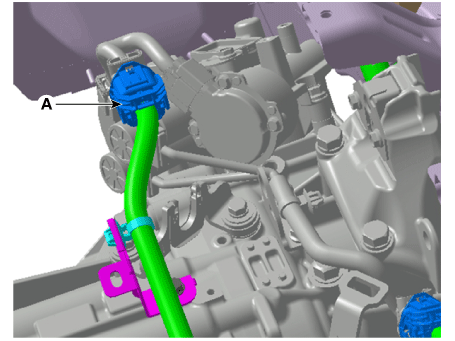
Disconnect the gear actuator motor connector (A).
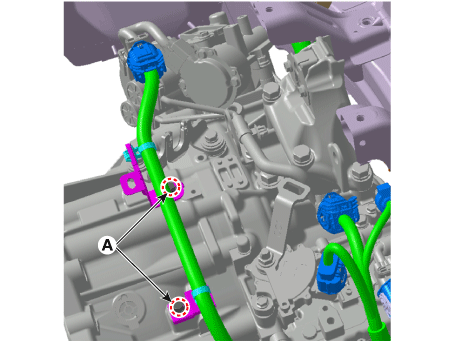
Remove the wire harness bracket bolts (A).
Tightening Torque: 9.8–11.8 N·m
Remove the shift cable by loosening the bolts (A) and nut (B).
Tightening torque:
(A) 9,8–14.7 N·m
(B) 19,6–26 N·m
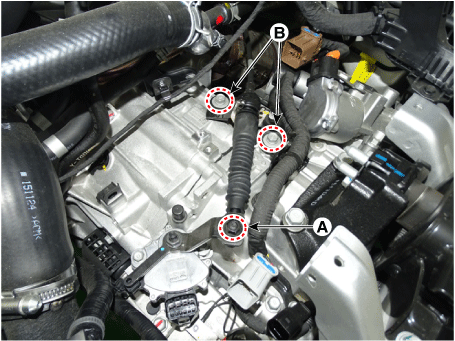
Loosen the ground bolt (A).
Tightening Torque: 9.8–11.8 N·m
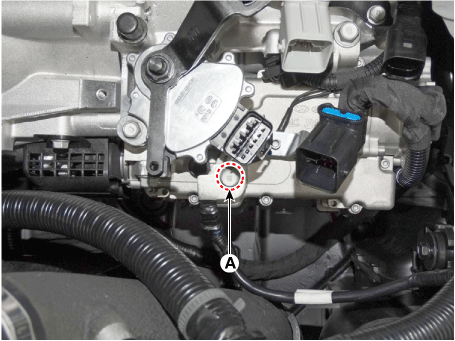
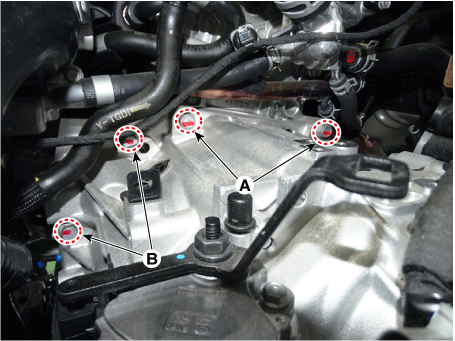
Loosen the transmission upper mounting bolts (A) and starter mounting bolts (B).
Tightening torque:
(A): 42,2–54 N·m
(B): 49,0–64 N·m
Remove the upper hood cover.
(Refer to Body - "Upper Cowl Cover")
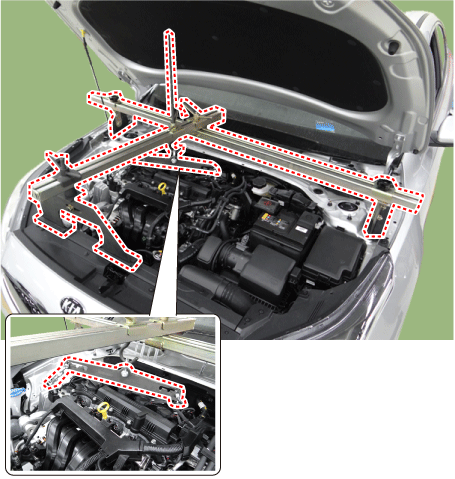
Assemble the engine mount in the engine compartment.
(Refer to Special Service Tools — "Engine Mount Assembly Drawing")
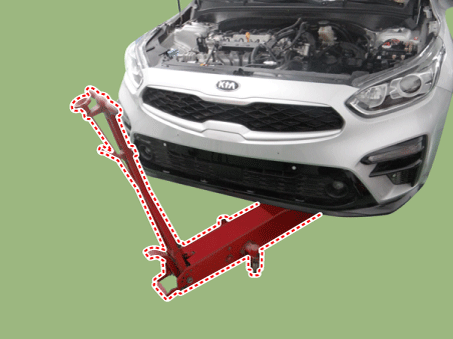
Using the engine support, hold the engine and transmission assembly securely.
Securely support the transmission on a jack.
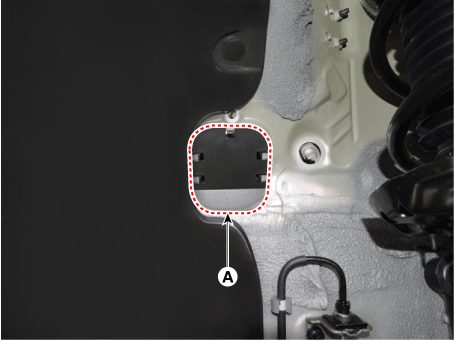
Remove the dust cover (A).
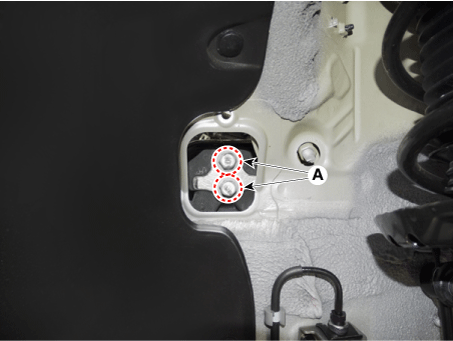
Loosen the transmission mount bracket bolts (A).
Tightening torque: 98.1 - 118 N·m
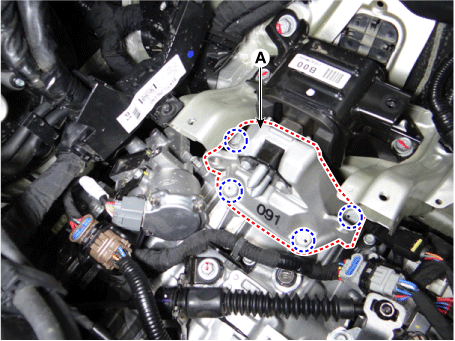
Remove the transmission support bracket (A).
Tightening torque: 58.8–78 N·m
Remove the under cover.
(Refer to Engine Mechanical System - "Engine Room Cover")
Remove the clamps (A) from the wire harness bracket.
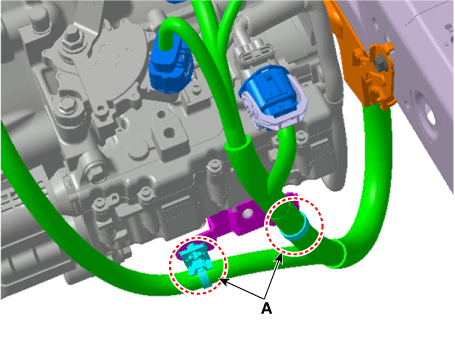
Remove the subframe.
(Refer to Suspension System — "Subframe")
Remove the drive shaft assembly.
(Refer to Drive Shaft and Axle — "Front Propeller Shaft")
Remove the vacuum pump.
(Refer to Brake System - "Vacuum Pump")
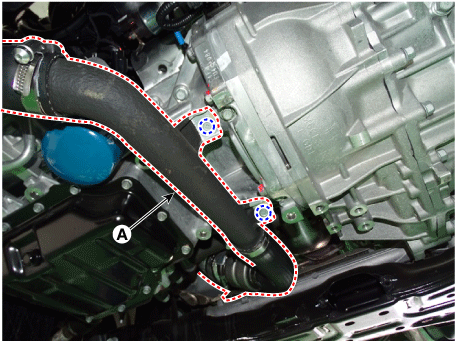
Remove the intake hose and intercooler pipe (A).
Tightening torque: 18.6 – 24 N·m
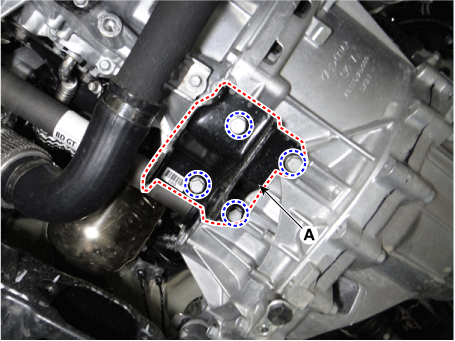
Remove the roller rod support bracket (A).
Tightening Torque: 49.0–69 N·m
Safely support the transmission with a jack.
Loosen the transmission lower mounting bolts (A, B).
Tightening torque:
(A): 42,2–48 N·m
(B) : 42,2–54 N·m
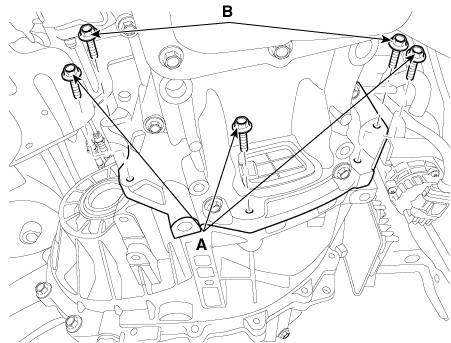
After separating the transmission from the engine, remove the transmission by slowly lowering the jack.
Remove the dual clutch assembly from the transmission.
(Refer to Dual Clutch System — "Dual Clutch Assembly")
Installation
Install in the reverse order of removal.
Follow each of the procedures below when reinstalling or replacing with a new dual clutch transmission (DCT).
When Reinstalling
If the differential oil seal is damaged and oil is leaking, replace the oil seal with a new one. When installing the new oil seal, use the special service tools (09430-C1190, 09231-H1100).
After installing the DCT, check the fluid level after filling the DCT with oil.
Erase the diagnostic trouble codes (DTC) using the KDS. Disconnecting the negative battery terminal will not erase the DTCs. Clear the DTCs using the KDS only.
When Replacing with a New Dual Clutch Transmission
After replacing with a new DCT, it is not necessary to add oil and check the level, because the specified amount of oil is already filled inside the new DCT.
Erase the diagnostic trouble codes (DTC) using the KDS. Disconnecting the negative battery terminal will not erase the DTCs. Clear the DTCs using the KDS only.
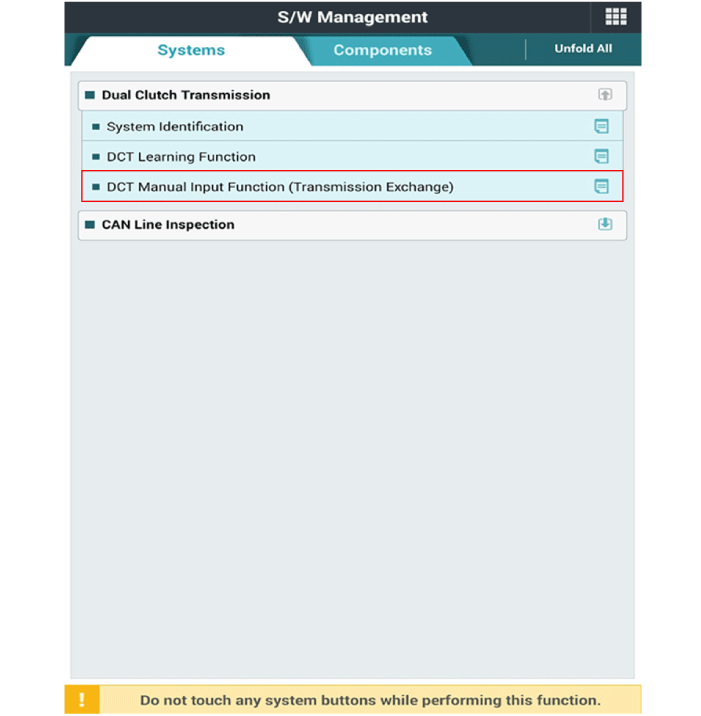
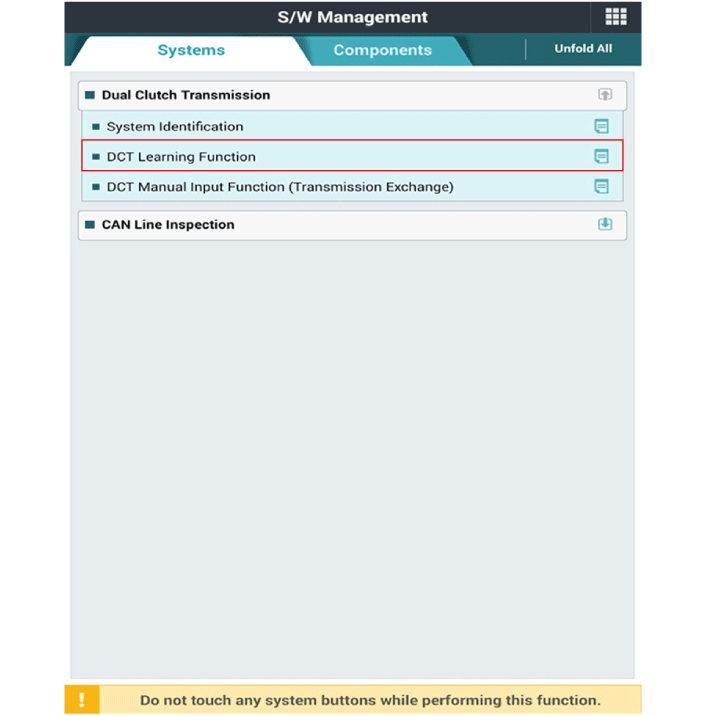
Perform the clutch characteristic input procedure using the KDS. (One of the two procedures must be performed.)
Clutch Characteristics Input (Manual Learning)
Clutch Touch Point Learning
Test yourself
A quick Kia Forte BD quiz: every answer comes with an explanation and a link to the manual page.