Engine Mounting
Components and Component Location
Components
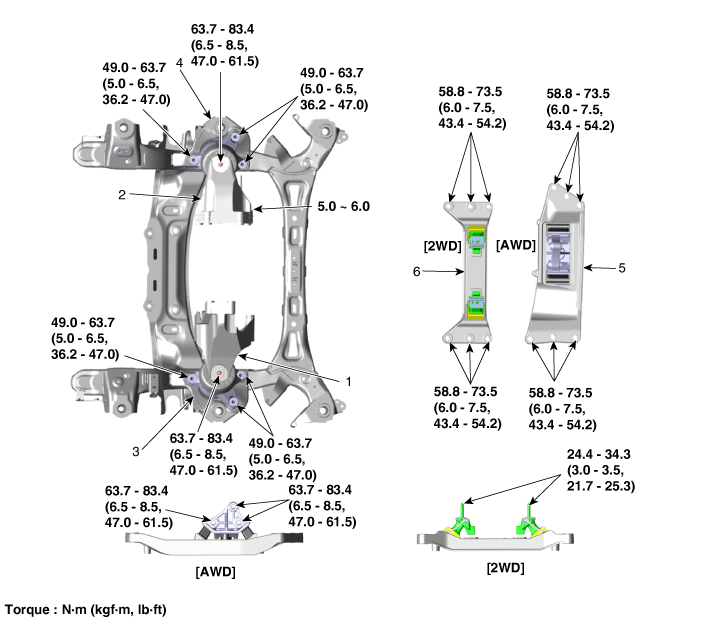
| 1. Engine Mounting Bracket (LH) 2. Engine Mounting Bracket (RH) 3. Engine Mounting Insulator (LH) |
4. Engine Mounting Insulator (RH) 5. Transaxle Mounting Bracket (AWD) 6. Transaxle Mounting Bracket (2WD) |
Repair Procedures
Removal and Installation
Engine Mounting Bracket
Remove the front engine room under cover and the engine room side cover.
(See Engine and Transaxle Assembly - Under Hood)
Disconnect the universal joint assembly from the shaft joint.
(Refer to Steering System - "Steering Column and Shaft")
Remove the engine mount bracket nut (A).
Tightening torque: 63.7–83 N·m
[LH]
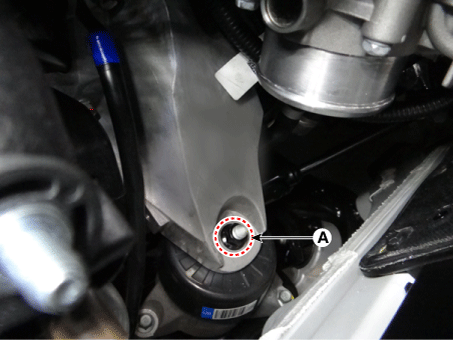
[RH]

Place a jack under the edge of the oil pan to support the engine.
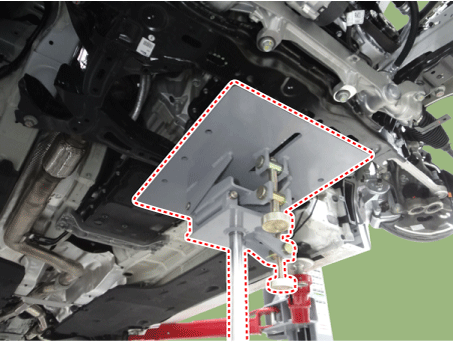
Slightly raise the engine with a jack to create clearance for removing the engine mounting.
Remove the engine mounting bracket (A).
Tightening Torque: 49.0–64 N·m
[LH]
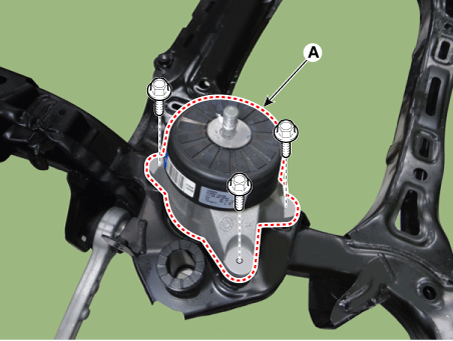
[RH]
Install in the reverse order of removal.
Transaxle Mounting Bracket (AWD)
Remove the rear engine room under cover.
(See Engine and Transaxle Assembly - Under Hood)
Install a jack under the transaxle to support it.

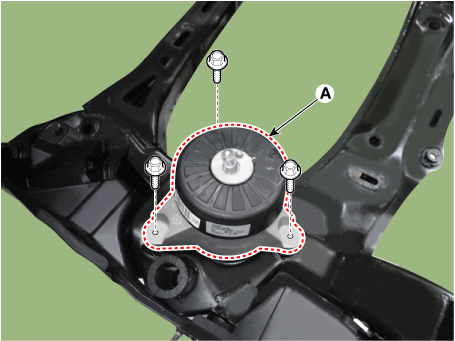
Remove the transaxle mounting bracket (A).
Tightening Torque
Bolts:
58,8–74 N·m
Nuts:
63,7–83 N·m

Install in the reverse order of removal.
Transaxle Mounting Bracket (2WD)
Remove the rear engine room under cover.
(See Engine and Transaxle Assembly - Under Hood)
Install a jack under the transaxle to support it.
Remove the transaxle mounting bracket bolts (A).
Tightening torque: 58.8–74 N·m

Remove the transaxle mounting bracket (A).
Tightening torque: 24.4–34 N·m

Install in the reverse order of removal.
Test yourself
A quick Kia Stinger CK quiz: every answer comes with an explanation and a link to the manual page.