Crash Pad Main Assembly
Components and Component Location
Component Location
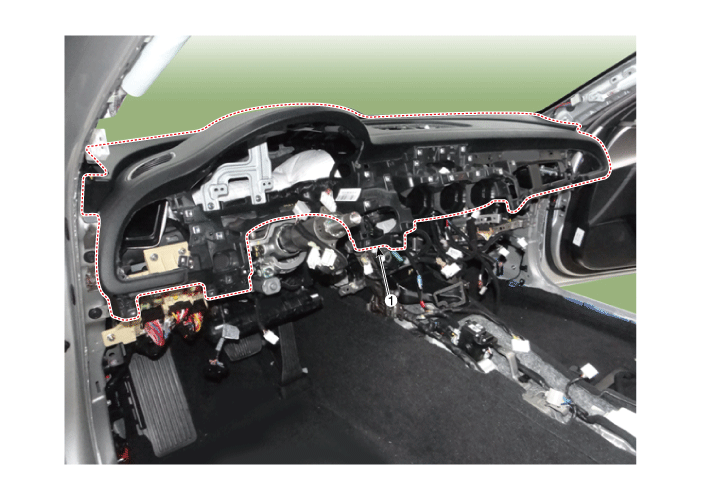
| 1. Main Crash Pad Assembly |
Repair Procedures
Replacement
Disconnect the negative (-) battery terminal.
Remove the front seat assembly (both sides).
(Refer to Front Seat - "Front Seat Assembly")
Remove the floor console assembly.
(Refer to Floor Console - "Floor Console Assembly")
Remove the front pillar trim.
(Refer to Interior Trim - "Front Pillar Trim")
Remove the steering column lower cover panel.
(Refer to Crash Pad - "Steering Column Cover Panel")
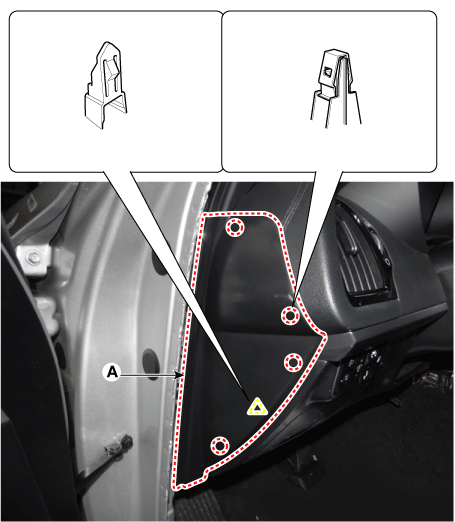
Remove the side cover of the airbag [LH] (A) using a trim remover.
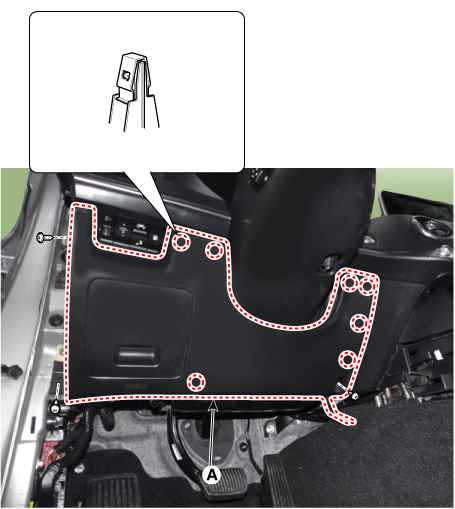
Separate the lower panel of the emergency cluster (A) after loosening the bolts and screws.
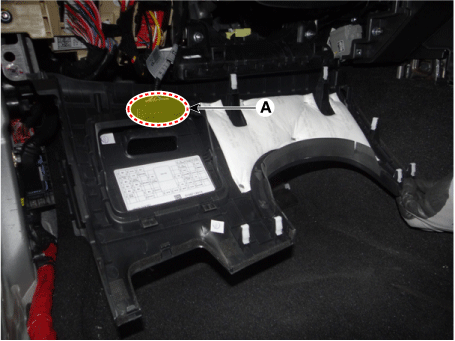
Disconnect the connector from the airbag lower switch (A).
Remove the garnish [LH] (A) after loosening the mounting screws.
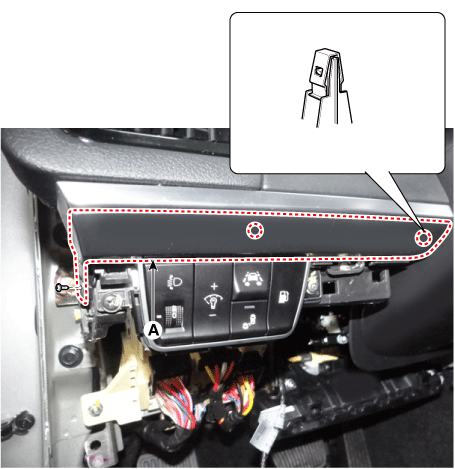
Remove the driver side panel (A) of the protector garnish after loosening the mounting screws.
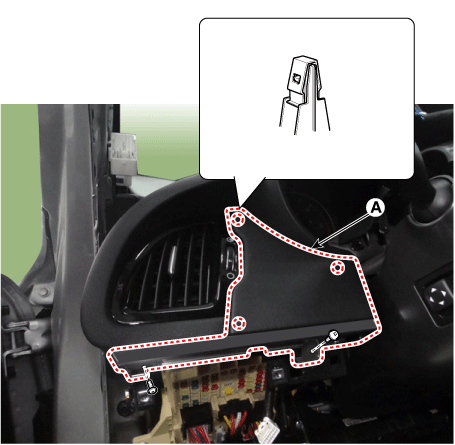
Remove the side cover of the airbag [RH] (A) using a trim remover.
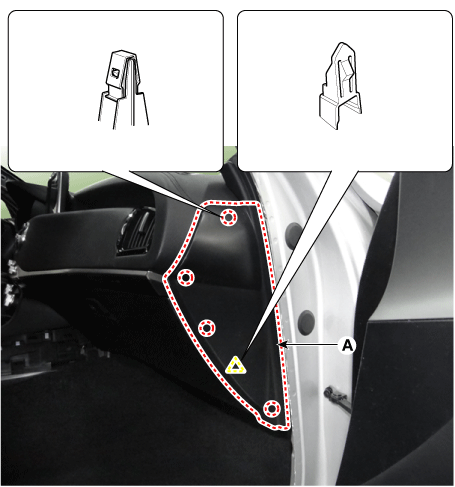
Remove the garnish [RH] (A) after loosening the mounting screws.
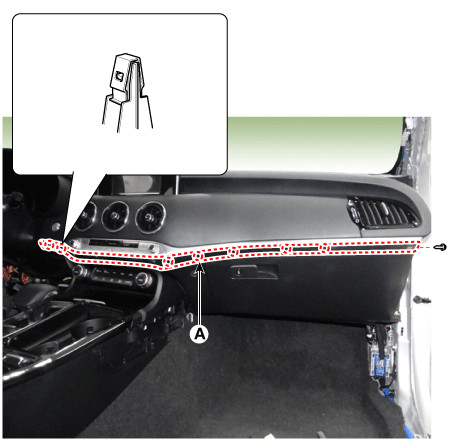
Separate the passenger side panel (A) after loosening the mounting screws.
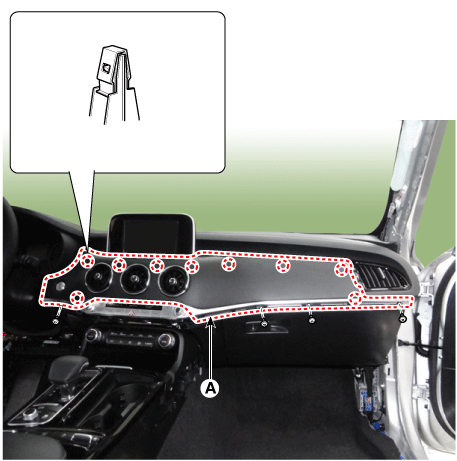
Disconnect the Start/Stop button connector (A), then remove the crash pad ornament.
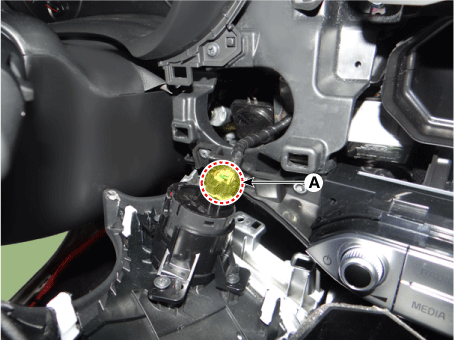
Remove the front cluster panel (A) using a trim remover.
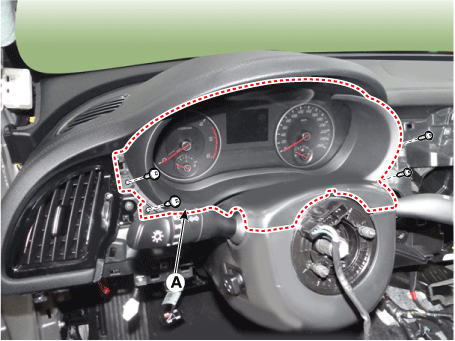
Remove the steering column cover lower panel (A) after loosening the mounting screws.
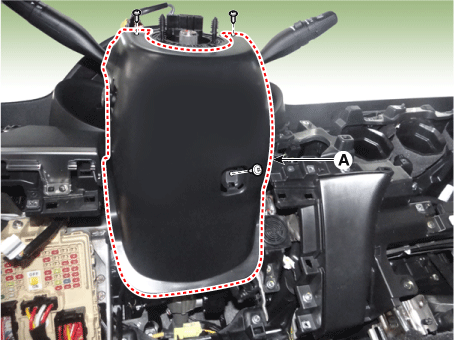
Separate the cluster (A) after loosening the mounting screws.
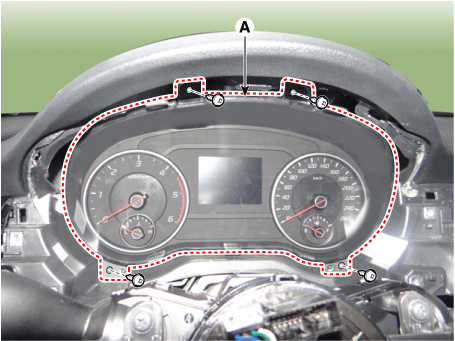
Remove the cluster assembly (A) after disconnecting the connector.

Remove the side airbag switch (A) after loosening the screws.

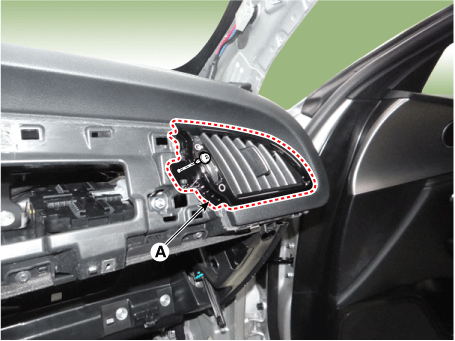
Remove the ventilation duct (A) after loosening the screw.
[LH]
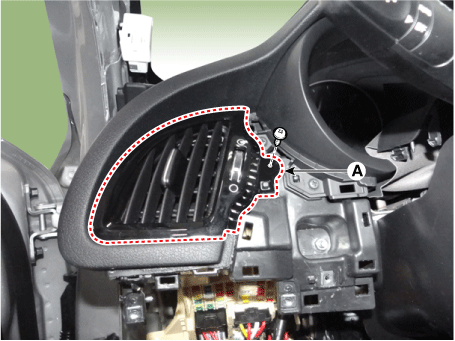
[RH]
Pull both side stoppers (B) from the glove box (A).
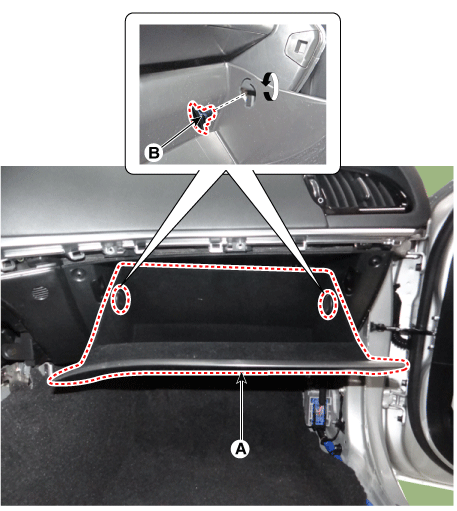
Remove the air damper (A) from the glove box (B).
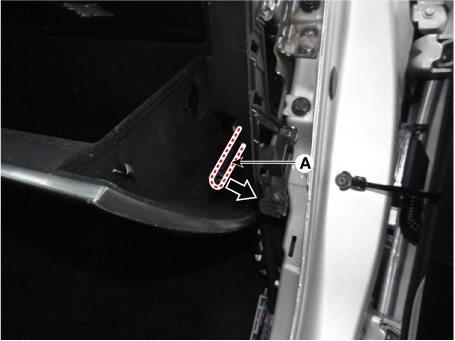
Remove the stopper pins (A), then remove the glove box (B).
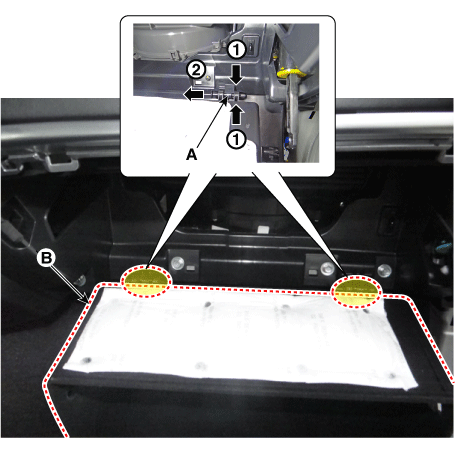
Separate the protector garnish under the cover [RH] (A).
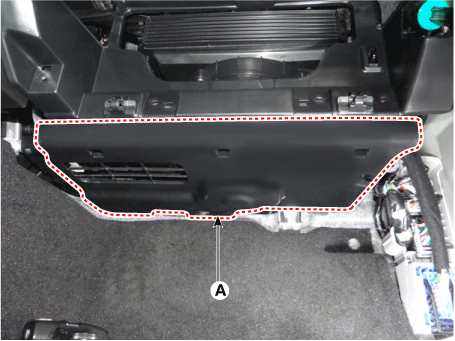
Disconnect the lamp connector (A), then remove the protector garnish under the cover.
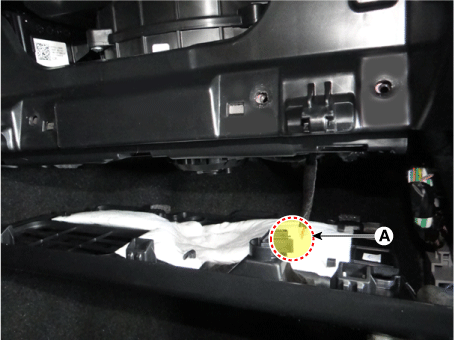
Separate the glove box housing (A) after loosening the mounting screws, bolts and nuts.
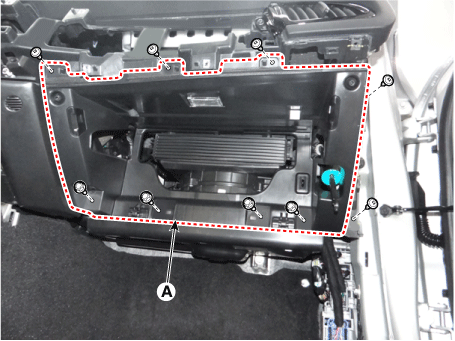
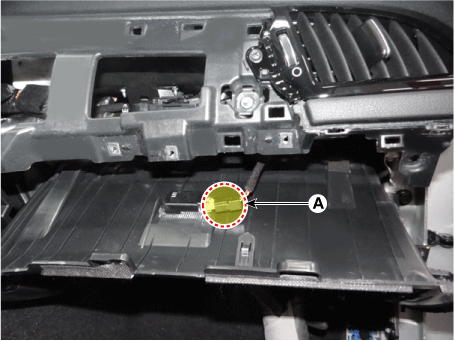
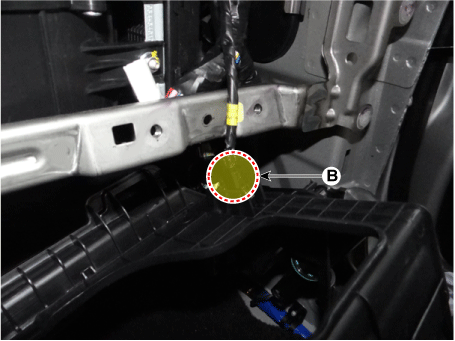
Remove the glove box housing after disconnecting the connectors (A), (B).
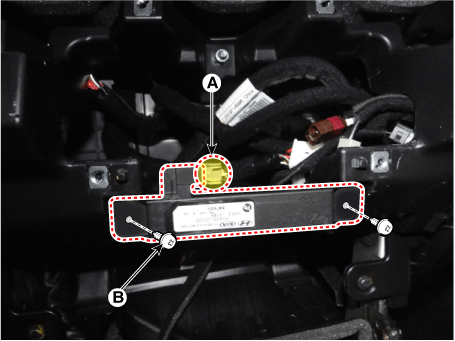
Remove the smart key antenna (B) after disconnecting the connector (A) and the screws.
Separate the AVN head unit (A) after loosening the mounting screws.
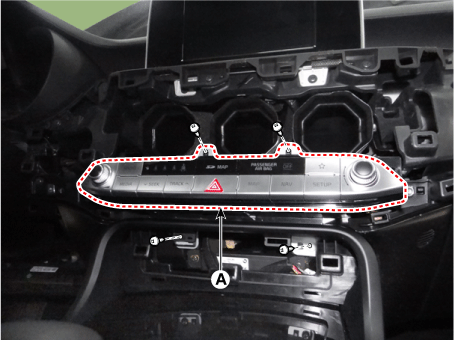
Remove the AVN head unit after disconnecting the connectors (A).
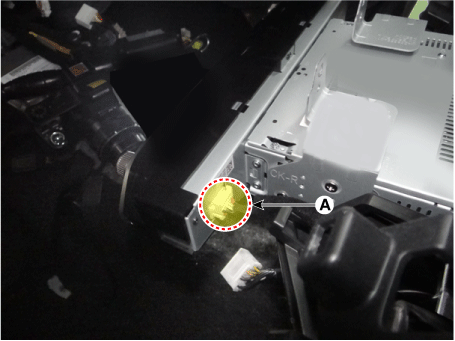
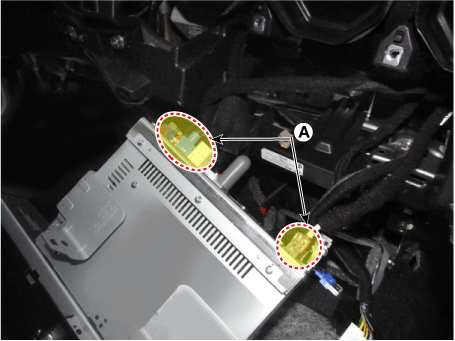
Separate the monitor unit (A) after loosening the mounting screws.
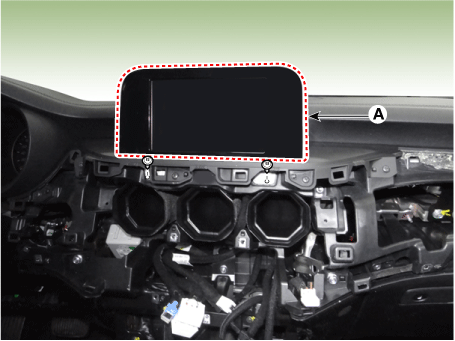
Remove the monitor unit (A) after disconnecting the connectors.
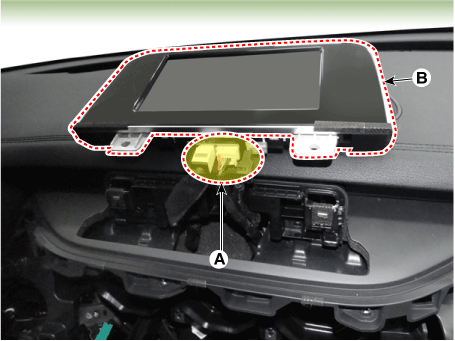
Remove the monitor front panel (A) after loosening the mounting screws.
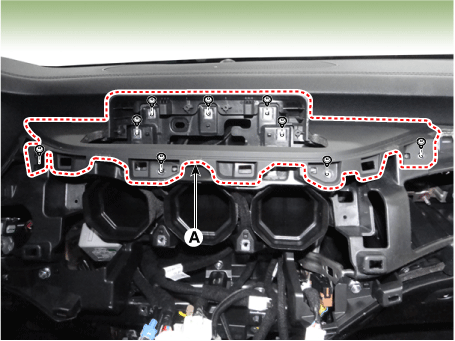
Separate the center speaker grille (A) using a trim remover.
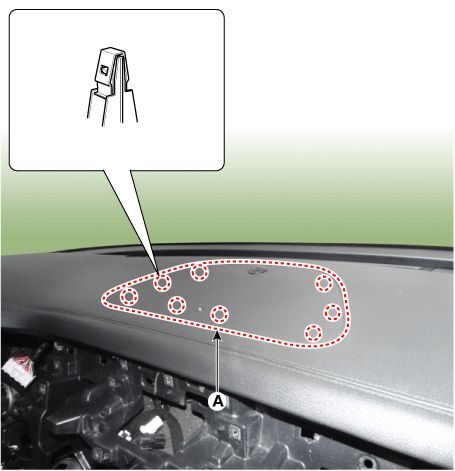
Remove the center speaker grille after disconnecting the automatic lighting sensor and safety indicator connector (A).
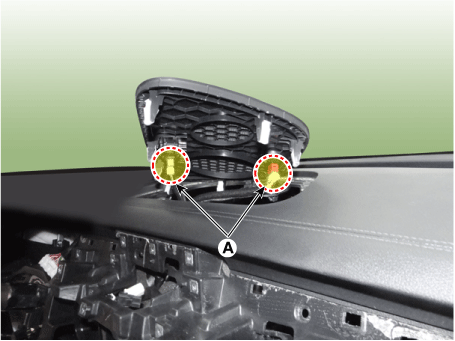
Separate the center speaker (A) after loosening the mounting screws.
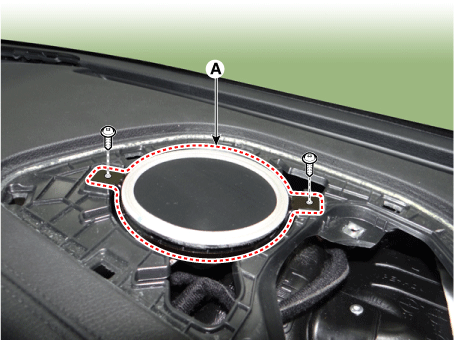
Remove the center speaker after disconnecting the connector (A).
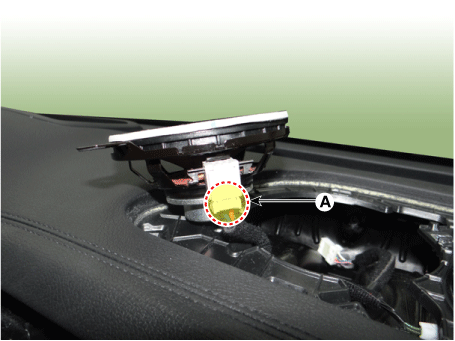
Separate the center lower airbag cover (A) after loosening the mounting screws and nuts.

Remove the center lower airbag cover after disconnecting the hose and connector (A).
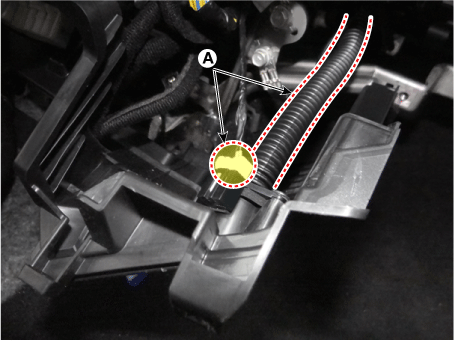
Loosen the passenger airbag module mounting bolts (A).
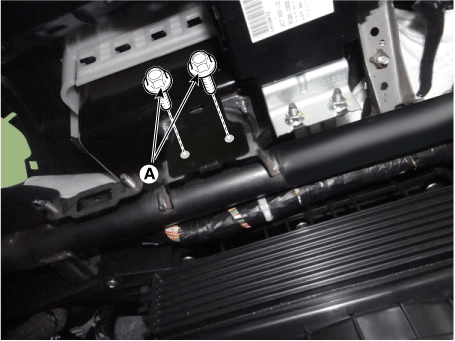
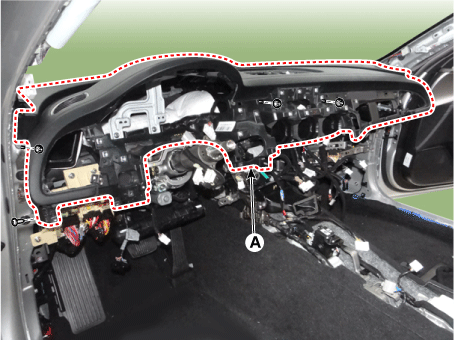
Separate the main protector garnish assembly (A) after loosening the mounting bolts and nuts.
[LH]
[RH]
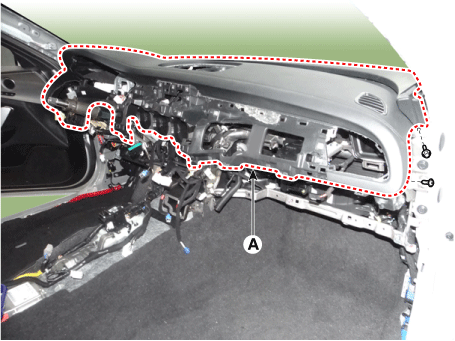
Remove the protector garnish assembly after disconnecting the passenger airbag connector (A).

Install in the reverse order of removal.
Test yourself
A quick Kia Stinger CK quiz: every answer comes with an explanation and a link to the manual page.