Sunroof Assembly
Components and Component Location
Component Location
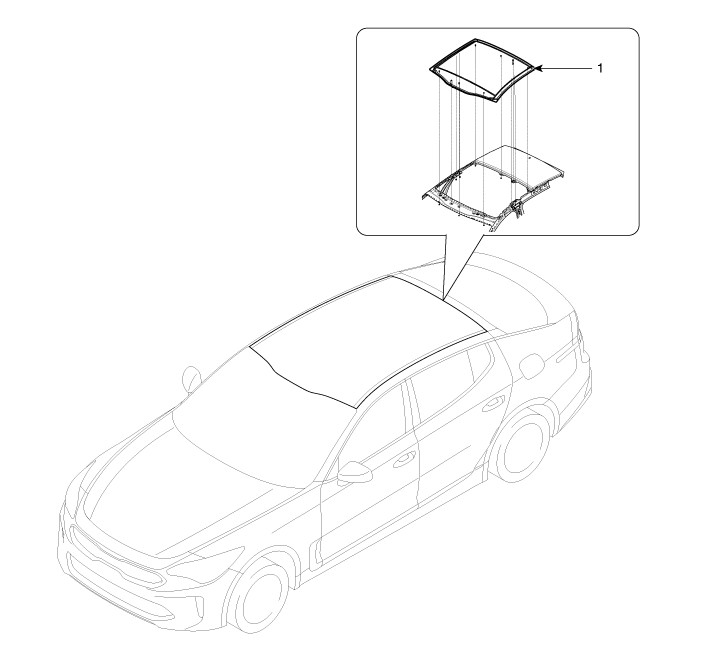
| 1. Sunroof Assembly |
Repair Procedures
Removal
Remove the sliding glass.
(Refer to Sunroof — "Sliding Glass")
Remove the roof side molding.
(Refer to Body Side Moldings - "Roof Side Molding")
Remove the headliner.
(Refer to Headliner - "Headliner Assembly")
Remove the curtain airbag (CAB) module.
(Refer to Passive Safety System — "Curtain Airbag (CAB) Module")
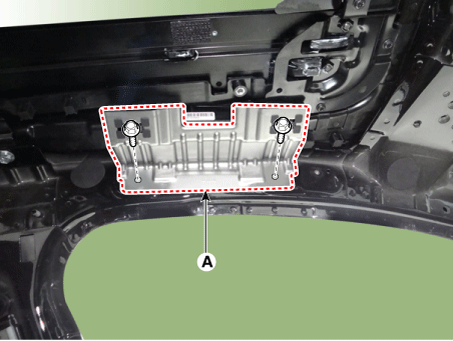
After loosening the mounting bolts, remove the assist grip bracket (A).
Secure the front windshield upper molding (A) as shown in the illustration below.

Pull the square wire (A) left and right, then apply force in the direction of the arrow to cut off the remaining sealant.
Carefully remove the windshield (A) without damaging it.
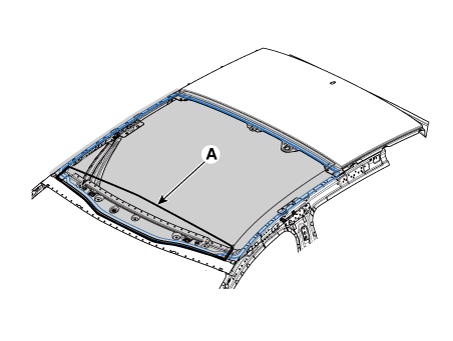
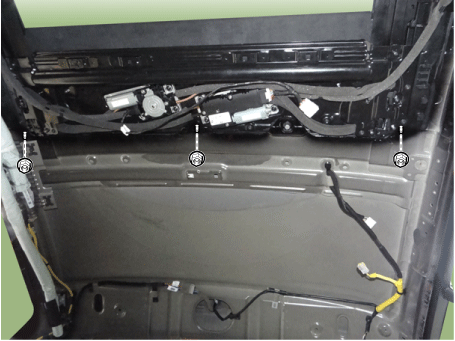
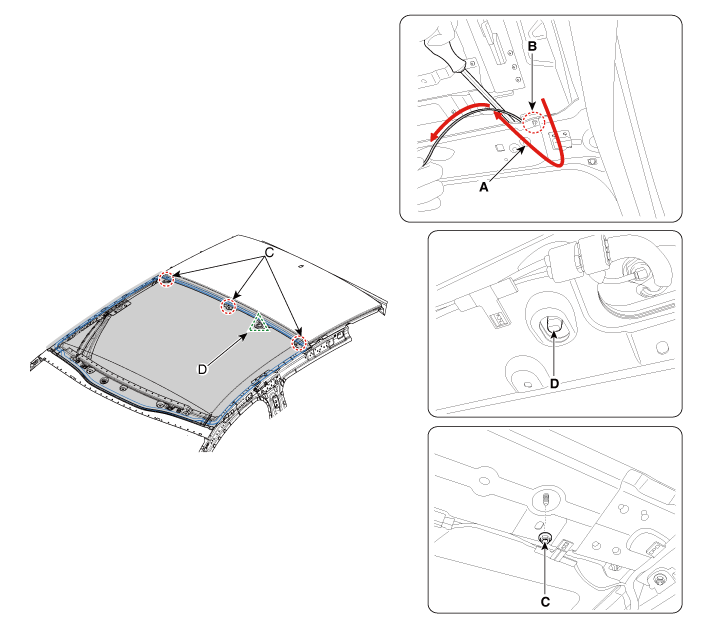
Loosen the sunroof assembly mounting nuts (A).
[Front]
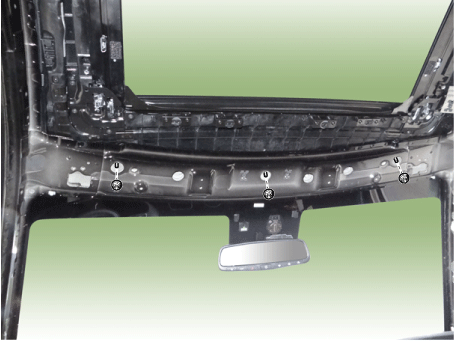
[Rear]
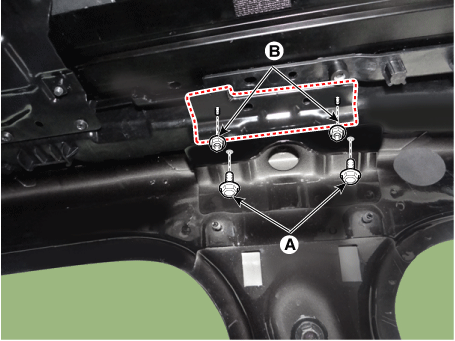
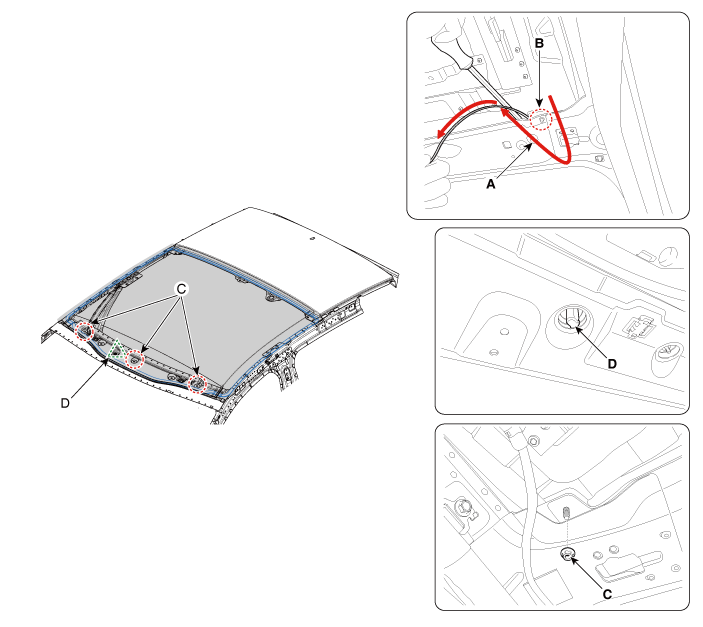
Loosen the bolts (A) and nuts (B) on the side of the sunroof.
Pull the square wire (A) left and right, then apply force in the direction of the arrow to cut off the remaining sealant on the front edge (B).
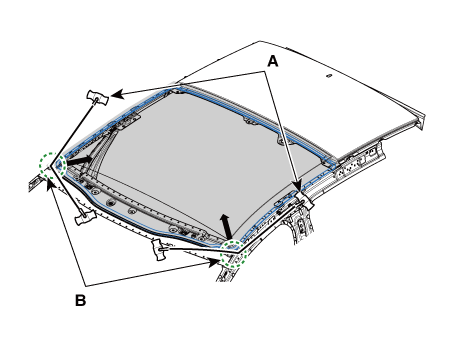
Push the wire (A) from the outside of the housing toward the edge (B) in the direction of the arrow.
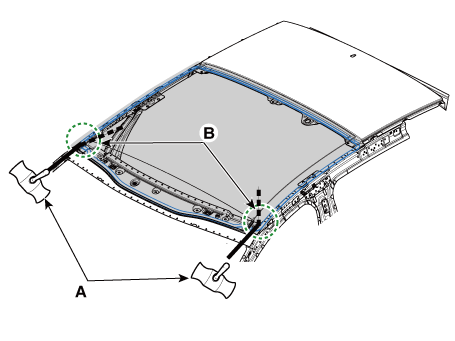
Pull the wire (A) inward when it becomes visible inside the housing.

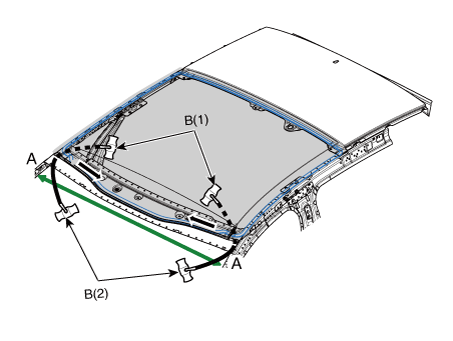
Pull the square wire (B) left and right, then apply force in the direction of the arrow to cut off the remaining sealant on the front section (A-A).
B(1): Work inside the vehicle
B(2): Work outside the vehicle
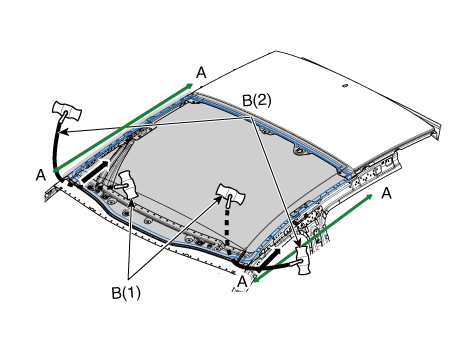
Pull the square wire (B) left and right, then apply force in the direction of the arrow to cut off the remaining sealant on the side section (A-A).
B(1): Work inside the vehicle
B(2): Work outside the vehicle
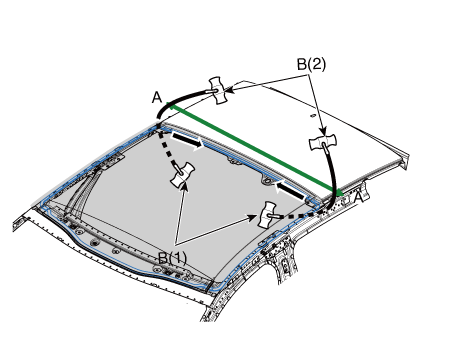
Pull the square wire (B) left and right, then apply force in the direction of the arrow to cut off the remaining sealant on the rear section (A-A).
B(1): Work inside the vehicle
B(2): Work outside the vehicle
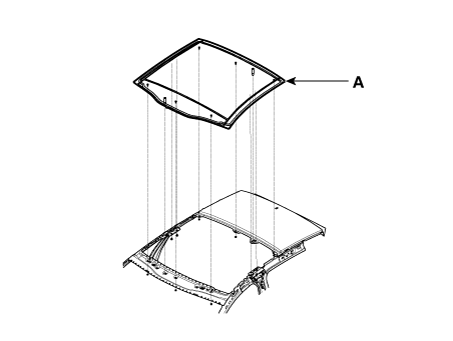
Cut off the remaining sealant on each surface, then remove the sunroof assembly (A).
Installation
Use a blade to cut away the remaining sealant (A) around the body panel.
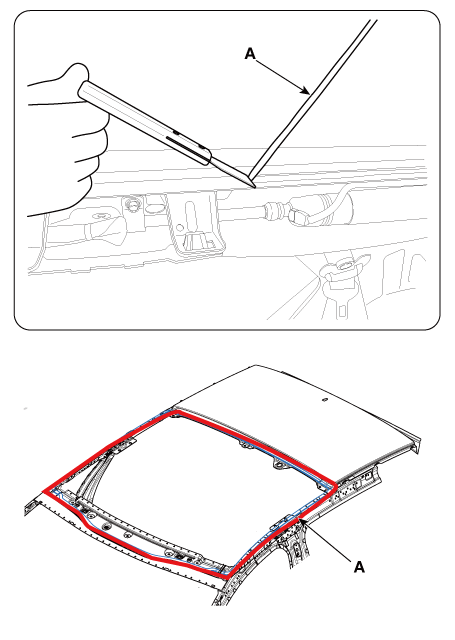
If the sunroof assembly (A) is to be reused, use a sealant removal blade (B) to remove the remaining sealant around the body panel.
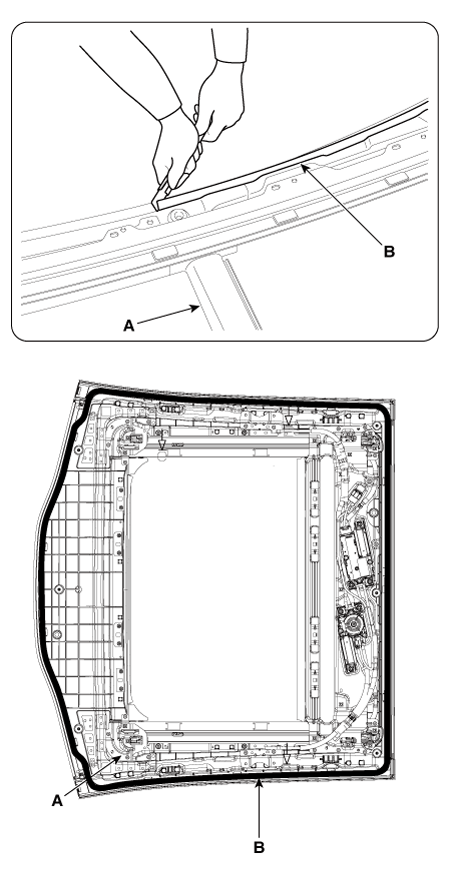
Clean the body panel edges and the sunroof assembly with alcohol or an air gun.
Using a sealant gun, apply sealant (B) around the body panel (A).
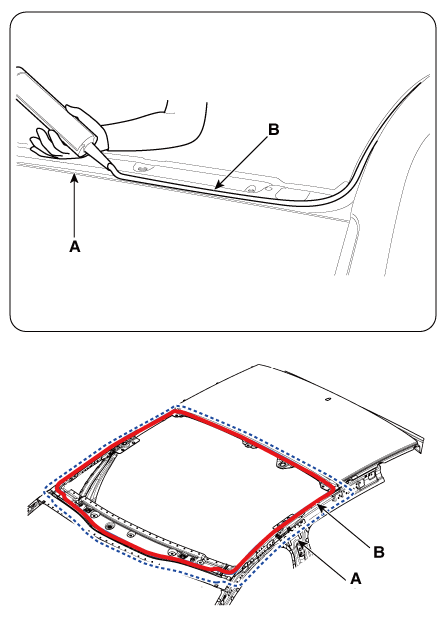
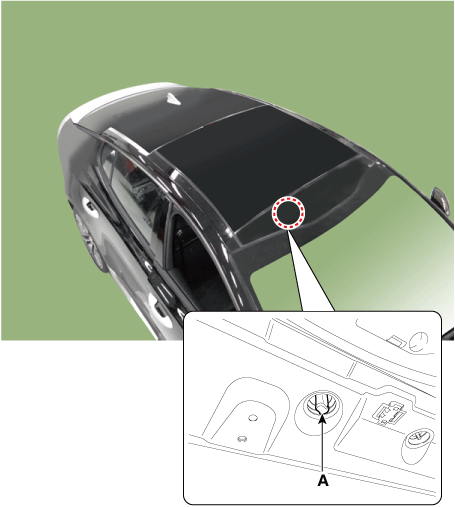
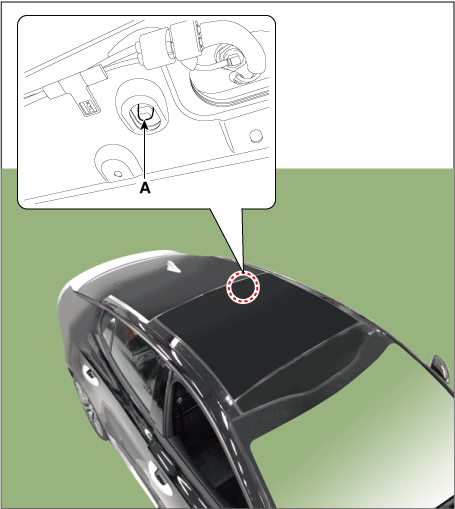
Align with the centering device hole (A) in the housing and carefully install the sunroof assembly onto the body panel.
[Front]
[Rear]
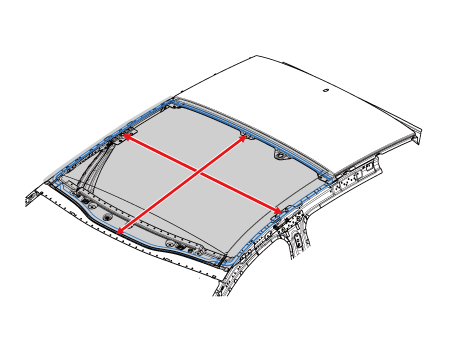
Check the gap and flush before fully installing the sunroof assembly (A).
Apply tape around the sunroof assembly to prevent the assembly from slipping.
Tighten the sunroof assembly mounting nuts (A).
[Front]
Tightening torque: 7.8–11.8 N·m
[Rear]
Tightening torque: 7.8–11.8 N·m
Tighten the side sunroof mounting bolts (A) and nuts (B).
Tightening torque: 7.8–11.8 N·m
Install the assist grip bracket (A).
Tightening torque: 7.8–11.8 N·m
Install the sliding glass.
(Refer to Sunroof — "Sliding Glass")
Press the sunroof switch to fully close the sliding glass.
Perform a water leak test.
In case of water leakage, apply sealant over the entire leakage area.
If the windshield (A) is to be reused, use a sealant removal blade (B) to remove the remaining sealant around the body panel.
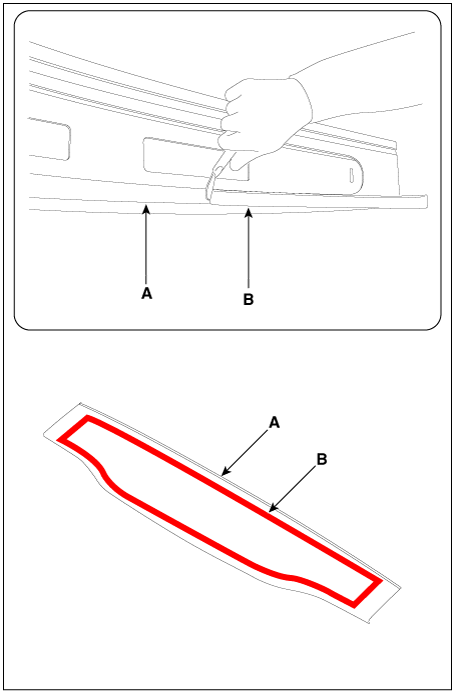
Clean the body panel edges and the windshield with alcohol or an air gun.
Using a sealant gun, apply sealant (B) around the body panel (A).
Install the windshield (A) loosely onto the body panel.
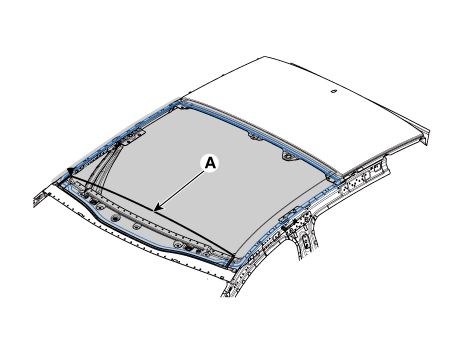
Check the gap and flush before the front glass (A) is fully installed.
Apply tape around the windshield to prevent the glass from separating.
Install the Curtain Air Bag (CAB) module.
(Refer to Passive Safety System — "Curtain Airbag (CAB) Module")
Remove the roof side molding.
(Refer to Body Side Moldings - "Roof Side Molding")
Remove the headliner.
(Refer to Headliner - "Headliner Assembly")
Test yourself
A quick Kia Stinger CK quiz: every answer comes with an explanation and a link to the manual page.