Cylinder head cover
Components and Component Location
Components
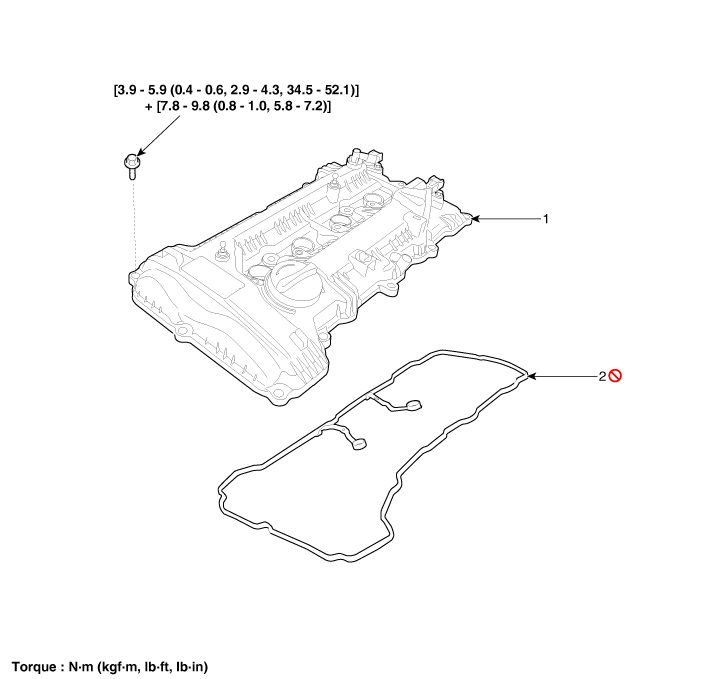
| 1. Cylinder Head Cover | 2. Cylinder Head Cover Gasket |
Repair Procedures
Removal
Remove the engine cover.
(See Engine and Transaxle Assembly - Engine Cover)
Disconnect the negative battery cable.
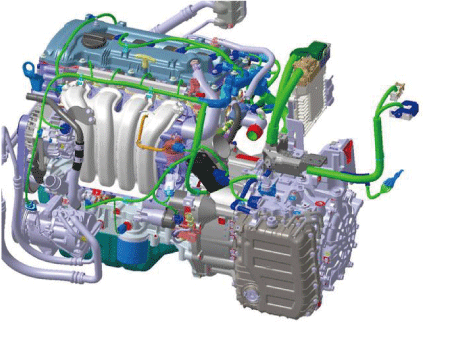
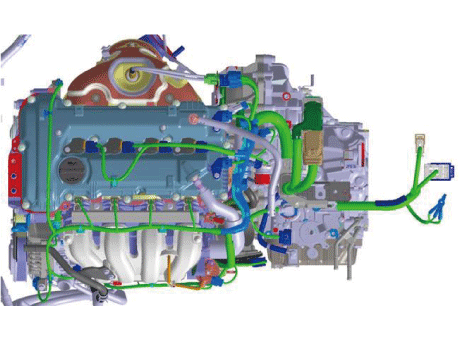
Disconnect the wiring connectors and harness clamps, and remove the bracket around the cylinder head cover.
Remove the air cleaner assembly.
(See Intake and Exhaust System - Air Cleaner)
Remove the ignition coils.
(See Engine Electrical System - Ignition Coil)
Remove the engine oil level sensor.
(Refer to Lubrication System - Oil Level Gauge and Tube)
Disconnect the positive crankcase ventilation (PCV) hose (A).
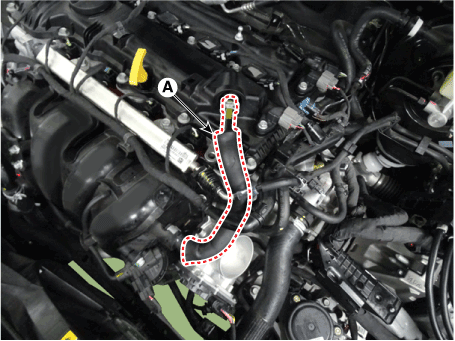
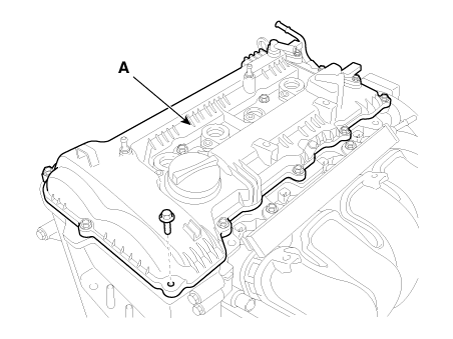
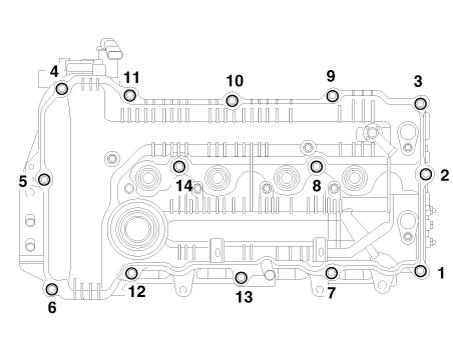
Remove the cylinder head cover (A).
Installation
Install the cylinder head cover.
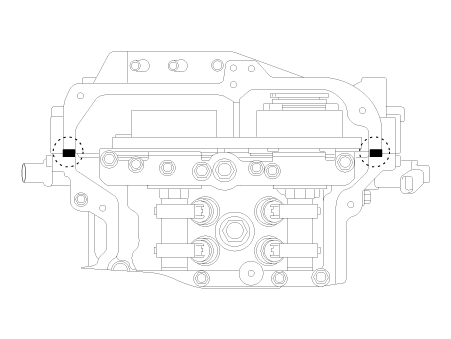
Hardened sealant on the cylinder head cover and the gap between the timing chain cover and the camshaft holder must be removed before installing the cylinder head cover.
Apply engine oil to the seal lip on the cover and the outer surface of the spark plug tubes.
After applying sealant to the gap between the timing chain cover and the camshaft holder, assemble it within 5 minutes.
Bead width: 2.0–3.0 mm (0.08–0.12 in.)
Sealant: Threebond 1217H or equivalent.
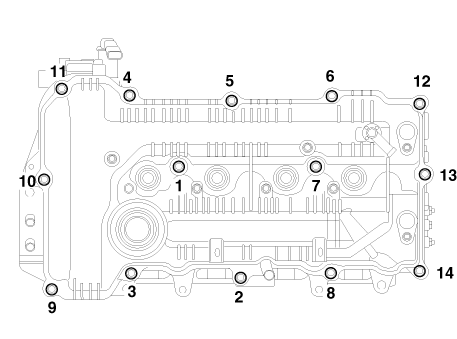
Install the cylinder head cover and tighten the bolts in several passes in the sequence shown.
Tightening Torque
Step 1:
3.9–5.9 N·m (0.4–0.6 kgf·m, 2.9–4.3 ft-lbf, 34.5–52.1 in-lbf)
Step 2:
7.8–9.8 N·m (0.8–1.0 kgf·m, 5.8–7.2 ft-lbf)
Install the remaining parts in the reverse order of removal.
Test yourself
A quick Kia Optima DL3 quiz: every answer comes with an explanation and a link to the manual page.