Joint Assembly (Transaxle Side)
Components and Component Location
Components
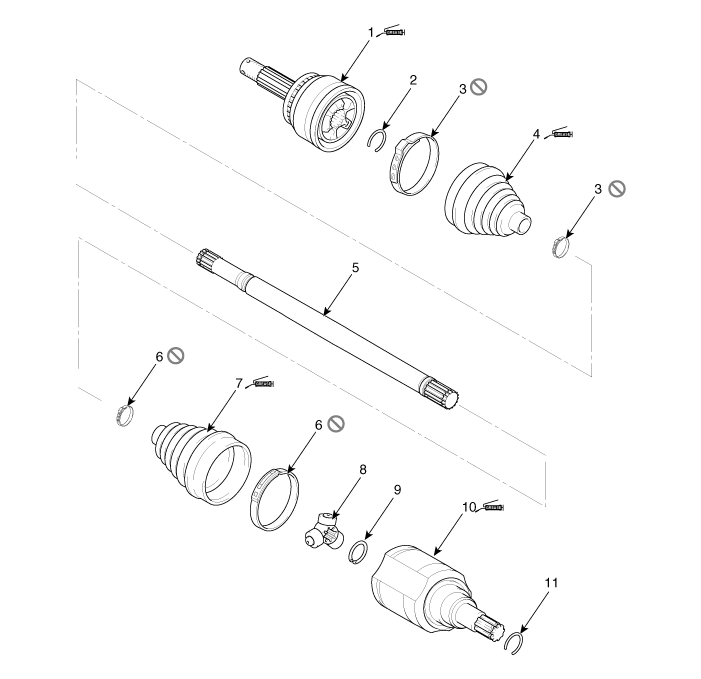
| 1. Wheel Side Joint Assembly 2. Wheel Side Snap Ring 3. Wheel Side Boot Band 4. Wheel Side Boot |
5. Shaft 6. Transaxle Side Boot Band 7. Transaxle Side Boot 8. Spider Assembly |
9. Snap Ring 10. Transaxle Side Joint Housing 11. Snap Ring |
Repair Procedures
Removal
Remove the front drive shaft.
(Refer to Drive Shaft Assembly — "Front Drive Shaft")
Remove both boot bands from the transaxle side joint.
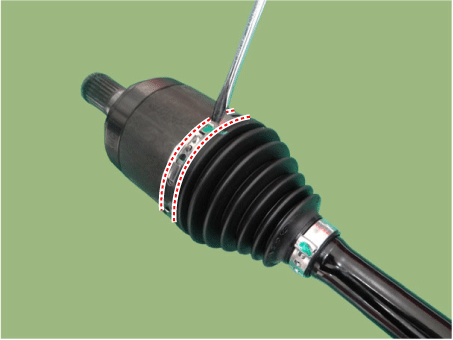
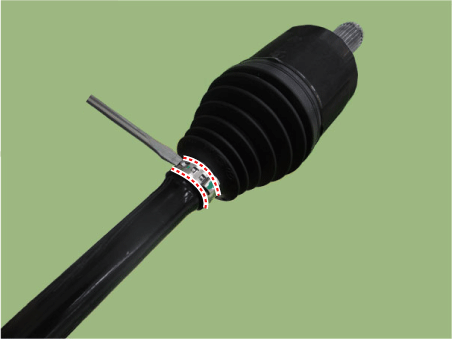
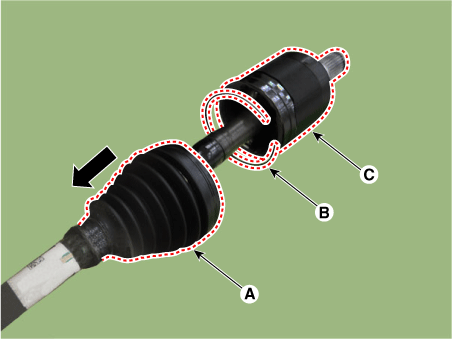
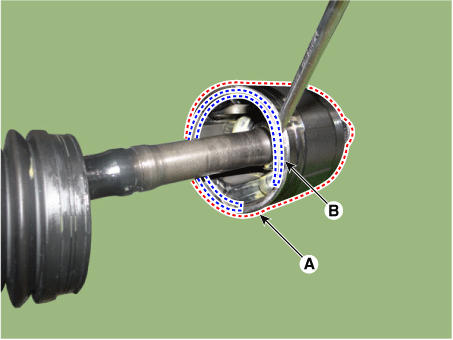
After separating the transaxle side boot (A) in the direction indicated by the arrow, remove the joint snap ring (B) and joint housing (C).
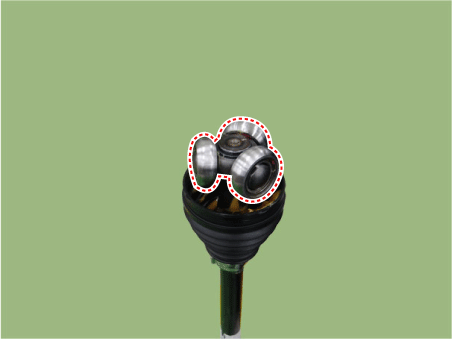
Remove the bearing from the spider assembly.
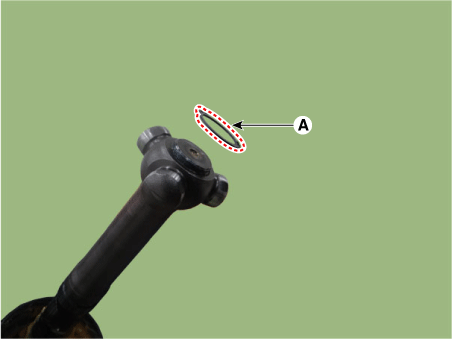
Use snap ring pliers to remove the snap ring (A).
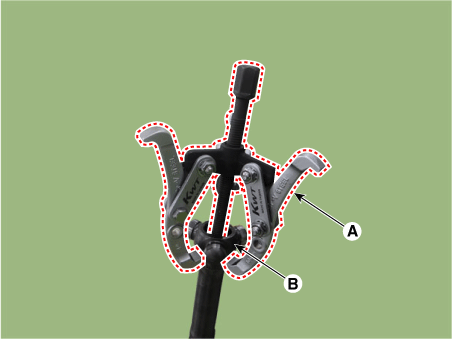
Remove the spider assembly (B) from the drive shaft using a puller (A).
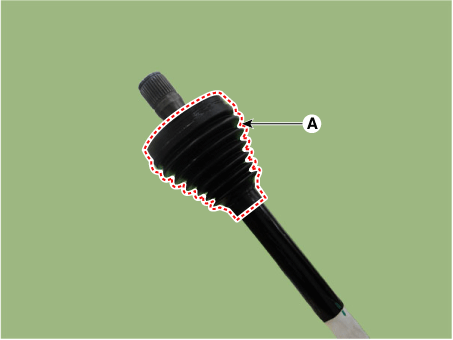
Remove the transaxle side boot (A).
Clean the spider assembly and joint housing.
Inspection
Check the splines (A) for damage, wear, or cracks.
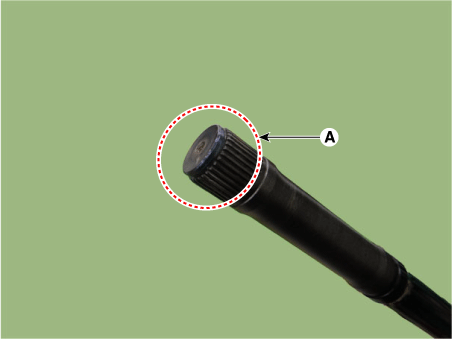
Check the boot for water or foreign material.
Check the joint assembly for damage, wear, cracks, and rust.
Replace any defective parts.
Installation
Install the transaxle side boot (A) and band (B) onto the drive shaft.
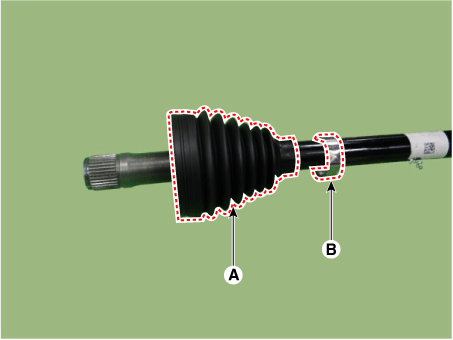
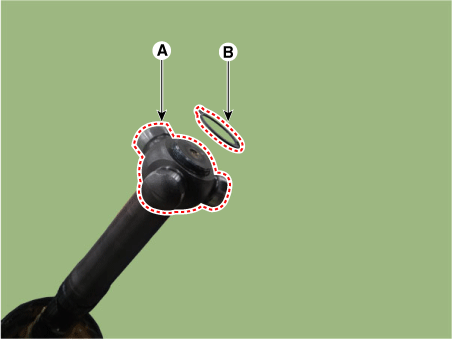
Install the spider (A) and snap ring (B) onto the drive shaft splines in assembly order.
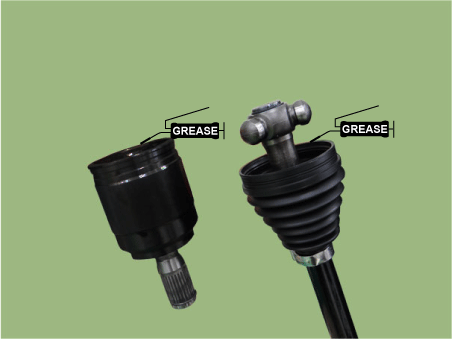
Apply the specified grease to the joint housing and boot.
Install the bearing onto the spider assembly.
Assemble the transaxle side joint housing (A) onto the drive shaft and install the snap ring (B).
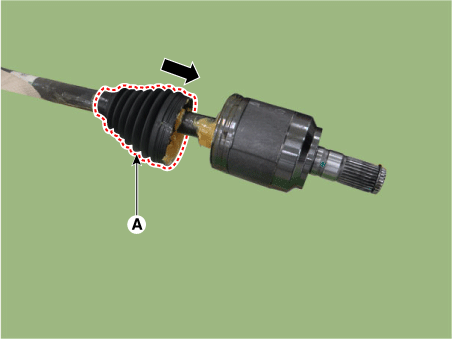
Install the boot (A) onto the joint housing.
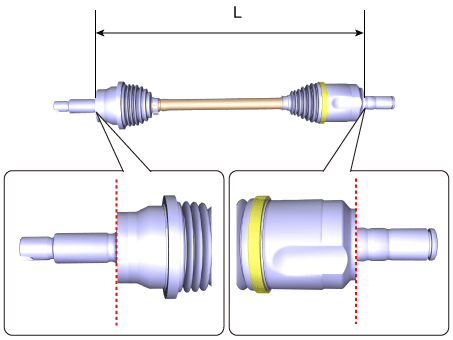
Set the drive shaft length to the standard value, then install the boot band to adjust the air in the transaxle side boot.
Engine Distance (L) mm (in.) Left side Right Side THETA III 2.5 GDI 538,9 (21,2165) 835,5 (32,8937) NU 2.0 MPI 551 (21,6929) 824,3 (32,4527)
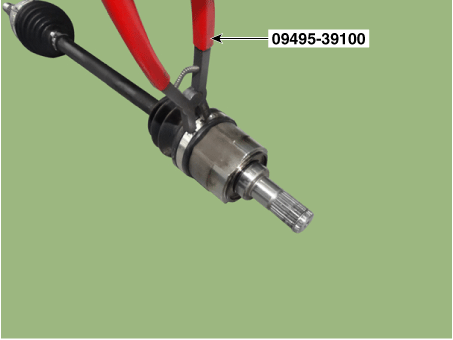
Install the large diameter boot band using the SST (09495-39100).
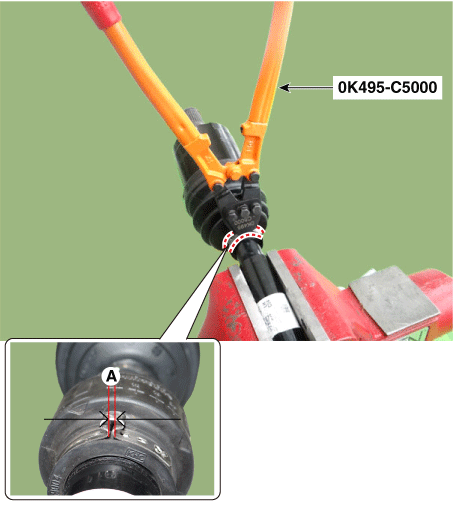
Install the small diameter boot band using the SST (0K495-C5000).
Clearance (A): 2.0 mm (0.0787 in.) or less
Install the front drive shaft.
(Refer to Drive Shaft Assembly — "Front Drive Shaft")
Inspect the front wheel alignment.
(Refer to Suspension System - Front Wheel Alignment)
Test yourself
A quick Kia Optima DL3 quiz: every answer comes with an explanation and a link to the manual page.