Autonomous Emergency Braking (AEB) System
Description and Operation
Description
The AEB system is designed to help avoid or reduce the severity of a potential collision when the driver applies insufficient brake force, delayed braking, or no braking at all to avoid a collision.
The system detects road hazards using the front camera and radar sensor, warns the driver, and activates emergency braking to prevent a collision or reduce collision speed.
The system control process is as follows.
Confirm the target object (vehicles and pedestrians) with the AEB system using analyzed data.
Calculate the required deceleration based on speed, distance, and the presence or absence of a preceding vehicle.
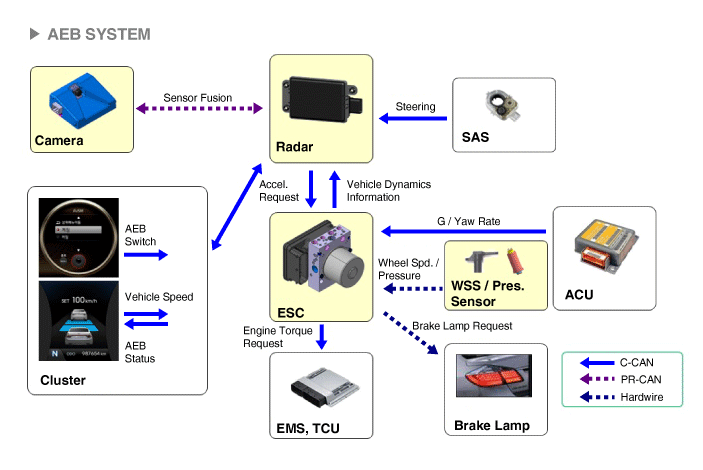
Send the "required deceleration" to the Electronic Stability Control (ESC) system (CAN communication).
The ESC performs automatic control after calculating the torque required to achieve the "required deceleration" (CAN communication).
Operation
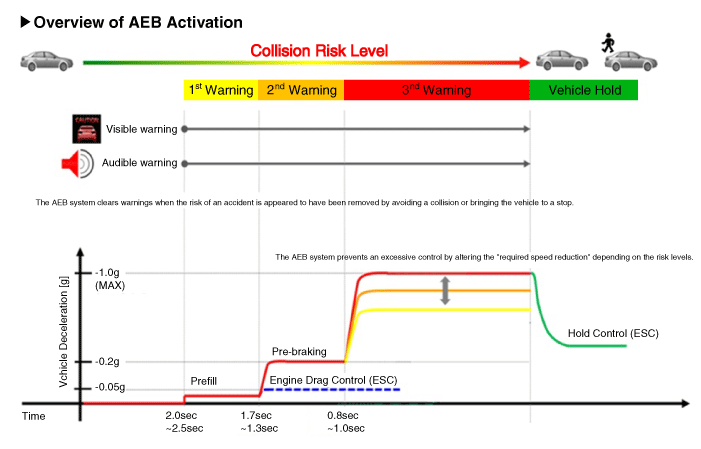
※ The indicated time will vary depending on vehicle speed.
Step 1: Issue a visual (display) and audible warning when a hazard is detected.
Step 2: Reduce engine torque and activate AEB when there is a high probability of collision.
Step 3: Activate emergency braking when a collision is unavoidable.
After the vehicle stops: Maintain braking control for a specified time, then release it.
Components and Component Location
Components
The AEB system configuration is as follows.
Detection device (radar and camera) capable of recognizing potential obstacles ahead.
Human Machine Interface (HMI) to warn the driver or change settings.
Brake system for automatic braking of the vehicle.
Circuit Diagrams
Schematic Diagram
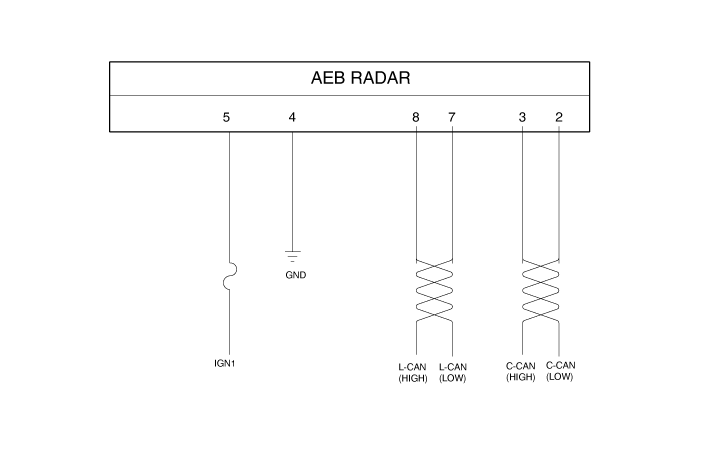
Terminal Function

| NO. | Terminal Function |
| 1 | - |
| 2 | C-CAN LOW |
| 3 | C-CAN HIGH |
| 4 | GROUND |
| 5 | IGN1 |
| 6 | - |
| 7 | L-CAN_LO |
| 8 | L-CAN_HI |
Repair Procedures
Inspection
The AEB ON/OFF switch can be set in the USM (User Setting Menu), and the factory default setting is ON.
When the ignition is switched on, the system maintains the default ON state and does not reflect the driver's setting at the next ignition switch ON.
If the ESC function is turned off, the AEB function is also deactivated.
AEB ON/OFF is set in USM (User Setting Mode) and is ON by default.
While IGN is on, the setting remains on; however, the driver setting is not changed the next time IGN is turned on again.
When ESC is OFF, AEB is also OFF.
Removal
Turn the ignition switch OFF and disconnect the negative (-) battery cable.
Remove the front bumper cover.
(Refer to Body - "Front Bumper Assembly")
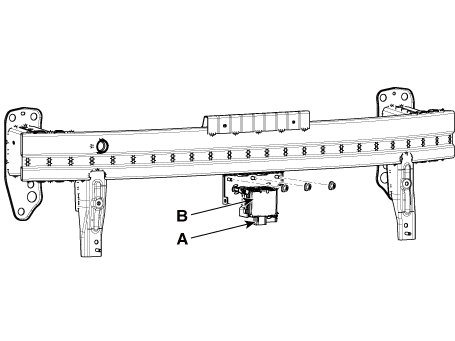
Disconnect the AEB radar connector (A), then remove the AEB radar unit (B).
LDWS Camera
Unlike SCC (Smart Cruise Control), AEB must operate on a stationary vehicle, so the system uses the Fusion Target system to combine radar and camera data.
Disconnect the battery negative (-) cable.
Remove the camera.
(Refer to Body Electrical System - "Lane Departure Warning System (LDWS)" Unit)
Installation
AEB Radar
Installation is the reverse of removal.
Perform AEB variant coding.
Perform AEB radar alignment.
LDWS Camera
Installation is the reverse of removal.
Perform Automatic Target Point Alignment Calibration (SPTAC).
(Refer to Body Electrical System - "Lane Departure Warning System (LDWS)").
Autonomous Emergency Braking (AEB) System Radar Sensor Alignment
The AEB system is designed to help avoid or mitigate a potential collision when the driver applies insufficient brake force, applies the brakes late, or does not brake at all to avoid a collision.
For the radar sensor to operate correctly, it must be aligned correctly parallel to the vehicle's direction of travel. For this reason, the radar sensor alignment procedure must be performed each time the sensor is reinstalled or replaced with a new one.
If the sensor alignment procedure is not performed under the conditions specified above, the smart cruise control system may not operate correctly.
Autonomous Emergency Braking (AEB) System Radar Sensor Alignment
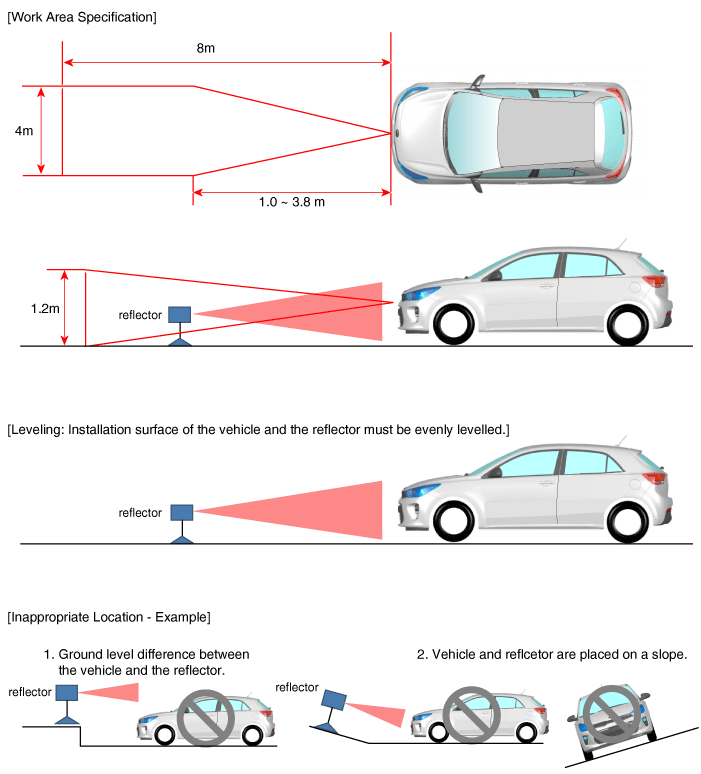
Park the vehicle on a level surface.
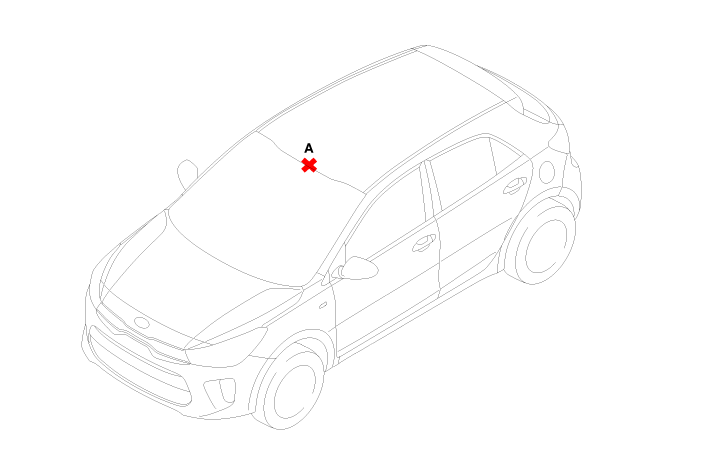
Mark the center point on the upper part of the windshield (A).
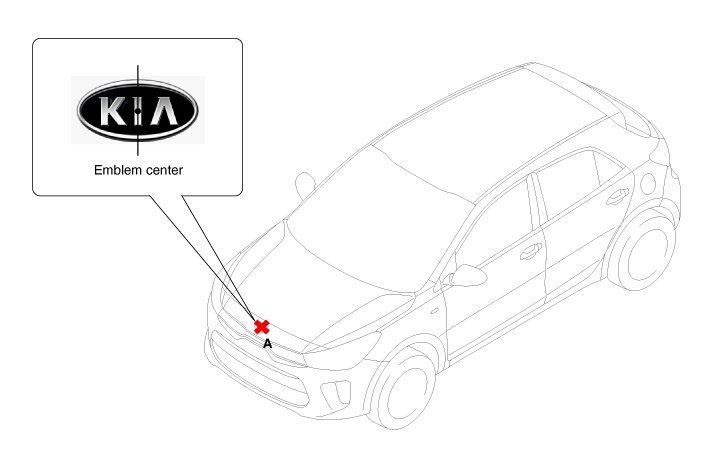
Mark the center point of the emblem (A).
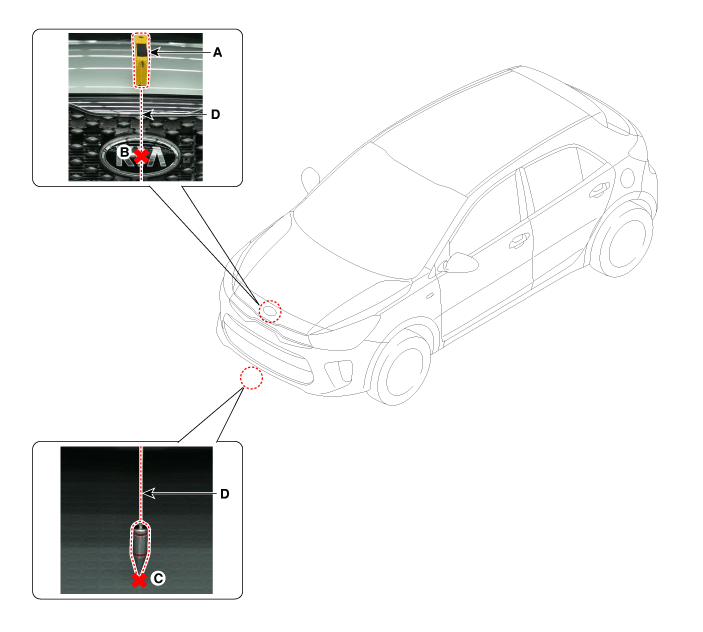
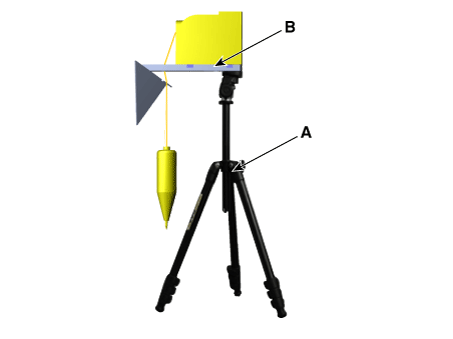
Install the SCC calibration laser [SST No.: 09964-C1200] onto the tripod. [SST No.: 09964-C1300].

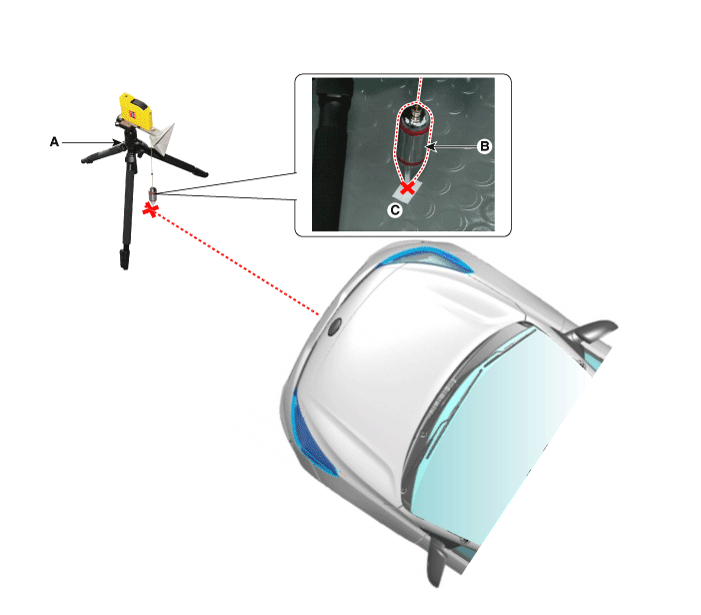
Using the SCC calibration reflector [SST No.: 09964-C1100] (A), adjust the wire (D) so that the center point of the emblem (B) and the center point on the ground (C) are perpendicular to each other.
Install the vertical/horizontal laser [SST No.: 09964-C1200] (A) at least 3.8 m (12.5 ft) in front of the vehicle.
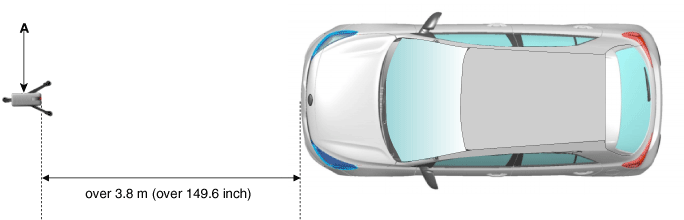
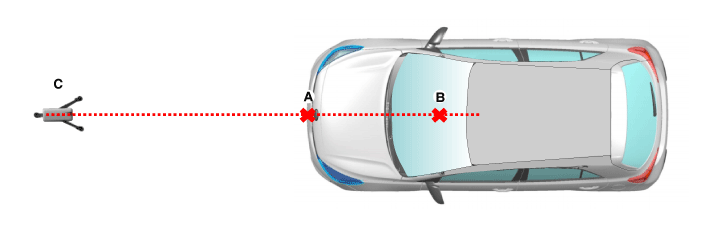
Align the vertical laser line with (A) and (B) using the vertical/horizontal laser (C) [SST No.: 09964-C1200].
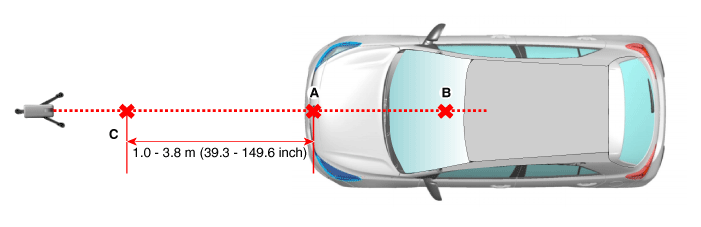
Mark (C) at a distance of 1.0–3.8 m (3.3–12.5 ft) from (A) in front of the vehicle.
Remove the SCC calibration laser [SST No.: 09964-C1200] (B) from the tripod [SST No.: 09964-C1300] (A).
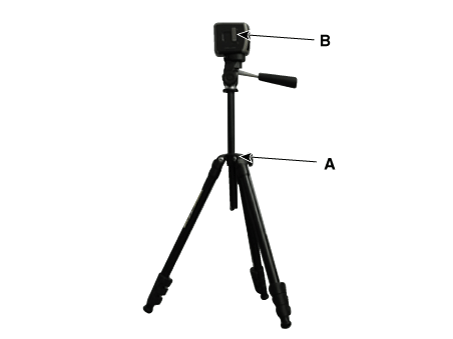
Install the reflector [SST No.: 09964-C1100] (B) on the stand [SST No.: 09964-C1300] (A).
Align the vertical weight (B) of the SCC calibration reflector [SST No.: 09964-C1100] (A) with point (C).
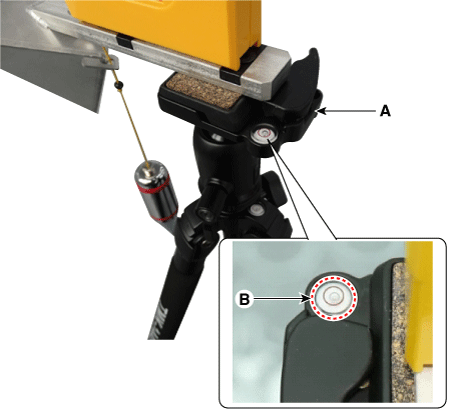
Using the level vial (B) of the stand [SST No.: 09964-C1300] (A), set the reflector horizontally.
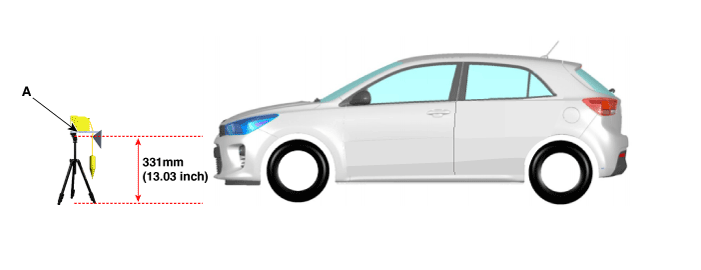
Set the height of the SCC calibration reflector [SST No.: 09964-C1100] (A) to 331 mm (13.03 in.).
Visually check the radar sensor and the front bumper surface again before proceeding to the next step.
Connect the KDS/GDS to the vehicle DLC and start the sensor alignment.
After selecting the correct vehicle model, select "AEB Alignment" from the auxiliary functions in the KDS/GDS menu.
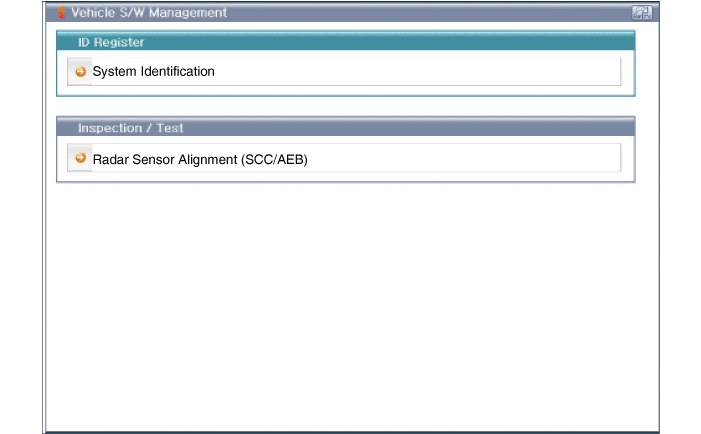
Perform the sensor alignment as instructed on the KDS/GDS screen.
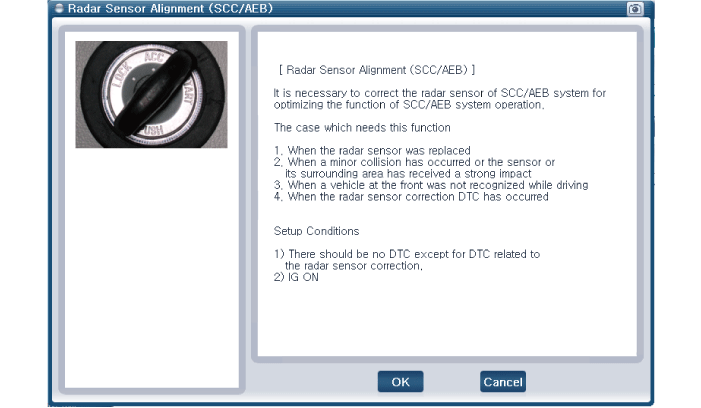
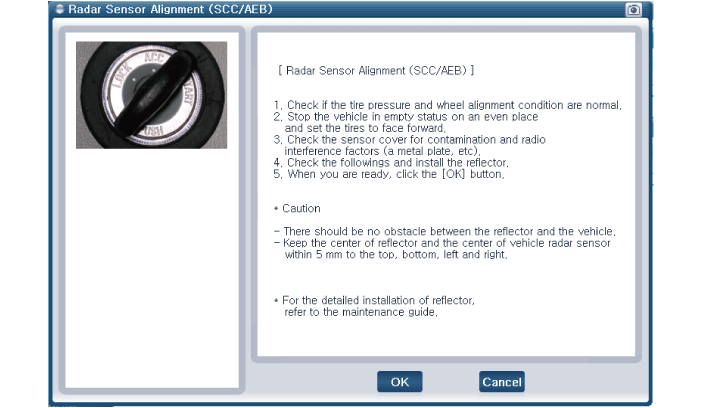
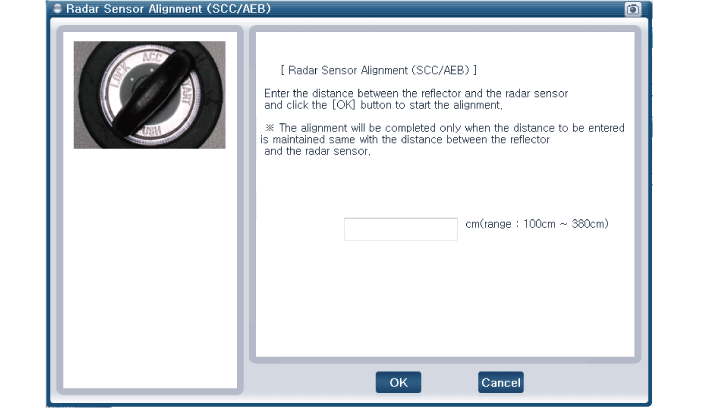
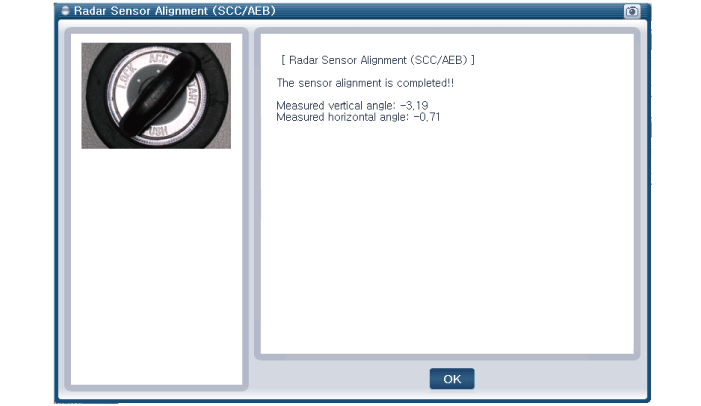
If the sensor alignment fails, check the alignment conditions. Turn the ignition off, then repeat the sensor alignment procedure.
Test yourself
A quick Kia Rio YB quiz: every answer comes with an explanation and a link to the manual page.