Puncture, spare wheel
In the event of a puncture
Depending on the vehicle, you have either a tyre inflation kit or a spare wheel (refer to the following pages).
 If the spare wheel has been kept for many years, have your garage check that it is still suitable and can be used safely. Vehicle fitted with a spare wheel different from the other four wheels:
- Never fit more than one spare wheel on the same vehicle.
- As the spare wheel is smaller than the punctured wheel, the vehicle’s ground clearance is reduced.
- Replace the spare wheel with a wheel identical to the original as soon as possible.
- During use, which must be temporary, do not exceed the speed indicated on the label on the wheel.
- Fitting this wheel may change the normal handling of your vehicle. Avoid sudden acceleration or braking and reduce your speed when cornering.
- If you need to use snow chains, fit the spare wheel on the rear axle and check the inflation pressures.

Spare wheel
Open the tailgate;
lift the floor mat;
lift cover 1, then remove it;
remove the tool kit by lifting it by its handles;
Label 2 reminds you how the spare wheel winch works.

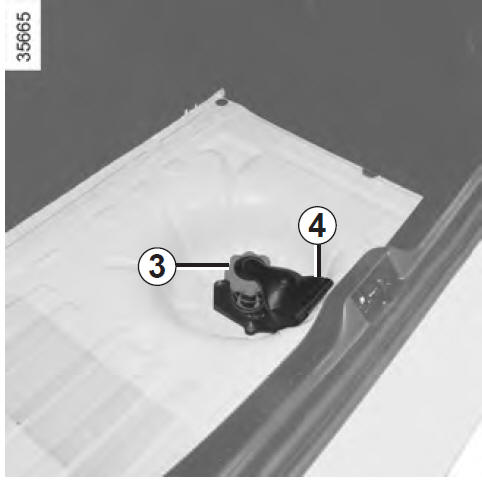
- turn nut 3 anticlockwise until it is fully raised, then place the palm of your hand on area A of handle 4 and push towards the front of the vehicle; the wheel drops;
 When you push on handle 4, the wheel falls under the vehicle, risk of injury. Keep all persons away from underneath the vehicle.
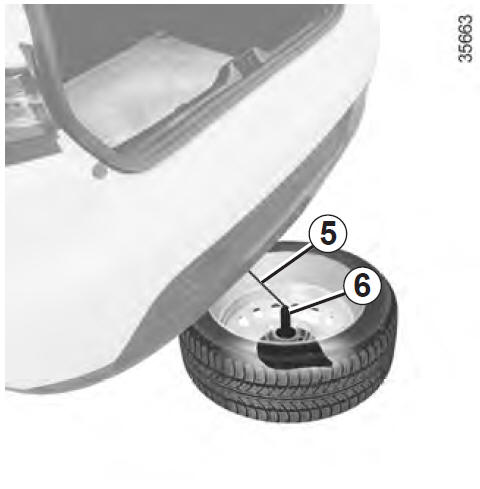
- pull the wheel towards you;
- keeping the wheel flat, unclip cable 5 from its housing 6.
You can remove the wheel from its holder.
Do not touch the exhaust, risk of burns.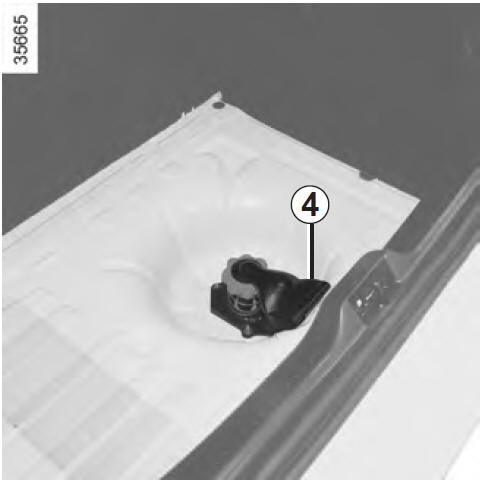
To refit the wheel
Do not refit a wheel with an aluminium rim or a wheel larger than 16" under the vehicle.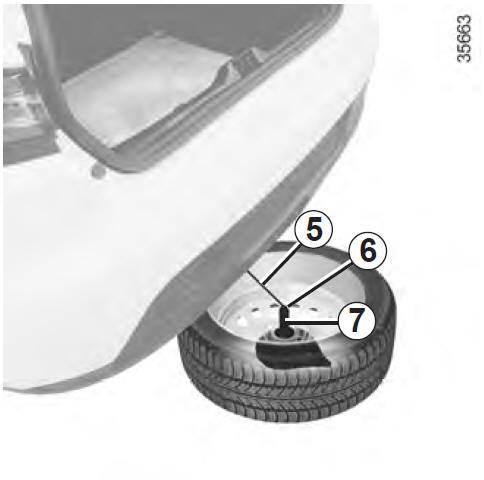
To carry out this operation, the cable must be unwound.
If the cable has been rewound on its own, to unwind it again:
- pull the handle to unwind the cable;
- press the button under handle 4 to hold the cable unwound, then guide it down;
- retrieve the cable from under the vehicle.
You can now raise the wheel.
After a wheel change, place the removed wheel on holder 7, valve facing the ground. Clip cable 5 into its housing 6, then push the wheel under the luggage compartment.
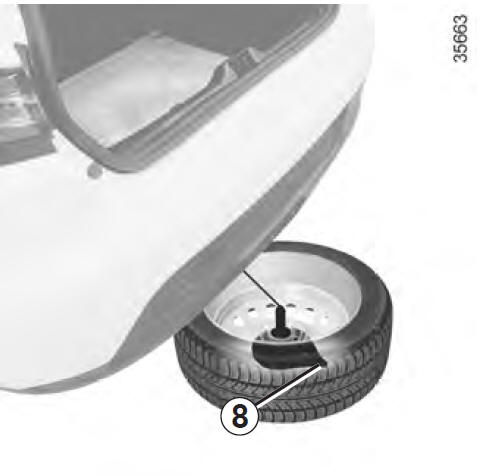
Make sure tab 8 faces the rear of the vehicle.
Stand behind the vehicle and pull handle 4 to raise the wheel until it latches under the vehicle.
 Make sure
no one places their fingers near the cable when operating the handle: risk of injury.
c
- Press nut 3 while turning it fully clockwise until it releases. Several turns are required.
This step is essential to secure the wheel;
- reposition handle 4 in its location;
- clip the tool kit in place;
- refit the cover, lower it and position the luggage compartment mat.
Note: if the tool kit does not lock, check that nut 3 is tightened and that handle 4 is correctly positioned.
Special notes
The spare wheel holder must always be in place while driving, even if there is no wheel: risk of water ingress.
If you need to release it when there is no wheel, press the centre of the wheel holder towards the ground while pressing handle 4.
 Strictly follow the wheel nut tightening procedure to secure the wheel
.
The system must only be used with wheels fitted as original equipment on the vehicle, or identical wheels.
Test yourself
A quick Renault Clio quiz: every answer comes with an explanation and a link to the manual page.