License Plate Light Bulb
Components
COMPONENTS
ILLUSTRATION
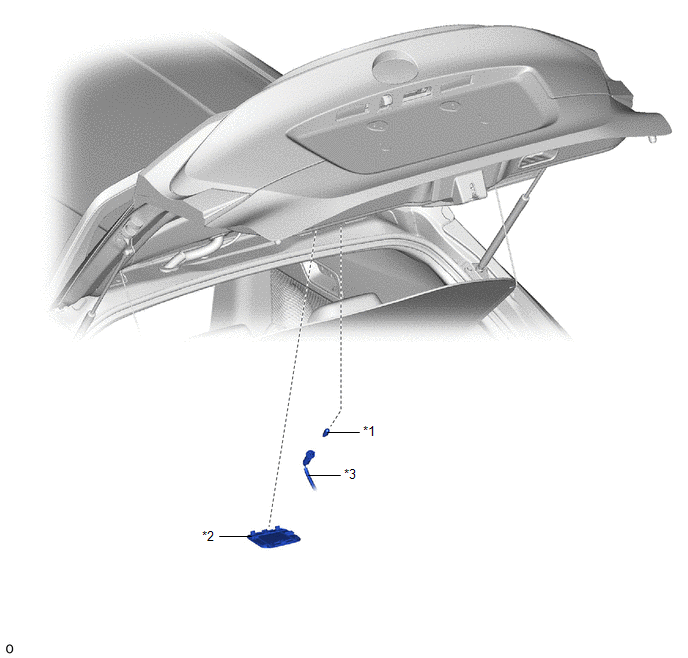
*1 |
LICENSE PLATE LIGHT BULB |
*2 |
BACK DOOR ACCESS HOLE COVER NO. 2 |
*3 |
LICENSE PLATE LIGHT SOCKET AND WIRE |
- |
- |
Removal
REMOVAL
PRECAUTION / NOTICE / HINT
HINT:
- Use the same procedure for the RH side as for the LH side.
- The procedure described below applies to the LH side.
PROCEDURE
1. REMOVE BACK DOOR ACCESS HOLE COVER NO. 2
(a) Using a screwdriver with its tip wrapped in protective tape, release the clips to remove the back door access hole cover No. 2, as shown in the illustration.
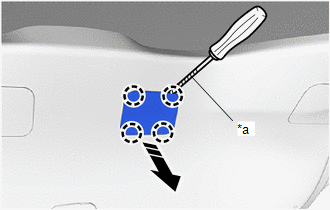
*a |
Protective tape |
 |
Remove in this direction |
2. REMOVE LICENSE PLATE LIGHT BULB
(a) Turn the license plate light socket and wire with the bulb as shown in the illustration to disconnect them together.
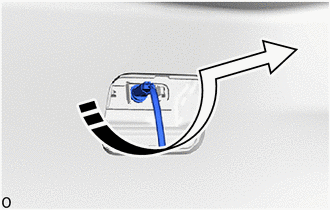
|
Remove in this direction |
(b) Remove the license plate light bulb from the license plate light socket and wire as shown in the illustration.
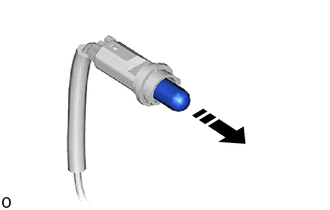
|
Remove in this direction |
Installation
INSTALLATION
PRECAUTION / NOTICE / HINT
HINT:
- Use the same procedure for the RH side as for the LH side.
- The procedure described below applies to the LH side.
PROCEDURE
1. INSTALL LICENSE PLATE LIGHT BULB
(a) Install the license plate light bulb into the license plate light socket and wire as shown in the illustration.
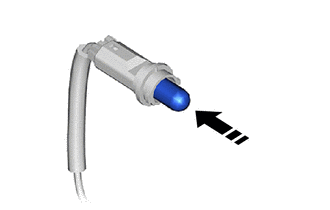
 |
Install in this direction |
(b) Turn the rear license plate light socket and wire with the bulb as shown in the illustration to connect them together.
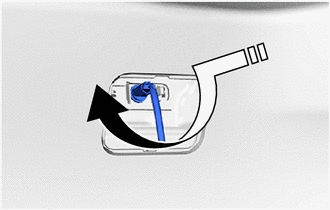
|
Install in this direction |
2. INSTALL BACK DOOR ACCESS HOLE COVER NO. 2
(a) Engage the clips to install the back door access hole cover No. 2 as shown in the illustration.
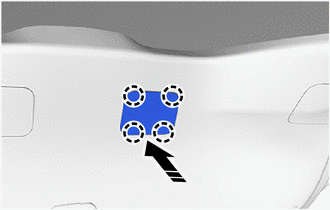
|
Install in this direction |