High Mounted Stop Light Assembly
Components
COMPONENTS
ILLUSTRATION
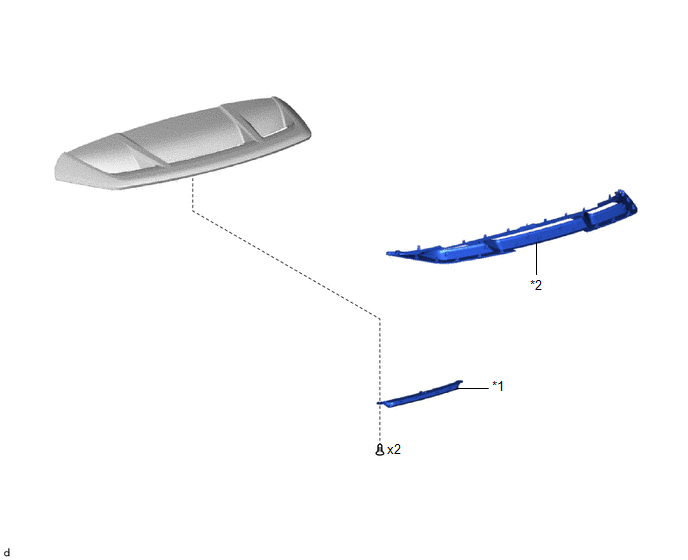
*1 |
HIGH MOUNTED STOP LIGHT ASSEMBLY |
*2 |
REAR SPOILER SHIELD NO. 2 |
Removal
REMOVAL
PROCEDURE
1. REMOVE REAR SPOILER ASSEMBLY
Click here
2. REMOVE REAR SPOILER SHIELD NO. 2
Click here
3. REMOVE HIGH MOUNTED STOP LIGHT ASSEMBLY
(a) Remove the 2 screws. |
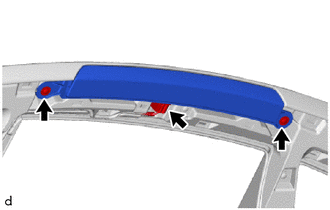 |
(b) Disconnect the connector to remove the high mounted stop light assembly.
Inspection
INSPECTION
PROCEDURE
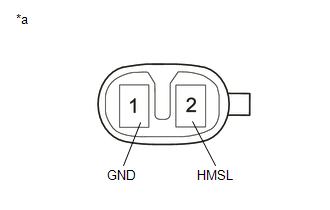
1. INSPECT HIGH MOUNTED STOP LIGHT ASSEMBLY
(a) Apply battery voltage to the high mounted stop light assembly and check that the light comes on. OK:
If the result is not as specified, replace the high mounted stop light assembly. |
|
Installation
INSTALLATION
PROCEDURE
1. INSTALL HIGH MOUNTED STOP LIGHT ASSEMBLY
(a) Connect the connector.
(b) Install the high mounted stop light assembly with the 2 screws.
2. INSTALL REAR SPOILER SHIELD NO. 2
Click here
3. INSTALL REAR SPOILER ASSEMBLY
Click here