Installation
INSTALLATION
PRECAUTION / NOTICE / HINT
NOTICE:
After replacing the rear disc brake pads, the brake pedal may feel soft due to the clearance between the rear disc brake pads and the rear disc. Depress the brake pedal several times until the pedal feels firm.
HINT:
- The following procedure applies to the left side.
- Repeat the same procedure for the right side and the left side.
PROCEDURE
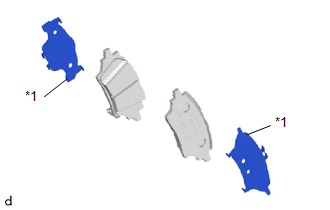
1. INSTALL REAR DISC BRAKE ANTI-SQUEAL SHIM KIT
NOTICE:
When replacing worn rear disc brake pads, the rear disc brake anti-squeal shim kit must be replaced together with the rear disc brake pads.
(a) Install the rear disc brake anti-squeal shims on each rear disc brake pad. NOTICE: Install the rear disc brake anti-squeal shim in the correct position and direction, as shown in the illustration. |
|
2. INSTALL REAR DISC BRAKE PAD KIT
CAUTION:
- After lifting up the rear disc brake caliper assembly, place it in position before working on it.
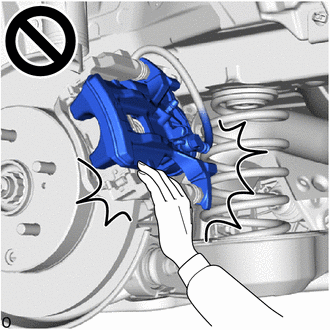
- The rear disc brake caliper assembly may fall and cause serious injury to your hands or fingers.
(a) Push in the rear disc brake piston.
NOTICE:
Do not force the rear disc brake piston into the rear disc brake cylinder assembly.
(b) Install the 2 rear disc brake pads on the rear disc brake caliper bracket.
NOTICE:
Make sure that disc brake grease has been applied to the friction material surface of the disc brake pad.
(c) Hold the rear disc brake caliper guide pin and install the rear disc brake caliper assembly on the rear disc brake caliper bracket with a new bolt. Torque: 34 N·m {352 kgf·cm, 25 ft·lbf} |
|
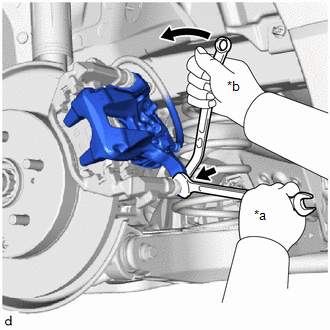
(d) Depress the brake pedal several times.
3. ADD BRAKE FLUID
Click here
4. INSTALL REAR WHEEL
Click here
5. RESTORE NORMAL OPERATION
Click here