Parking aid
Assembly overview - Parking aid
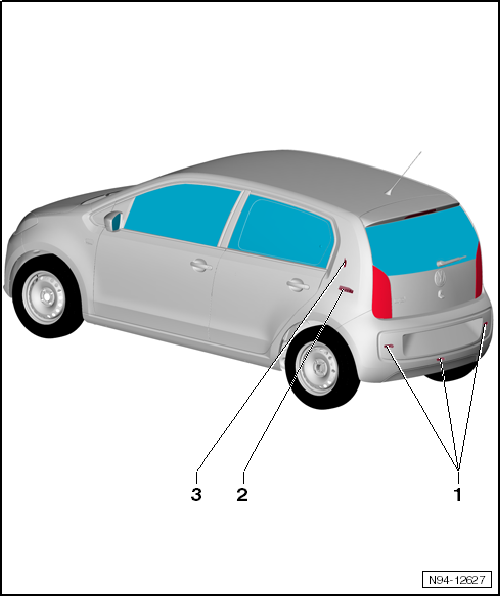
- Sensor for parking aid in rear bumper cover
- Parking aid sensor, rear left -G203-
- Parking aid sensor, rear centre -G796-
- Parking aid sensor, rear right -G206-
- Remove and install
- Parking aid control module -J446-
- Remove and install
- Adapting functions of parking aid control module
- Coding parking aid control module
- Parking aid warning buzzer -H15-
- Remove and install
- Adapting warning buzzer functions
Removing and installing rear parking aid warning buzzer -H15-
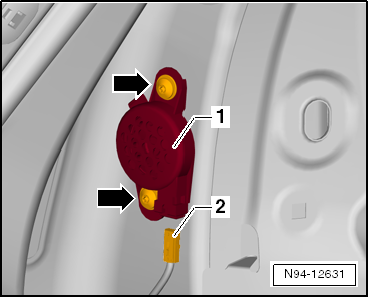
The rear parking aid warning buzzer -H15- is located behind the left side panel trim in the luggage compartment.
Removing
- Switch off ignition and all electrical consumers and remove the ignition key.
- Remove the left side panel trim in the luggage compartment → Body assembly work interior.
- Unscrew the pins of the expanding rivet and release the expanding rivet -arrows-.
- Unlock and disconnect the connector -2- and remove the warning buzzer -1-.
Installing
Installation is performed in the reverse order.
Adapting volume and frequency of rear parking aid warning buzzer
Adapting parking aid control module -J446-
The volume and frequency of the rear parking aid warning buzzer -H15- can be adapted using the parking aid control module -J446-.
The following parking aid functions can be adapted with this program:
- Parking aid activation tone
- Frequency of parking aid warning buzzer
- Volume of parking aid warning buzzer
- Audio reduction
- Visual display for parking aid
- Connect the vehicle diagnostic tester.
- Adapt volume and frequency of rear parking aid warning buzzer → Vehicle diagnostic tester.
Coding parking aid control module -J446-
- Connect the vehicle diagnostic tester.
- Code parking aid control module -J446- → Vehicle diagnostic tester.
Removing and installing rear parking aid sensors
The following parking aid sensors are installed in the rear bumper cover:
- Parking aid sensor, rear left -G203-
- Parking aid sensor, rear centre -G796-
- Parking aid sensor, rear right -G206-

Note
- Three parking aid sensors are installed in the rear bumper cover.
- The rear bumper cover does not need to be removed to remove and install the two outer sensors. The sensors are accessible through the wheel arch.
- The sensors are removed and installed from their sensor holders in the same way for all sensors, so the procedure is described below for one sensor only.
Removing
- Switch off ignition and all electrical consumers and remove the ignition key.

Caution!
The sequence for removing the sensors must be strictly observed.
Otherwise the sensor may be damaged. Excessive force on the sensor can cause hairline cracks, leading to sensor failure.
First remove the sensor from the holder, then unlock and disconnect the sensor connector.
Only for removing and installing the centre sensor:
- Remove the rear bumper cover → Body assembly work exterior.
Continuation for removing and installing all sensors:
- Unclip the rubber cap -1- from the sensor holder.
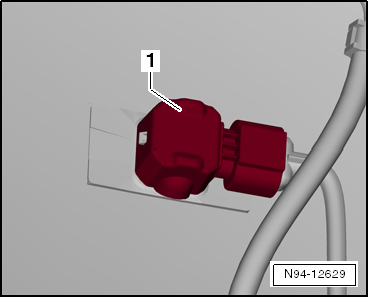
- Press the latches -2- on the sensor holder outwards.
- Pull the sensor -1- with the connected wires rearwards out of the sensor holder.

Note
- When removing the sensor, make sure that the decoupling ring (black silicone ring) stays on the sensor head and does not remain in the holder or get lost.
- Avoid stretching the decoupling ring at all times.
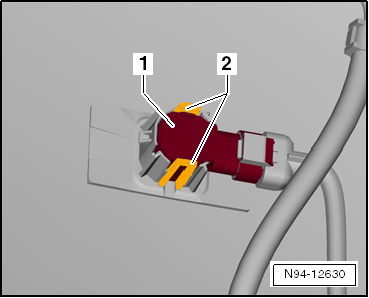
- Unlock the connector -2- and pull it off the sensor -1-.
Installing
Installation is carried out in the reverse order of removal, observing the following:

Caution!
An incorrect or damaged decoupling ring can cause malfunctions.
Avoid stretching the decoupling ring at all times.
Replace damaged decoupling rings and make sure the correct decoupling ring is installed.
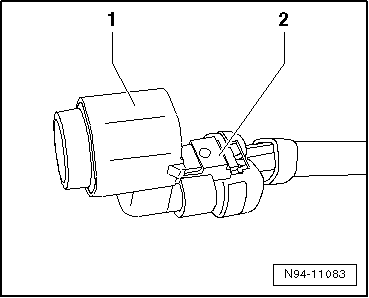
- Check the decoupling ring -1- of the sensor for damage and replace it if necessary.

Note
- When installing the sensor, make sure the decoupling ring is correctly fitted onto the sensor head and does not twist or roll up when inserted into the sensor holder.
- Both locking lugs of the sensor holder must audibly engage when the sensor is installed.
- Make sure the rubber cap engages correctly on the sensor holder.
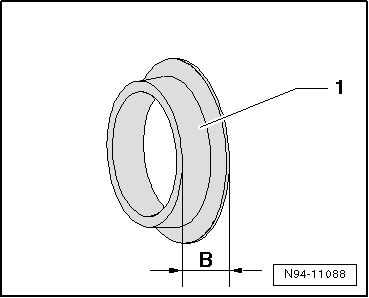
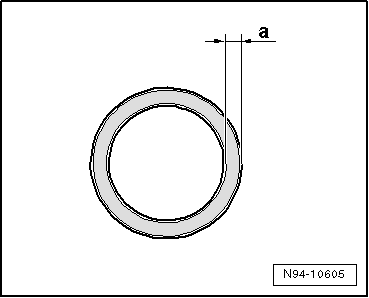
- After installing the sensor, check that the sensor is correctly seated in the holder. Visible on the outside of the bumper, the gap -a- between the sensor head and the bumper cover must be even all the way around.
- Check the functions of the parking assistance system.
Removing and installing control module for parking assistance -J446-
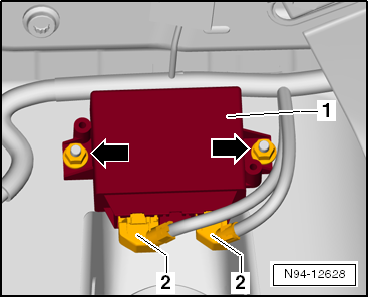
The control module for parking assistance -J446- is located behind the left side trim panel in the luggage compartment.
Removing
- Switch off ignition and all electrical consumers and remove the ignition key.
- Remove the left side panel trim in the luggage compartment → Body assembly work interior.
- Unlock and disconnect connectors -2-.
- Unscrew the two retaining nuts -arrows- and remove the control module for parking assistance -J446--1-.
Installing
Installation is carried out in the reverse order of removal, observing the following:
- Tighten the two retaining nuts to the torque specified in the assembly overview.