Quick connectors
Disconnecting quick connectors
Required Special Tools, Test and Measuring Equipment and Auxiliary Items
- Release tool -T10468-
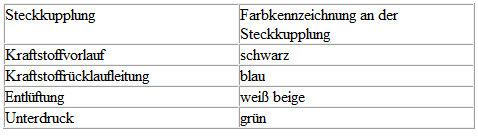
Assignment of quick connectors

Note
- The quick connectors for fuel, vacuum and vent lines are color coded. Either there is a colored dot on the quick connector or the release button has the corresponding color.
- Observe safety precautions.
- Observe cleanliness rules.


WARNING!
The fuel supply line is under pressure! Wear safety goggles and protective clothing to avoid injury and skin contact. Before loosening hose connections, place a rag around the connection point. Then relieve pressure by carefully pulling off the hose.
Variant 1
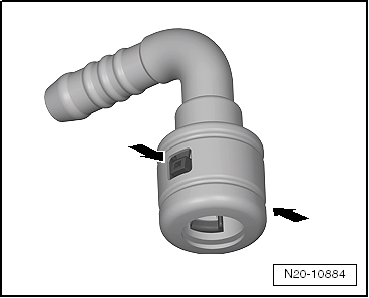
Quick connector with release buttons -arrows- on right and left.
Opening
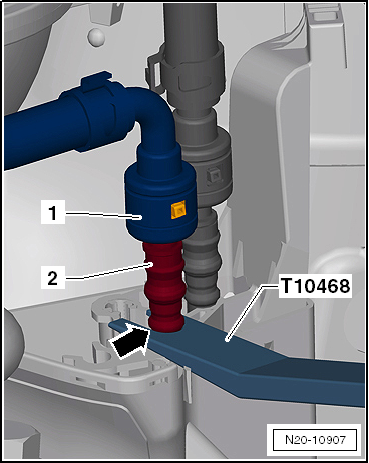
The fuel coupling point -1- must be held counter.
- Insert -T10468- between the heat shield and the stop -arrow- of the fuel line -2- and hold counter.
Continuation for all coupling points of the fuel system:
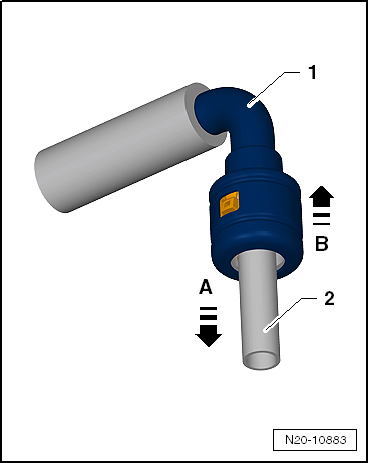
- Press quick connector -1- in -arrow direction A-.
- Press the release buttons and pull quick connector -1- off the fuel line -2- in -arrow direction B-.
When installing, observe color assignment.
- Check that the quick connector is firmly seated by pulling against it!
Variant 2
Quick connector with pull release -arrow-.
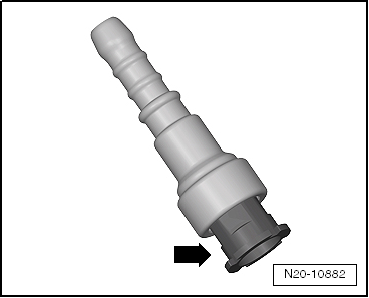
Opening
- Press quick connector -1- in -arrow direction A-.
- Pull pull release -2- in -arrow direction B-.
- Pull quick connector -1- off the fuel line -3- in -arrow direction B-.
When installing, observe color assignment.
- Check that the quick connector is firmly seated by pulling against it!

Variant 3
Quick connector with front button -arrow-.
Opening
- Press release button -arrow- and pull off quick connectors.
When installing, observe color assignment.
- Check that the quick connectors are firmly seated by pulling against them!
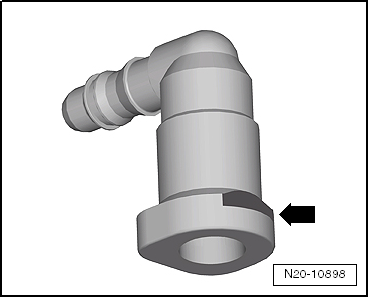
Variant 4
Quick connector with release buttons -arrows- on right and left.
Opening
- Press quick connector in -arrow direction A-.
- Press release buttons -arrows- and pull off quick connector.
When installing, observe color assignment.
- Check that the quick connector is firmly seated by pulling against it!
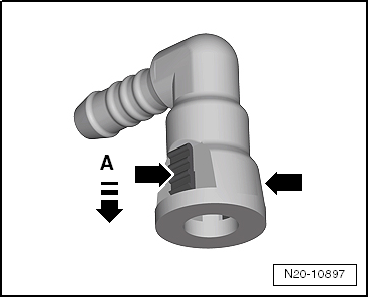
Variant 5
Quick connector with release buttons -arrows- on right and left.
Opening
- Press release buttons -arrows- and pull off quick connector.
When installing, observe color assignment.
- Check that the quick connector is firmly seated by pulling against it!
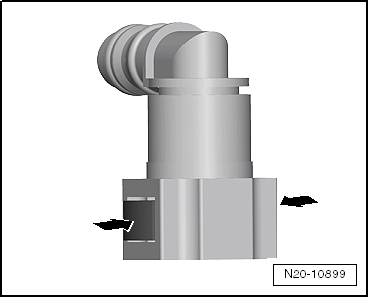
Variant 6
Quick connector with release buttons -arrows- on right and left.
Opening
- Press and hold quick connector -1- in -arrow direction-.
- Press release buttons -arrows- and pull off quick connector.
When installing, observe color assignment.
- Check that the quick connector is firmly seated by pulling against it!

Variant 7
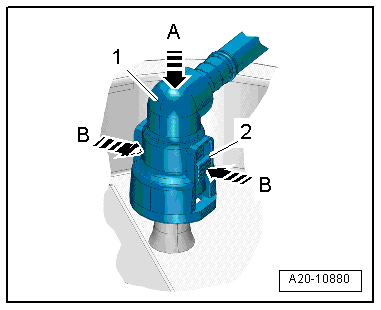
Quick connector -1- with release buttons -2- on right and left:
Opening
- Press quick connector -1- in -arrow direction A- and hold.
- Press release buttons -2- in -arrow direction B- and pull off quick connector -1-.
When installing, observe color assignment.
Plug-in connectors must audibly lock into place when engaged.
- Check that the quick connector is firmly seated by pulling against it!
Fuel filter

Note
- The fuel filter and the pressure relief valve are integrated in the fuel pump and cannot be replaced individually.
- Replace fuel pump.