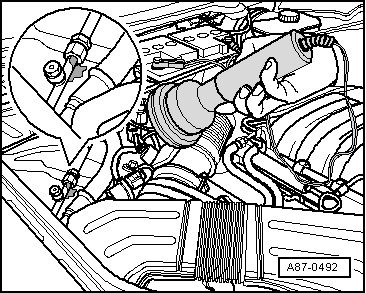
Locating Leaks in the Refrigerant Circuit

Note
- This repair guide describes refrigerant circuit leak detection using different methods. These methods have been tested and, when applied correctly and according to the specific fault, they lead to a reliable result under the various operating conditions.
- Only if leak detection with compressed air / nitrogen or vacuum has not produced a result should the electronic leak detector or UV leak detection additive be used.
- Minor leaks can be detected, for example, with an electronic leak detector or a UV leak detection lamp.
- Numerous methods for leak detection in the refrigerant circuit are offered on the open market. These methods do not always deliver clear results. If they are not applied exactly as specified, they can also cause components of the refrigerant circuit to be indicated as leaking even though they are sealed. In addition, with certain methods, components of the refrigerant circuit can be damaged or pre-damaged.
- Components in which a leak has been found must not be repaired; they must be replaced with genuine parts.
- A leaking refrigerant circuit must not be filled with refrigerant. Therefore, evacuate an empty refrigerant circuit before adding refrigerant and check it for leaks during this process.

Caution!
- If there is a suspicion that chemical substances for sealing leaks have been added to the vehicle's refrigerant circuit, do not connect the air conditioning service unit and do not extract the refrigerant.
- Chemical leak sealants form deposits in the refrigerant circuit that impair the function of the air conditioning system and lead to failure of the air conditioning system (and your air conditioning service unit).
- Make the customer aware that their air conditioning system contains substances that have not been approved by VW. This air conditioning system cannot be drained or repaired by you.

Note
- VW does not permit the use of chemical substances to seal leaks in the refrigerant circuit.
- Chemical sealants for refrigerant circuit leaks usually react with the ambient air and the humidity it contains. They cause malfunctions of valves and other components they come into contact with, due to deposits in the refrigerant circuit (and in your air conditioning service station). These deposits cannot be completely removed from the components (not even by flushing).
- Chemical sealants for refrigerant circuit leaks can usually not be detected from the outside. The required label that must be attached for identification is usually not present. Therefore, be cautious with a vehicle whose history you do not know.
- The aftermarket offers containers that are supposed to separate these chemical substances (used to seal leaks) from the refrigerant. Since VW does not permit the use of these substances, no statement can be made here about the effectiveness or separation rate of these filters.
Leak Detection in the Refrigerant Circuit with Compressed Air or Nitrogen

Note
- A leak can be located, for example, by building up a pressure of no more than 15 bar in the refrigerant circuit using cleaned and dried compressed air or nitrogen. If the leak is large enough, you will be able to hear a noise at the leak point, caused by the escaping air or gas.
- Introduce the compressed air or nitrogen via the service connection.
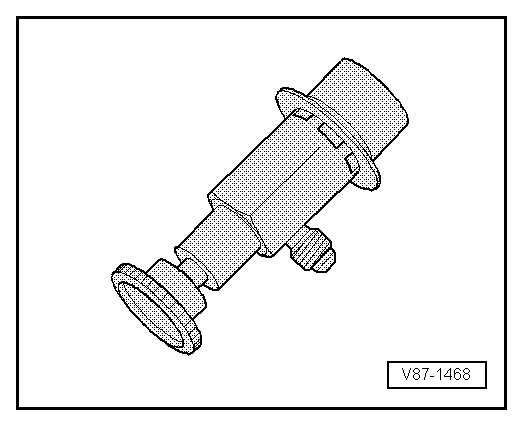
- You can connect the quick-release coupling adapter for service connections to the workshop compressed air system, for example, using a modified charging hose -A- (e.g. with a 5/8"-18 UNF thread, depending on the thread on the quick-release coupling adapter) and a suitable adapter -B-. This prevents moisture, oil and dirt from the workshop compressed air system from entering the air conditioning refrigerant circuit. Also use, for example, a combined fine filter unit for compressed air systems with oil, dirt and water separator, as is common for paint booths; install this between the compressed air system and charging hose -A- → Equipment catalogue.
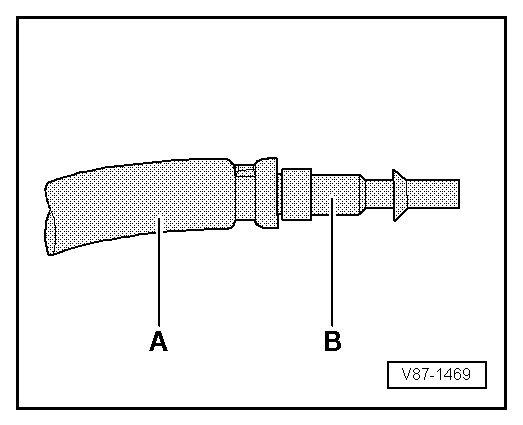
- Using a gauge manifold with nitrogen pressure regulator (maximum reducing pressure: 15 bar) -1-, you can connect a nitrogen-filled pressure gas cylinder -3- to the closed refrigerant circuit via a charging hose -2- (e.g. with a 5/8"-18 UNF thread) at the service connection (to which you have connected a quick-release coupling adapter for service connections).
- Slowly increase the pressure in the refrigerant circuit to no more than 15 bar.

WARNING!
- Maximum permissible working pressure 15 bar
- When performing leak detection with nitrogen, only work with a pressure regulator designed for nitrogen cylinders.
- Locate the leak point by the noise produced by escaping gas at that point. To make the noise easier to locate, use ultrasonic measuring device -V.A.G 1842-.
- Purge the nitrogen out of the refrigerant circuit with cleaned and dried compressed air. The nitrogen must not get into the service cylinder. Reason: this would expose the service cylinder to non-condensable gases.
- Repair the leak point.
- Evacuate and then observe the vacuum gauge reading for several hours. Only fill once the vacuum holds.
- There is a leak of a size through which little or no air enters and the A/C service station can build up sufficient vacuum. After the A/C service station is switched off, the vacuum gauge reading does not rise, or rises only very slowly. This shows that air is entering only through a small leak and the vacuum is being lost.
- Add 100 grams of refrigerant to the circuit and use an electronic leak detector to locate and repair the leak, or add refrigerant with UV leak detection dye and use leak detection system VAS 6201 or successor model to locate and repair the leak in the refrigerant circuit.
- If necessary, drain the refrigerant circuit.
- Evacuate the refrigerant circuit and observe the vacuum gauge for several hours. Only charge the system once the vacuum holds.
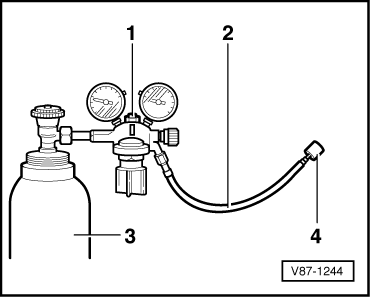
Locate leaks in the refrigerant circuit with leak detector -V.A.G 1796-

Note
Small leaks can be detected, for example, with an electronic leak detector.
- Evacuate the refrigerant circuit with the A/C service station.

Note
- If a larger leak is detected during evacuation, repair it as described.
- If no leak is detected during evacuation, or if the leak is so small that its location cannot be determined, proceed as follows.
- Refrigerant gas is quickly carried away by air movement. For this reason, avoid draughts during leak detection.
- If the refrigerant circuit is completely empty, add approx. 10 % of the charge quantity (sticker R134a or vehicle-specific repair manual) as refrigerant.
Leak detection:
- Put the leak detector into operation according to its operating instructions.
- Always hold the probe tip below the suspected leak point.
If, due to the design, the number of clicking noises increases or a whistling tone occurs, the leak has been found (see the operating instructions for the leak detector).
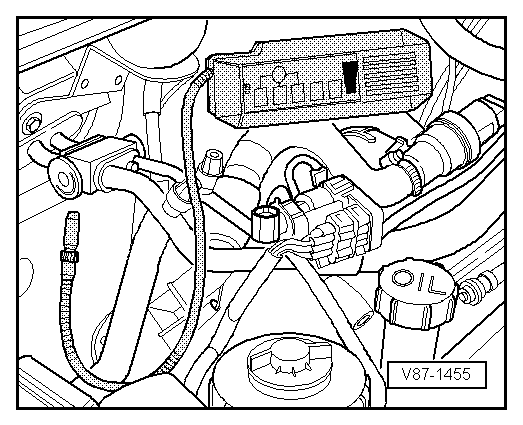
Locate leaks in the refrigerant circuit with leak detection system -VAS 6196- or leak detection system -VAS 6201- or successor model

Note
Small leaks can be detected, for example, with a UV leak detection additive.
- Evacuate the refrigerant circuit with the A/C service station.

Note
- If a larger leak is detected during evacuation, repair it as described.
- If no leak is detected during evacuation, or if the leak is so small that its location cannot be determined, proceed as follows.
- Refrigerant gas is quickly carried away by air movement. For this reason, avoid draughts during leak detection.
- If the refrigerant circuit is completely empty, add approx. 10 % of the charge quantity (sticker R134a or vehicle-specific repair manual) as refrigerant.
Leak detection system -VAS 6196-
or
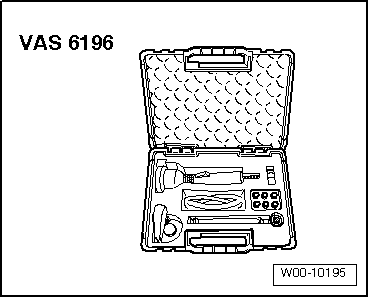
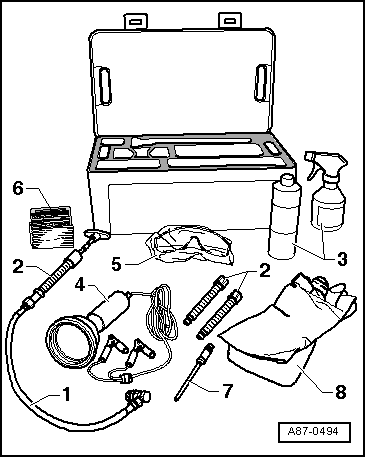
Leak detection system -VAS 6201- or successor model
- Hand pump with low-pressure service hose, service connection coupling and check valve -VAS 6201/1-
- Cartridge -VAS 6201/2-
- Cleaning agent -VAS 6201/3-
- UV leak detection lamp -VAS 6201/4-
- UV-absorbing safety goggles -VAS 6201/6-
- Sticker -VAS 6201/7-
- Tube -VAS 6201/8-
- Protective gloves -VAS 6201/9-
Adding leak detection additive to an empty refrigerant circuit
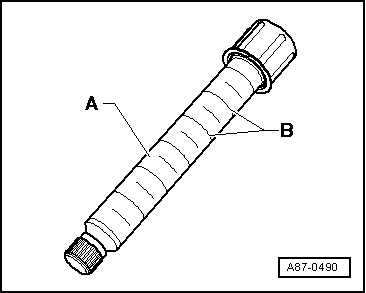
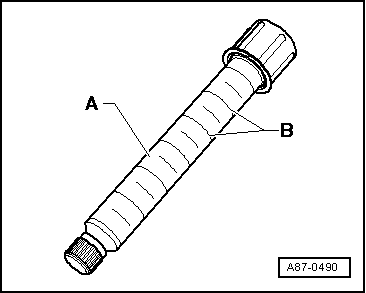
Cartridge -A- contains 15.4 ml of leak detection additive (one unit -B- equals 2.5 ml).
- Assemble the hand pump -VAS 6201- position -1- with the cartridge position -2- -VAS 6201/2-.
- Insert the filler tube -VAS 6201/8- (position -7-) into the hand pump.
- Open the service valve of the hand pump.
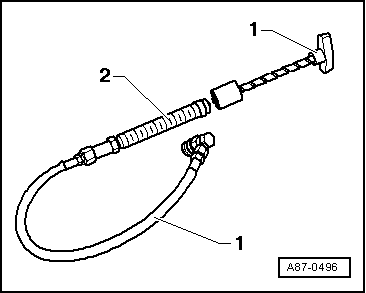
With an empty refrigerant circuit, the leak detection additive is most easily introduced into the circuit through an open connection.
- Open an easily accessible connection point on the refrigerant circuit.
- Cover the area around the connection point with foil or absorbent paper.
- Hold the tube upright.
- Turn the handle of the hand pump until the leak detection additive exits the tube.
- Add 2.5 +/- 0.5 ml (milliliters = cm3) of leak detection additive to the refrigerant circuit.

Note
If leak detection additive has already been added to a refrigerant circuit during a previous repair, note the following: only add new leak detection additive if the refrigerant compressor oil is replaced. If only part of the refrigerant compressor oil was replaced, add only a corresponding proportion of leak detection additive. For example, if 100 ml of refrigerant compressor oil were replaced in a vehicle with 250 ml of refrigerant compressor oil, add only 1 ml (cm3) of leak detection additive.
- Replace the O-rings at the opened connection point.
- Reassemble the refrigerant circuit.
- Attach a sticker near the service connections indicating that leak detection additive has been added to this refrigerant circuit.
- Evacuate and charge the refrigerant circuit according to specifications.
- Put the air conditioning system into operation.

Note
The air conditioning system must run for at least 60 minutes so that the added additive distributes throughout the entire refrigerant circuit (the A/C compressor must be running). Depending on the size of the leak, the leak point may become visible within this time.
- Locate the leak in the refrigerant circuit with UV lamp VAS 6196/4.

Note
After the repair, use cleaning agent -VAS 6201/3- to remove any leak detection additive remaining in the engine compartment or on refrigerant circuit components.
Adding leak detection additive to a charged refrigerant circuit

Note
- If leak detection additive has already been added to a refrigerant circuit during a previous repair, note the following: only add new leak detection additive if the refrigerant compressor oil is replaced. If only part of the refrigerant compressor oil was replaced, add only a corresponding proportion of leak detection additive. For example, if 100 ml of refrigerant compressor oil were replaced in a vehicle with 250 ml of refrigerant compressor oil, add only 1 ml (cm3) of leak detection additive.
- A small amount of leak detection additive remains in the service connection. Remove this residual amount carefully so that it is not mistakenly identified as a leak during later leak detection.
Cartridge -A- contains 15.4 ml of leak detection additive (one unit -B- equals 2.5 ml).
- Switch off the ignition.
- Remove the caps from the low-pressure service connection of the refrigerant circuit.
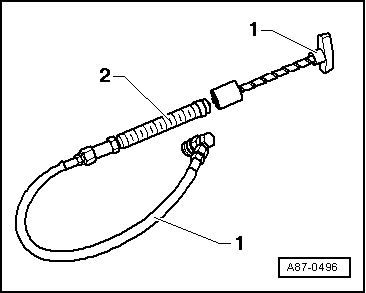
- Assemble the hand pump -VAS 6201- position -1- with the cartridge position -2- -VAS 6201/2-.

Note
Make sure the hand pump hose is completely filled with leak detection additive.
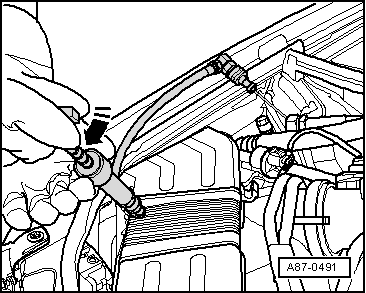
- Attach the quick coupling to the low-pressure service connection and open the service coupling by turning the handwheel in. Hold the hose upright and turn the handle of the hand pump until the leak detection additive begins to exit the tube.
- Cover the area around the service connection on the vehicle with foil or absorbent paper.
- Turn in the handle of the hand pump to add 2.5 +/- 0.5 ml (milliliters = cm3) of leak detection additive to the refrigerant circuit.
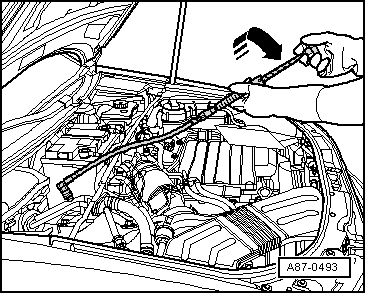
- Close the service coupling and remove it from the service port.
- Remove residues of the leak detection additive from the service port, e.g. with absorbent paper.
- Close the service port with the cap.
- If necessary, clean the area around the service port with the cleaning agent.
- Attach a warning label near the service ports stating that leak detection additive has been added to this refrigerant circuit.
- Put the air conditioning system into operation.

Note
The air conditioning system must run for at least 60 minutes so that the added additive distributes throughout the entire refrigerant circuit (the A/C compressor must be running). Depending on the size of the leak, the leak point may become visible within this time.
- Locate the leak in the refrigerant circuit with UV lamp VAS 6196/4.

Note
After the repair, use cleaning agent -VAS 6201/3- to remove any leak detection additive remaining in the engine compartment or on refrigerant circuit components.
Locating leaks in the refrigerant circuit with UV lamp VAS 6196/4

WARNING!
Do not look into the UV lamp.
Do not point the UV lamp at other persons.

Note
- The air conditioning system must run for at least 60 minutes so that the added additive distributes throughout the entire refrigerant circuit (the A/C compressor must be running). Depending on the size of the leak, the leak point may become visible within this time.
- In case of leaks at the evaporator, the additive may be washed off with the condensation water and escape through the condensate drain. Since the evaporator is not accessible without major preliminary work on most vehicles, checking the condensate drain can indicate a leaking evaporator. However, this requires that the additive has already been in the refrigerant circuit for a longer period.
- The safety goggles not only protect the eyes; they also enhance the fluorescence of the additive under UV light.
- Depending on the accessibility of various refrigerant circuit components, it may be necessary to remove certain vehicle parts (e.g. the bumper or the air filter).
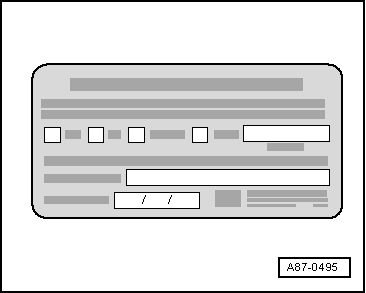
- Park the vehicle in a somewhat darker area of the workshop (in daylight or strong lighting, the effect of the UV light is reduced).
- Check the accessibility of the various refrigerant circuit components and remove parts around the refrigerant circuit that block your view of them (e.g. noise insulation and bumper).
- Protect your eyes by putting on the safety goggles.
- Connect the UV lamp to a 12 V battery (vehicle battery). Observe the correct polarity of the connections.
- Switch on the UV lamp and scan the refrigerant circuit components with it. Points where refrigerant, refrigerant oil and therefore also leak detection additive has escaped due to a leak will fluoresce under UV light.

Note
- The leak detection additive can remain in the refrigerant circuit.
- After the repair, use cleaning agent -VAS 6201/3- to remove any leak detection additive remaining in the engine compartment or on refrigerant circuit components.