Removal and installation of the steering tie rod
REMOVAL
1. Mark the position of the wheel relative to the hub with paint. This allows the balanced wheel to be installed in its original position. Loosen the wheel bolts on the vehicle while it is standing on the ground. Raise the vehicle, support it on stands and remove the wheel.
2. Remove the nut securing the ball joint to the strut.
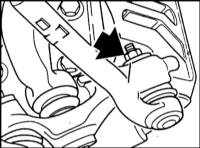
3. Separate the ball joint using a puller, e.g. HAZET 779-1.
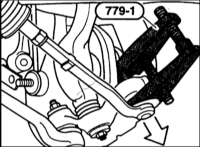
4. Remove the clamp and slide the protective boot back.
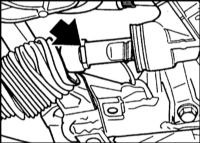
5. Push the toothed rack in as far as possible.
6. Disconnect the tie rod (arrow).
INSTALLATION
1. Measure the length of the old tie rod. Screw the end onto the new tie rod so that the original dimension is obtained. Lock the end with the locknut.
2. Tighten the locknut to 45 N·m.
3. If necessary, clean the ball joint stud and its seat in the steering knuckle of grease.
4. Check the protective boot and replace if necessary.
5. Secure the tie rod to the toothed rack to the torque specified in the Specifications.
6. Install the protective boot and secure it with a new clamp. Make sure the boot is not twisted.
7. Insert the tie rod end into the steering knuckle. Install a new self-locking nut and tighten it to the torque specified in the Specifications.
8. Install and secure the front wheel. Do not lubricate the wheel bolts. Install the wheel so that the marks made during removal are aligned. Lower the vehicle onto the wheels. Tighten the wheel bolts to 100 N·m.
9. Adjust the toe. Refer to the Wheel Alignment Check and Adjustment section.
Test yourself
A quick BMW 1 quiz: every answer comes with an explanation and a link to the manual page.