Timing Belt Drive - Installation
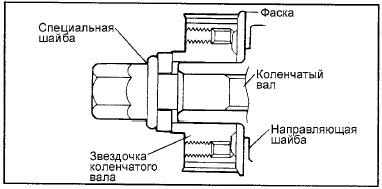
1. Install the guide washer and crankshaft sprocket as shown in the illustration. Pay attention to the orientation of the parts during installation.
Tightening torque Crankshaft sprocket bolt: 170 - 180 N·m
2. Install the camshaft sprocket and tighten its bolt to the specified torque.
Tightening torque Camshaft sprocket bolt:
100 - 120 N·m 3. Align the marks on the crankshaft and camshaft sprockets with the alignment marks when the No. 1 cylinder piston is at TDC of the compression stroke.
4. Install the timing belt tensioner pulley and idler pulley.
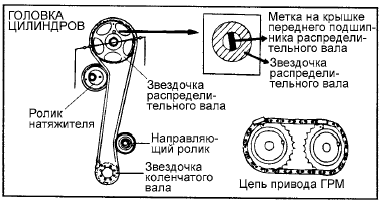
5. Install the timing belt on the camshaft sprocket.
After installing the timing belt on the camshaft sprocket, make sure the working side of the belt is tensioned when the tensioner pulley is moved toward the coolant pump.
6. Turn the crankshaft one full revolution in the normal direction of rotation (clockwise) and align the crankshaft sprocket mark with the alignment mark.
Do not turn the crankshaft counterclockwise. The crankshaft should rotate smoothly.
Tightening torque Idler pulley bolt and timing belt tensioner pulley bolt: 43 - 55 N·m
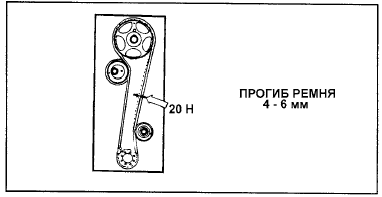
7. Recheck the timing belt tension. Apply light pressure (approximately 20 N) horizontally to the belt at the middle of its working side, and make sure the tooth tip deflects approximately 4 - 6 mm.
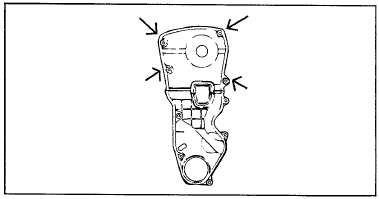
8. Install the timing belt cover.
Tightening torque Timing belt cover bolts: 8 - 10 N·m
9. Install the crankshaft pulley. Make sure the guide pin of the crankshaft sprocket enters the small hole of the pulley.
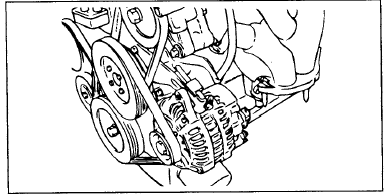
10. Install the coolant pump pulley.
11. Install the generator drive belt and adjust its tension.
Test yourself
A quick Hyundai Elantra CN7 quiz: every answer comes with an explanation and a link to the manual page.