In this manual: Heating, Ventilation, and Air Conditioning
13steps
~78min
3/5difficulty
Tightening torque found on this page
Done 0 of 13
Inspection
Inspect the condenser fins for blockage and damage. If clogged, clean them with water and blow dry with compressed air. If bent, carefully straighten them using a screwdriver or pliers.
Check the condenser connections for leaks and repair or replace them as necessary.
Replacement
Recover the refrigerant using a recovery/recycling/charging station.
Disconnect the negative (-) battery terminal.
Remove the engine room cover. (Refer to Engine Mechanical System - "Engine Room Cover")
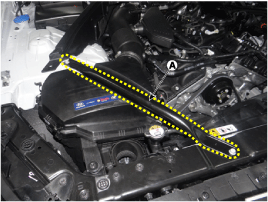
Remove the front brace (A).
Remove the air cleaner assembly. (Refer to Engine Mechanical System - "Air Cleaner")
Disconnect the upper radiator hose. (Refer to Engine Mechanical System - Radiator)
Remove the upper mounting bracket. (Refer to Engine Mechanical System - Radiator)
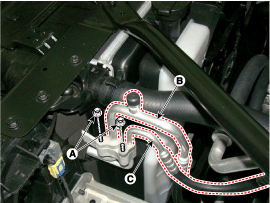
Remove the nuts (A), then disconnect the discharge line (B) and liquid line (C) from the condenser.
Tightening torque: 3.9 ~ 5.9 N·m
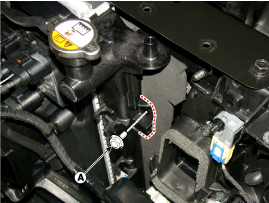
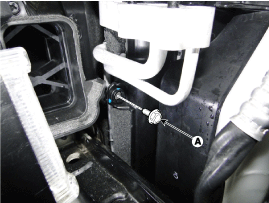
Remove the bolts (A) and detach the condenser. [Left][RH]
Pull the condenser (A) rearward, then pull it upward to remove.
Install in the reverse order of removal.
If installing a new condenser, add refrigerant oil.
Replace the O-rings with new ones at each fitting and apply a thin coat of refrigerant oil before installation. Be sure to use the correct O-rings for R-134a to prevent leakage.
Be careful not to damage the radiator and condenser fins when installing the condenser.
Charge the system and check that it operates properly.
?
Test yourself
A quick Hyundai Genesis DH quiz: every answer comes with an explanation and a link to the manual page.