Engine Control System/Fuel System
Fuel Tank Repair Procedures
In this manual: Engine Control System/Fuel System
16steps
~96min
4/5difficulty
Done 0 of 16
Removal
- Release the residual fuel pressure in the fuel line. (Refer to Fuel System - "Release Residual Fuel Pressure in Line")
- Remove the rear seat cushion. (Refer to Body - "Rear Seat Assembly")
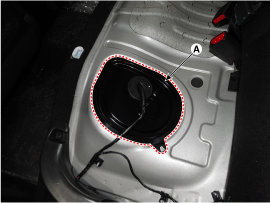
- Remove the fuel pump service cover (A).
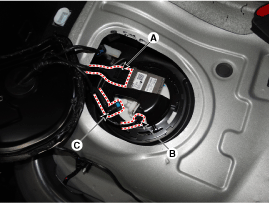
- Disconnect the connector (A) of the fuel pump control module.
- Disconnect the fuel pressure sensor (FPS) connector (B).
- Disconnect the quick-connector of the fuel feed tube (C).
- Raise the vehicle.
- Remove the center muffler assembly. (Engine Mechanical System - "Muffler")
- Remove the propeller shaft assembly. [With AWD] (Refer to Drive Shaft and Axle - "Propeller Shaft")
- Remove the canister assembly. (Refer to Evaporative Emission Control System - "Canister")
- Disconnect the fuel tank hose (A).
- Disconnect the vent tube (B).
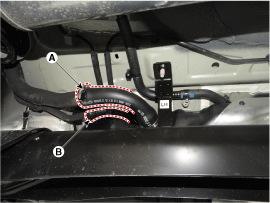
- Disconnect the quick-release connector of the leveling hose (C).

- Remove the side lower cover (A).

- Support the fuel tank with a jack.
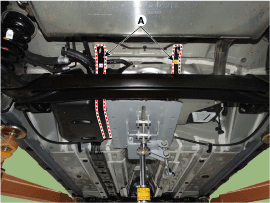
- Remove the fuel tank from the vehicle after removing the fuel tank band nuts (A).
Installation
- Install in the reverse order of removal. Fuel tank band mounting nut: 39.2 - 54 N·m
Test yourself
A quick Hyundai Kona quiz: every answer comes with an explanation and a link to the manual page.
Was this page helpful?