Engine Control System/Fuel System
Fuel Pump Repair Procedures
In this manual: Engine Control System/Fuel System
12steps
~72min
3/5difficulty
Done 0 of 12
Inspection
- Turn the ignition off, and then disconnect the negative (-) battery terminal.
- Remove the fuel pump assembly.
- Using an ohmmeter, measure the resistance between terminals 1 and 6 of the sensor connector (A) at each float level.
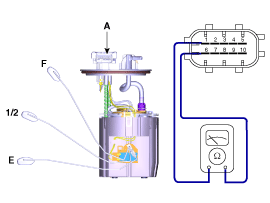
Pin No. Description 1 Fuel sensor ground (-) 2 Fuel pressure sensor (FPS) signal input 3 Fuel pressure sensor (FPS) ground (-) 4 Ground 5 CAN [Low] 6 Fuel sensor signal (+) 7 - 8 Fuel pressure sensor (FPS) power supply (+5V) 9 CAN [High] 10 Battery Power (B+) - Also check that the resistance changes smoothly as the float moves from "E" to "F".
Position Resistance (Ω) Capacity (L) E 298 - 305 4 1/2 85,5 - 87,5 25,6 F 14,0 - 16,0 47,5
Removal
- Release the residual fuel pressure in the fuel line. (Refer to Fuel System - "Release Residual Fuel Pressure in Line")
- Remove the rear seat cushion. (Refer to Body - "Rear Seat Assembly")
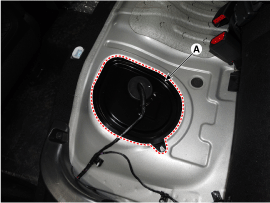
- Remove the fuel pump service cover (A).
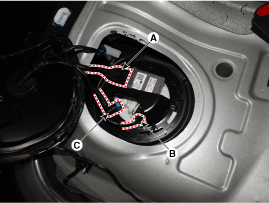
- Disconnect the connector (A) of the fuel pump control module.
- Disconnect the fuel pressure sensor (FPS) connector (B).
- Disconnect the quick-connector of the fuel feed tube (C).
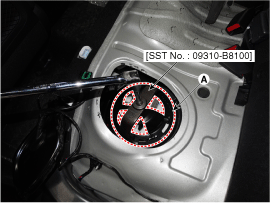
- Remove the snap ring (A) using the Special Service Tool [No.: 09310-B8100].
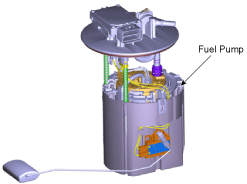
- Remove the fuel pump from the fuel tank.
Installation
- Install in the reverse order of removal.
Test yourself
A quick Hyundai Kona quiz: every answer comes with an explanation and a link to the manual page.
Was this page helpful?