Brake System
Rear Wheel Speed Sensor
In this manual: Brake System
25steps
~155min
5/5difficulty
1special tools
Done 0 of 25
Components and Component Location
Components
[2WD]
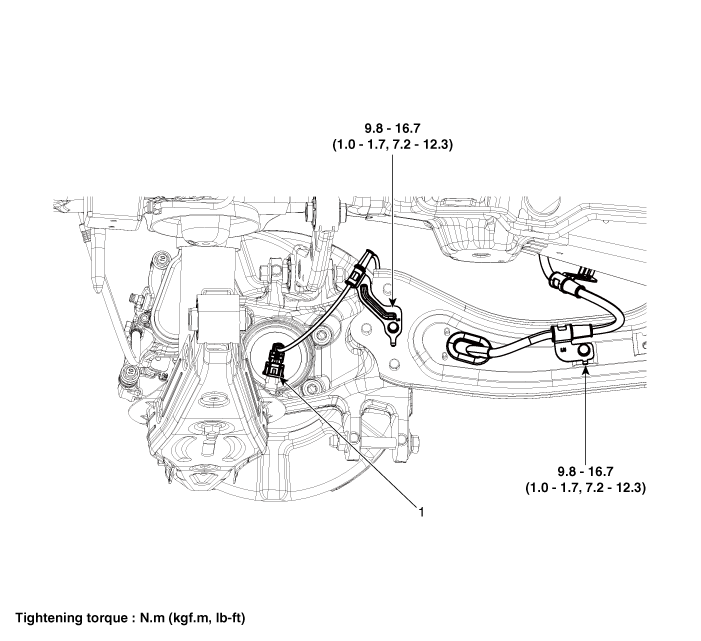
| 1. Front wheel speed sensor |
[4WD]
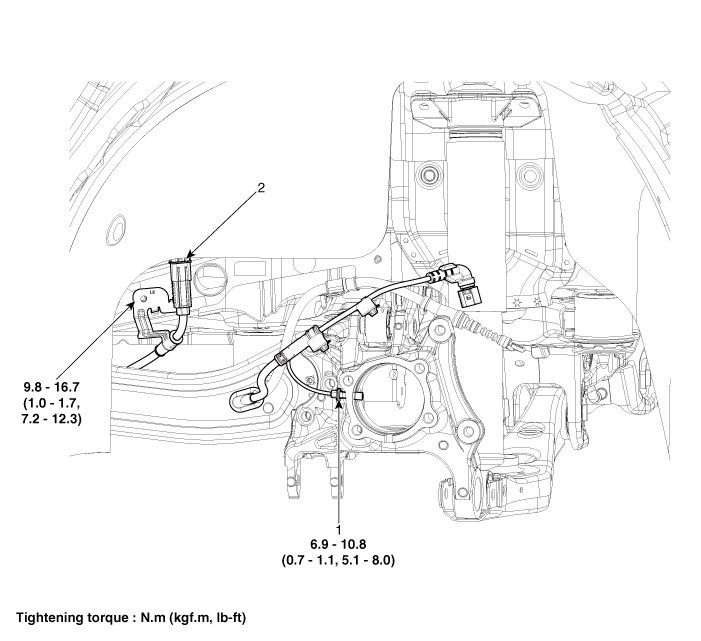
| 1. Rear wheel speed sensor | 2. Rear wheel speed sensor connector |
Repair Procedures
Removal
|

- Turn the ignition switch OFF, then disconnect the negative (-) battery cable.
- Loosen the wheel nuts slightly. Raise the vehicle and make sure it is securely supported.
- Remove the rear wheel and tire (A) from the rear hub.
Tightening torque: 107.9–128 N·m

- Be careful not to damage the hub bolts when removing the rear wheel and tire (A).

- Remove the rear brake caliper. (Refer to Brake System - "Rear Disc Brake")
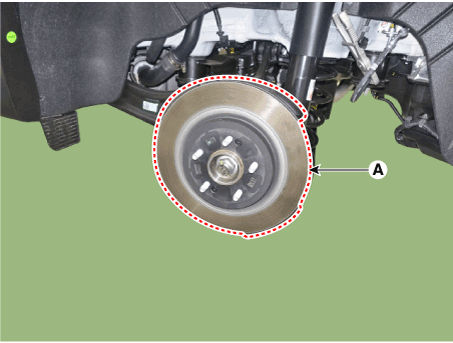
- Remove the rear brake disc (A).
- Disconnect the rear wheel speed sensor connector (A).

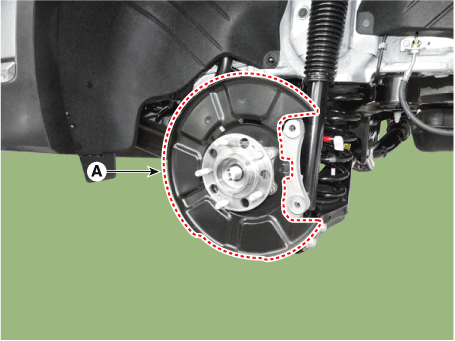
- Remove the hub assembly and dust cover (A) after loosening the mounting bolts.
Tightening torque: 98.1 - 118 N·m
- Turn the ignition switch OFF, then disconnect the negative (-) battery cable.
- Loosen the wheel nuts slightly. Raise the vehicle and make sure it is securely supported.
- Remove the rear wheel and tire (A) from the rear hub.
Tightening torque: 107.9–128 N·m

- Be careful not to damage the hub bolts when removing the rear wheel and tire (A).
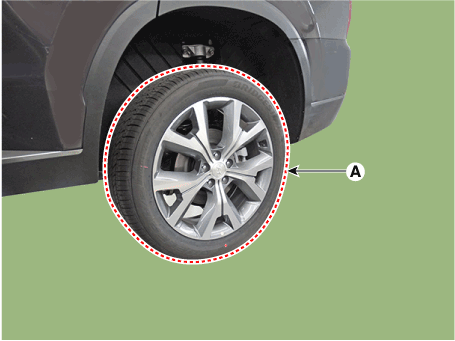
- Remove the rear wheel guard. (Refer to Body - "Rear Wheel Guard")
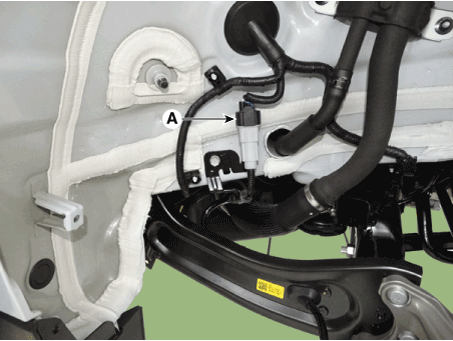
- Disconnect the rear wheel speed sensor connector (A).
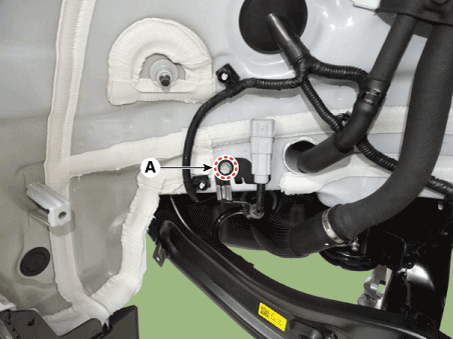
- Remove the mounting bolt of the rear wheel speed sensor cable bracket (A).
Tightening torque: 19.6–29 N·m
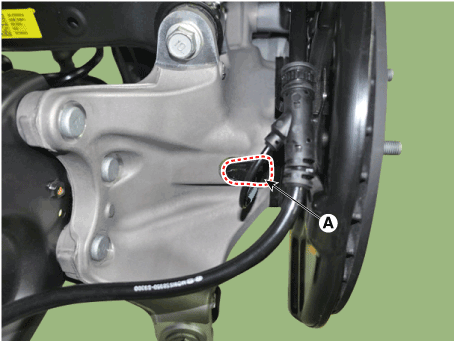
- Disconnect the EPB actuator connector (A).

- Remove the rear wheel speed sensor (A) after loosening the mounting bolt.
Tightening torque: 6.9–10.8 N·m
Replacement
- Remove the rear wheel hub bearing assembly. (Refer to Drive Shaft and Axle - "Rear Hub - Carrier")
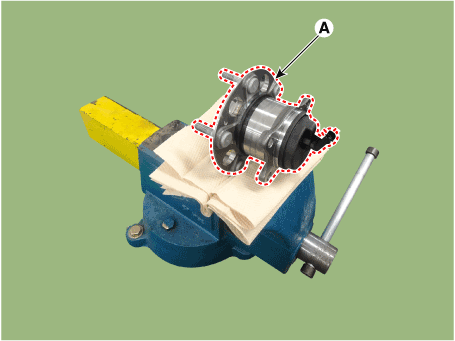
- Secure the rear wheel hub bearing assembly (A) in a vise.

- When clamping in a vise, use a cloth to avoid damaging the hub bearing assembly.
- Be careful, as excessive clamping force in the vise may damage the hub bearing assembly.
- Check the direction of the sensor cover (A).

- Remove the sensor cover by tapping the gap between the sensor cover and the hub bearing assembly with a scraper (A).


- To gradually widen the gap, tap around the bearing cover 10-20 times.

- When removing the sensor cover, pull it straight out to avoid damaging the tone wheel or encoder.

- To gradually widen the gap, tap around the bearing cover 10-20 times.
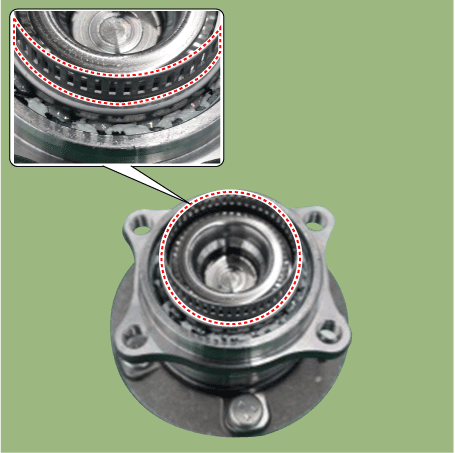
- Check the tone wheel or encoder (A) for distortion or damage.


- After removing the sensor cover, check the tone wheel or encoder for damage, and replace the hub bearing if it is deformed.
- If the tone wheel is deformed, it may cause the MIL to illuminate or other problems.
- Position the sensor cover in the same direction as the sensor cover connector (A) was positioned before removal.


- Before installing the sensor cover, do not allow foreign material and contaminants to enter the hub bearing assembly (A).
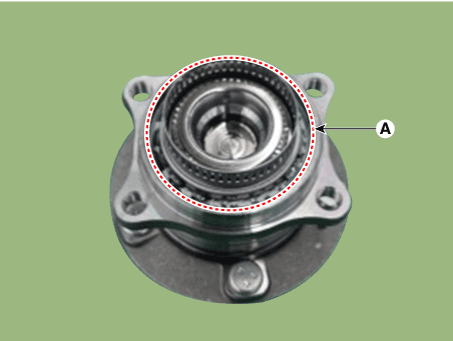
- Before installing the sensor cover, do not allow foreign material and contaminants to enter the hub bearing assembly (A).
- Install the sensor cover (A) using the special service tool (09527-AL500).
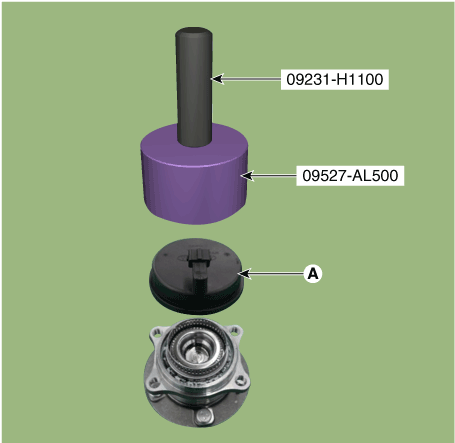

- Tap with a hammer until there is no gap between the SST and the hub bearing assembly, then install the sensor cover.
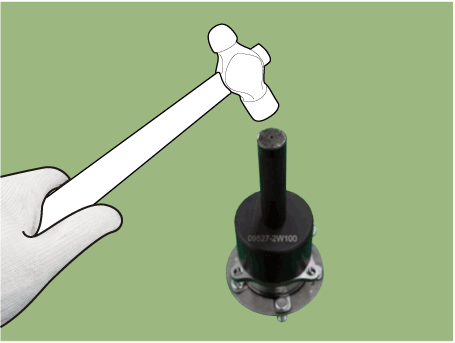
- Be careful not to install the sensor cover at an angle, as this may damage the tone wheel or encoder.
- When installing the sensor cover, tap it until the gap between the sensor cover and the hub bearing assembly disappears.
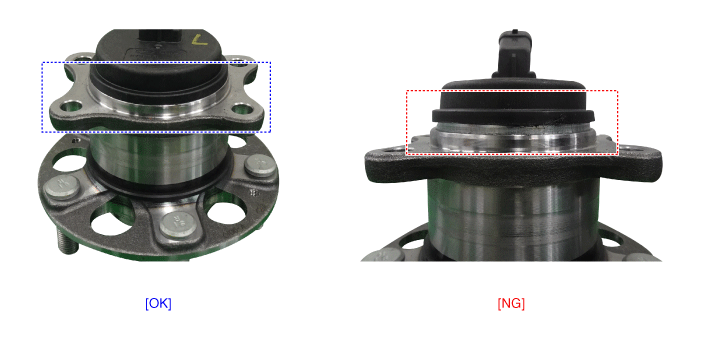
- Tap with a hammer until there is no gap between the SST and the hub bearing assembly, then install the sensor cover.
- Install the rear wheel hub bearing assembly. (Refer to Drive Shaft and Axle - "Rear Hub - Carrier")
Installation
- To install, reverse the removal procedure.
Inspection
- Measure the output voltage between the wheel speed sensor terminal and body ground.

- To protect the wheel speed sensor, use a 100 Ω resistor when measuring the output voltage, as shown in the illustration.
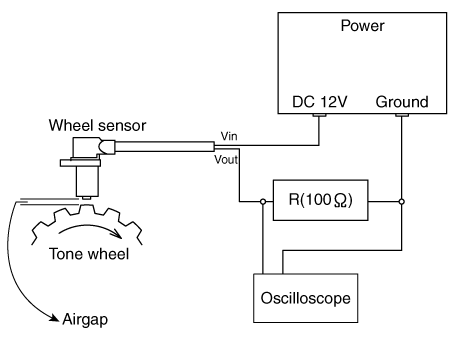
- Compare the change in the wheel speed sensor output voltage with the normal output voltage change, as shown below.

V_low: 0.59–0.84 V V_high: 1.18–1.68 V Frequency range: 1–2,000 Hz
Test yourself
A quick Hyundai Palisade quiz: every answer comes with an explanation and a link to the manual page.
Was this page helpful?