Body Electrical System
Headlamp Repair Procedures
In this manual: Body Electrical System
23steps
~138min
4/5difficulty
Done 0 of 23
Removal
|

|
- Disconnect the negative (-) battery terminal.
- Remove the front bumper. (Refer to Body - "Front Bumper")
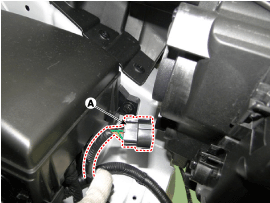
- Disconnect the headlamp connector (A).
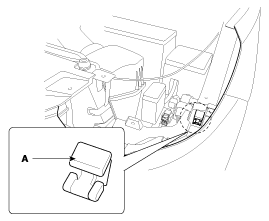
Be careful not to damage the locking clip (A).
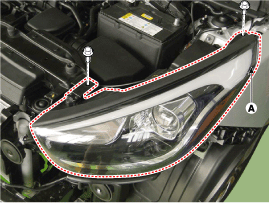
- Remove the headlamp (A) after loosening the bolts.
Installation
- Install the headlamp bulbs.
- Install the headlamp bulb covers.
- Assemble the headlamp assembly after connecting the bulb connector.
Replacement
|
- Turn off the headlamp switch.
- Disconnect the power connector from the bulb.
- Remove the bulb assembly.
- Remove the dust cover.
- Disconnect the connector (A) from the bulb.
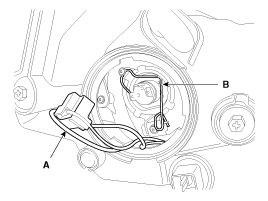
- Remove the bulb clip (B) and the bulb from the lamp assembly.
- Installation is the reverse of removal.
- Turn off the headlamp switch.
- Remove the bulb assembly.
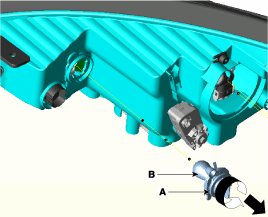
- Turn the bulb socket (A) counterclockwise to remove the turn signal bulb (B).
Adjustment
Headlamp Aiming Instructions Headlamps must be aimed using correct beam setting equipment and in accordance with the equipment manufacturer's instructions.
|
- Inflate the tires to the specified pressure and remove all loads from the vehicle except the driver, spare tire, and tools.
- The vehicle must be on a level floor.
- Draw vertical lines (vertical lines passing through the respective centers of the headlamps) and a horizontal line (horizontal line passing through the center of the headlamps) on the screen.
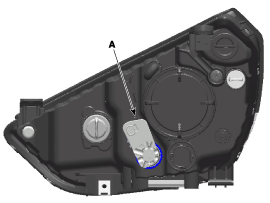
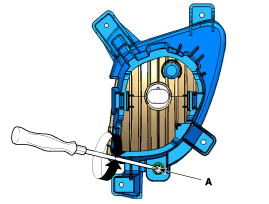
- With the headlamp and battery in normal condition, aim the headlamps so that the brightest part is on the vertical lines. Adjust the vertical (A) low beam using the adjusting wheel.
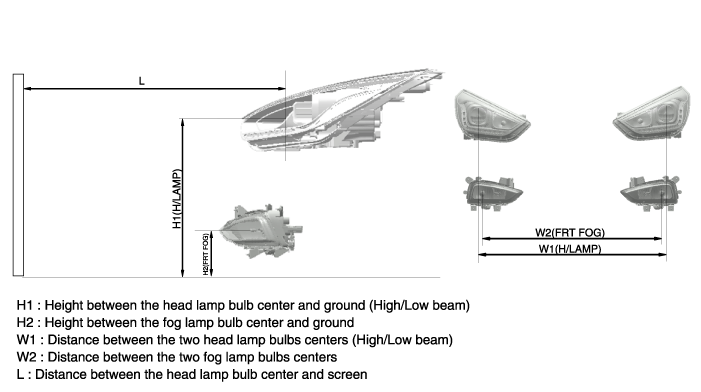

- General type
A. Turn on the low beam without the driver. B. The cutoff line must project within the allowable range (shaded area) shown in the illustration. C. If a headlamp leveling device is installed, set the headlamp leveling switch to position 0. 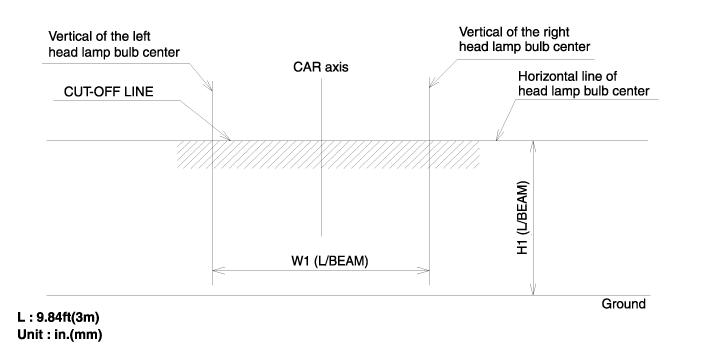
- Turn on the front fog lamps with the driver seated in the vehicle. The cutoff line must project within the allowable range shown in the illustration.
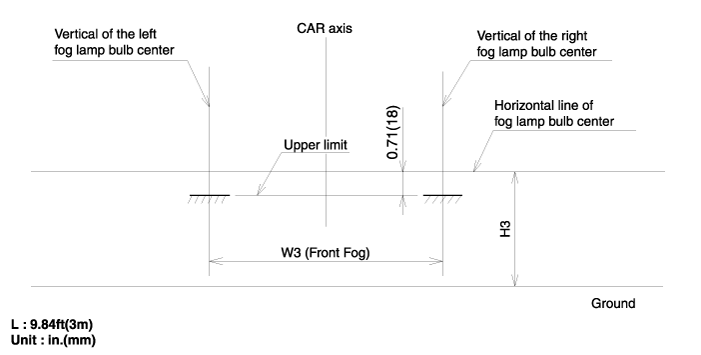
Test yourself
A quick Hyundai Tucson LM quiz: every answer comes with an explanation and a link to the manual page.
Was this page helpful?