Engine and Transaxle Assembly
Repair Procedures
Removal
Disconnect the negative battery cable.
Remove the engine cover.
(See Engine and Transaxle Assembly - Engine Cover)
Remove the air duct and air cleaner assembly.
(See Intake and Exhaust System - Air Cleaner)
Remove the battery and battery tray.
(Refer to Engine Electrical System - Battery)
Remove the engine room cover.
(See Engine and Transaxle Assembly - Under Hood)
Loosen the drain plug and drain the coolant. Open the radiator cap to speed up draining.
(Refer to Cooling System - "Engine Coolant")
Recover the refrigerant, then remove the high-pressure pipe and low-pressure pipe.
(See Heating, Ventilation and Air Conditioning - Compressor)
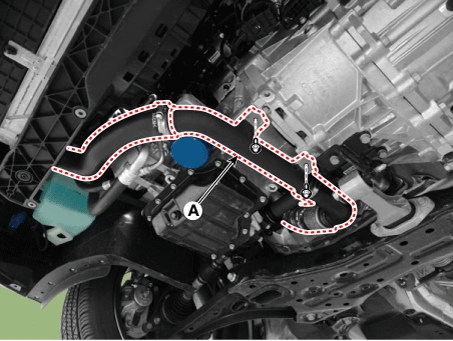
Remove the intake hose and intercooler pipe (A).
Tightening Torque
Hose clamp bolt:
4.9–6.9 N·m (0.5–0.7 kgf·m, 3.6–5.1 ft·lbf, 43.4–60.8 in·lbf)
(If equipped with a cap, tighten until the cap is removed.)
Pipe mounting bolt:
18,6–24 N·m
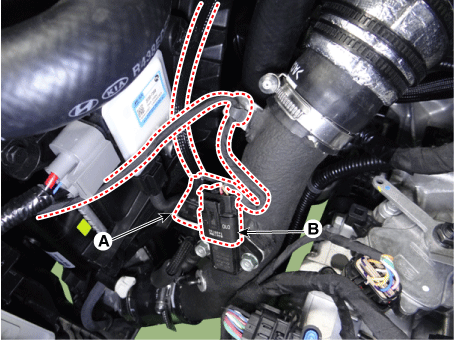
Disconnect the RCV solenoid valve connector (A) and the boost pressure sensor (BPS) connector (B).
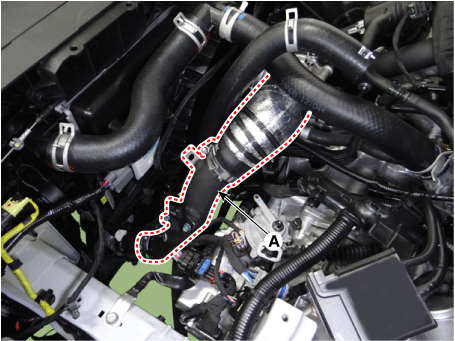
Disconnect the intercooler outlet hose (A).
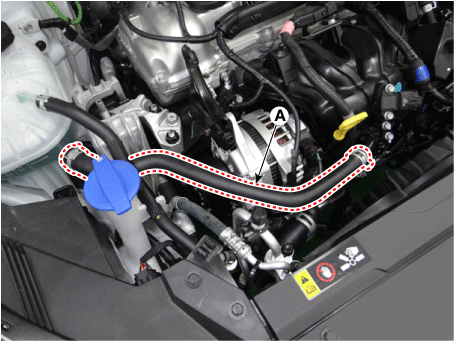
Disconnect the reservoir tank hose (A).
Disconnect the upper radiator hose (A).
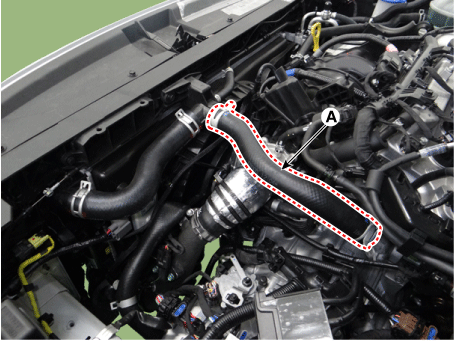
Disconnect the radiator lower hose (A).
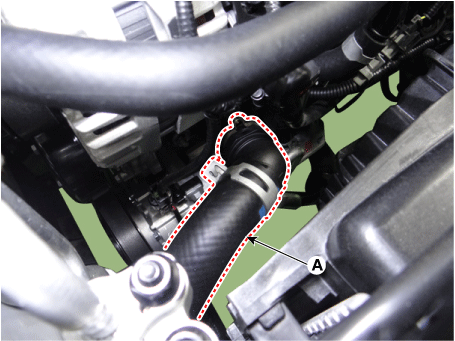
Disconnect the brake booster vacuum hose (A).
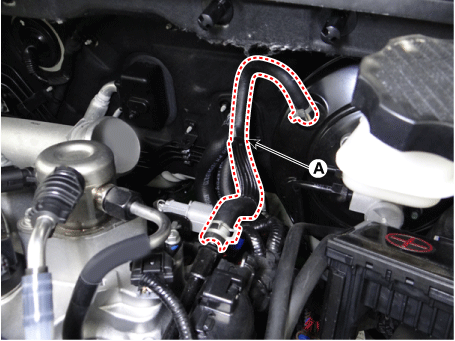
Disconnect the heater hose (A).
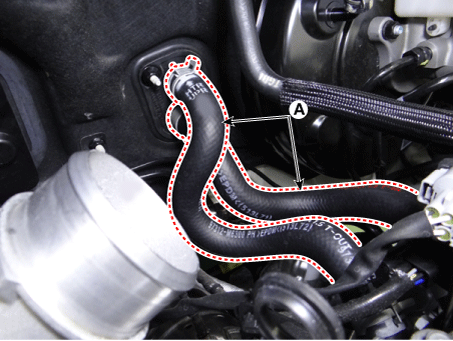
Disconnect the fuel hose (A) and the purge control solenoid valve (PCSV) hose (B).
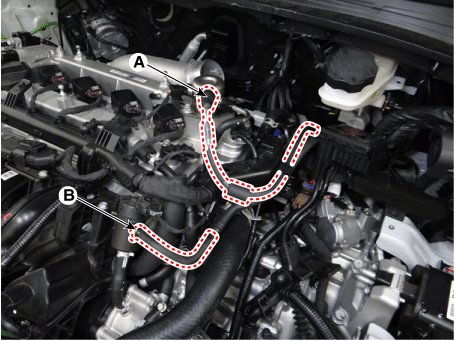
Remove the engine wiring.
Disconnect the battery sensor connector (A).
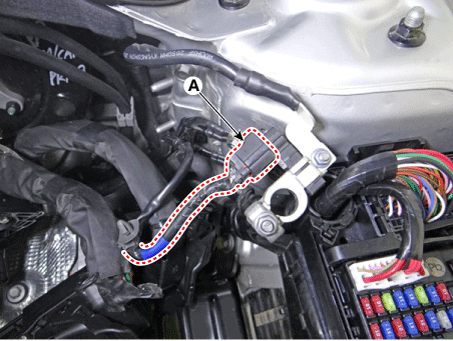
Disconnect the connector (A) from the fuse block.
Disconnect the ground cable (B).
Tightening torque: 10.8 - 13.7 N·m
Remove the main wiring protector (C).
Tightening torque: 6.9–9.8 N·m
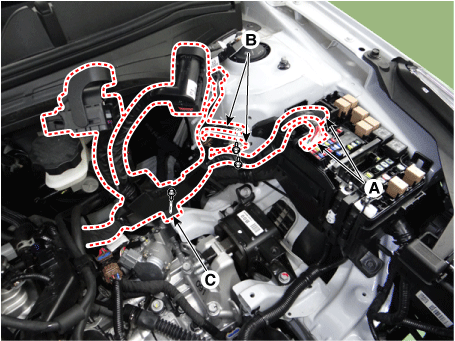
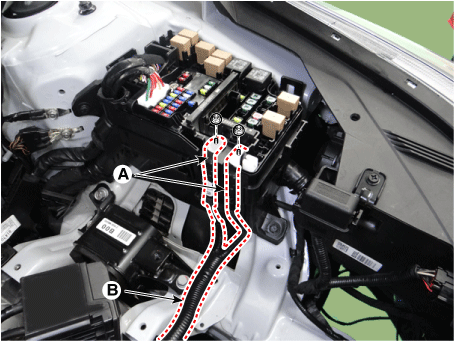
Disconnect the wire cable from the fuse block (A).
Disconnect the battery wiring (B).
Remove the front muffler.
(See Intake and Exhaust System - Muffler)
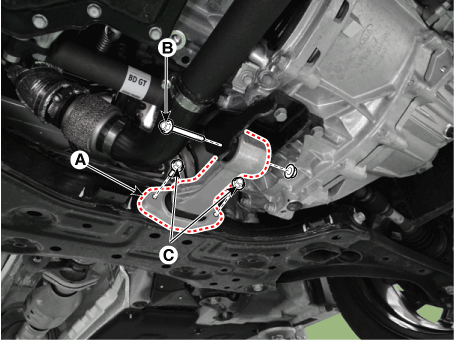
Remove the idler arm bracket (A).
Tightening Torque
Bolt (B):
107,9–128 N·m
Bolts (C):
49,0–64 N·m
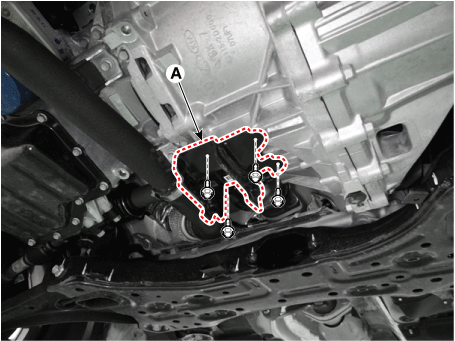
Remove the roller rod bracket (A).
Tightening Torque: 49.0–69 N·m
Remove the subframe.
(Refer to Suspension System — "Subframe")
Remove the front propeller shaft from the front axle.
(Refer to Drive Shaft and Axle — "Front Propeller Shaft")
Support the engine and transaxle assembly with a lift table.
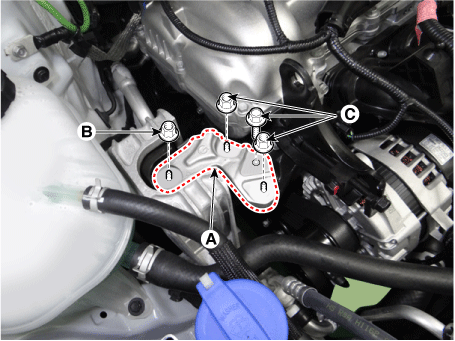
Remove the engine mount support bracket (A).
Tightening Torque
Nut (B):
88,3–108 N·m
Bolts and nuts (C):
58,8–74 N·m
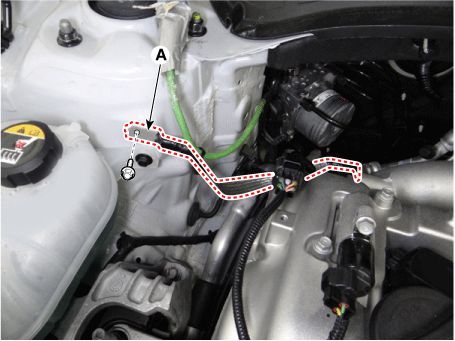
Disconnect the engine ground cable (A).
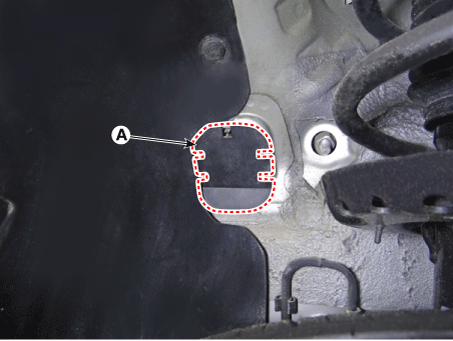
Remove the transaxle mounting side panel seal (A).
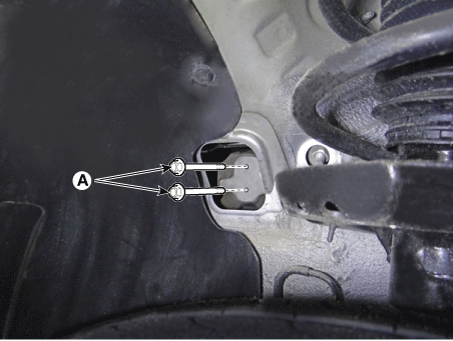
Loosen the bolt (A) of the transaxle support bracket.
Tightening torque: 98.1 - 118 N·m
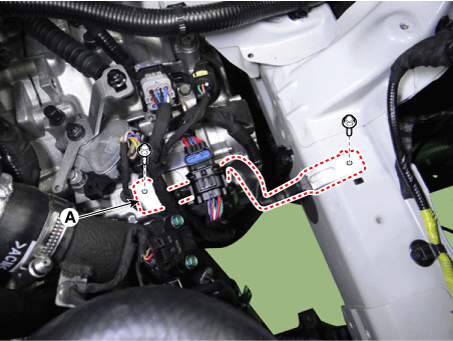
Disconnect the transaxle ground cable (A).
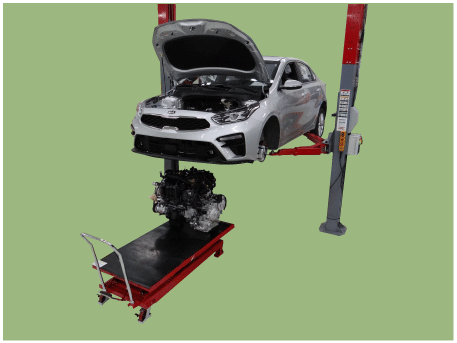
Remove the engine and transaxle assembly by lifting the vehicle.
Installation
Installation is the reverse of removal.
Fill the engine oil.
(See Lubrication System - Engine Oil)
Fill the radiator with engine coolant.
(Refer to Cooling System - "Engine Coolant")
Perform the following.
• Adjust the shift cable.
• Fill the transaxle with transmission fluid.
• Check for fuel leaks.
– After installing the fuel line, turn the ignition ON (do not crank the engine) so the fuel pump operates for about two seconds and the fuel line is pressurized.
– Repeat this operation two or three times, then check for fuel leaks at all points of the fuel line.
• Clean the battery terminals and cable ends with sandpaper, connect them, then apply grease to prevent corrosion.
Test yourself
A quick Kia Forte BD quiz: every answer comes with an explanation and a link to the manual page.