Power Window Switch
Circuit Diagrams
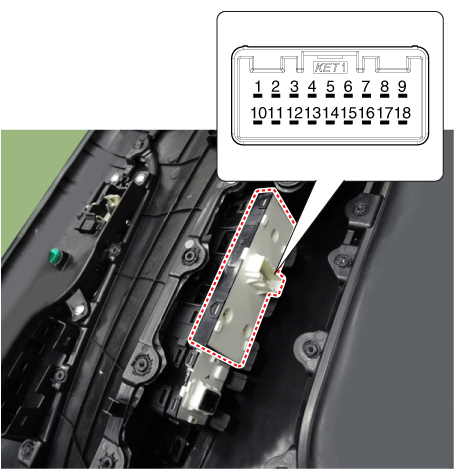
Connector and Terminal Function
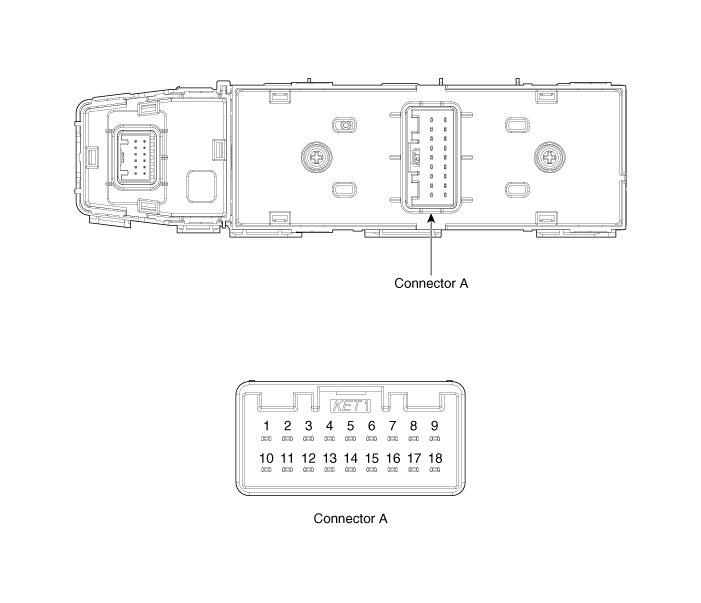
[Driver Safety Window Switch]
| Pin | Function | Pin | Function |
| 1 | Front Right Window Regulator (Upper) | 10 | Rear Right Window Regulator (Upper) |
| 2 | Door Lock Switch | 11 | Rear Right Window Regulator (Lower) |
| 3 | - | 12 | Battery (+) Right Side |
| 4 | Front Right Window Regulator (Lower) | 13 | Rear Lamp |
| 5 | Left Side Window Lock Switch | 14 | Right Window Lock Switch |
| 6 | Door Unlock Switch | 15 | Rear Left Window Regulator (Upper) |
| 7 | Ground | 16 | Rear Left Window Regulator (Lower) |
| 8 | Left Side Front Ground | 17 | - |
| 9 | Left Front Side Safety Window | 18 | Battery (+) Left Side |
[Auto Down]
| Pin | Function | Pin | Function |
| 1 | Front Right Window Regulator (Upper) | 10 | - |
| 2 | Door Lock Switch | 11 | - |
| 3 | - | 12 | Battery (+) Right Side |
| 4 | Front Right Window Regulator (Lower) | 13 | Rear Lamp |
| 5 | - | 14 | - |
| 6 | - | 15 | - |
| 7 | Front Left Window Regulator (Upper) | 16 | - |
| 8 | Ground | 17 | - |
| 9 | Front Left Window Regulator (Lower) | 18 | Battery (+) Left Side |
Repair Procedures
Inspection
Remove the front left door trim panel.
(Refer to Body - "Front Door Trim Panel")
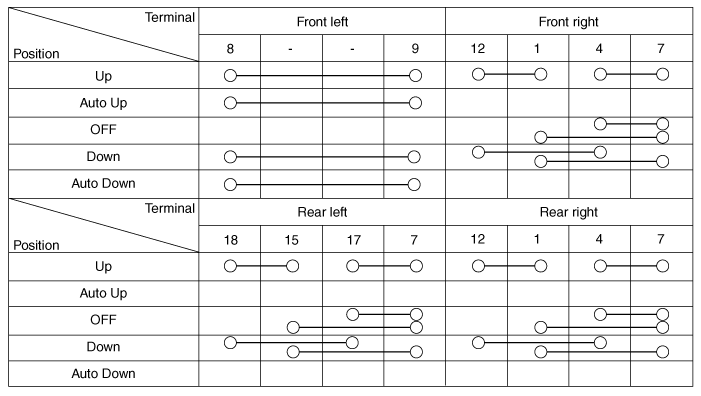
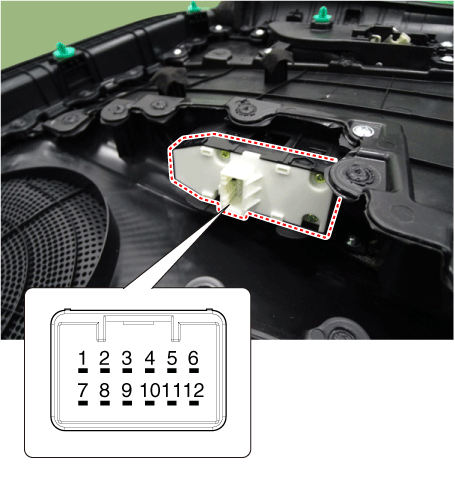
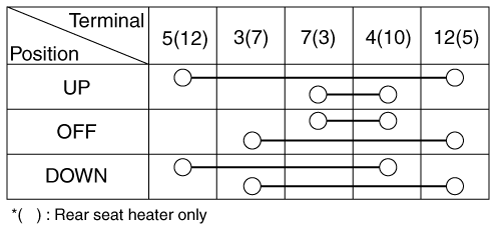
Check the continuity between terminals at each switch position in accordance with the table.
[Driver Safety and Auto Up/Down]
[Auto Down]
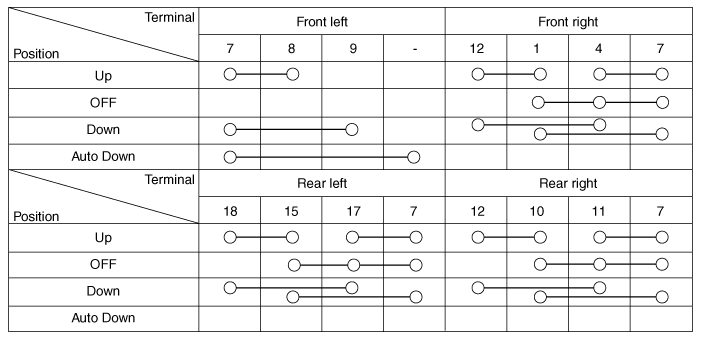
Auxiliary/Rear Window Switch
Disconnect the negative (-) battery terminal.
Remove the front right door trim panel. / Remove the rear door trim panel.
(Refer to Body - "Front Door Trim Panel")
(Refer to Body - "Rear Door Trim Panel")
Check the continuity between terminals at each switch position in accordance with the table.
Removal
Driver Window Switch
Disconnect the negative (-) battery terminal.
Remove the front driver door trim panel.
(Refer to Body - "Front Door Trim Panel")
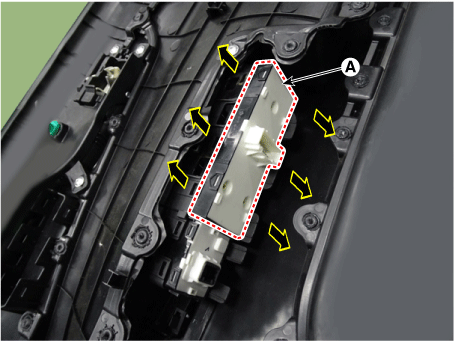
Remove the window regulator switch assembly (A) by pulling on both ends of the switch holders.
Auxiliary/Rear Window Switch
Disconnect the negative (-) battery terminal.
Remove the front right door trim panel. / Remove the rear door trim panel.
(Refer to Body - "Front Door Trim Panel")
(Refer to Body - "Rear Door Trim Panel")
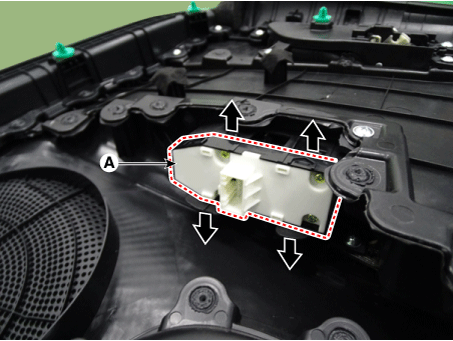
Remove the window regulator switch assembly (A) by pulling on both ends of the switch holders.
Installation
Install in the reverse order of removal.
Test yourself
A quick Kia Forte BD quiz: every answer comes with an explanation and a link to the manual page.