Seat Heater Switch
Components and Component Location
Component Location
Driver's / Passenger's Seat
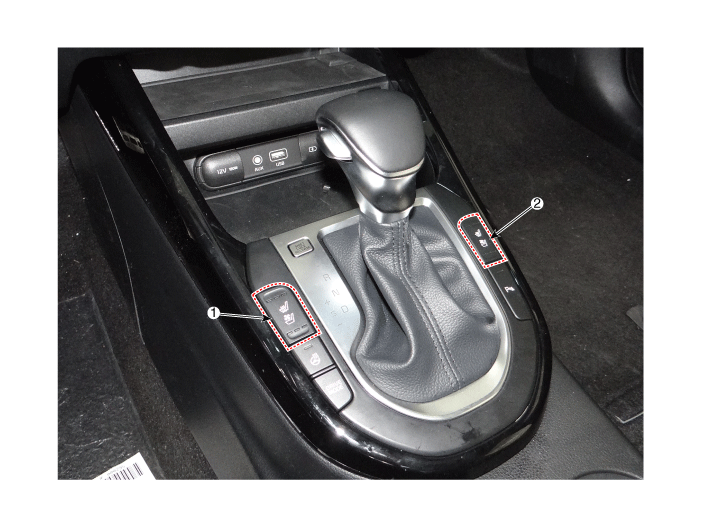
| 1. Driver's seat heater switch | 2. Passenger's seat heater switch |
Rear Seat
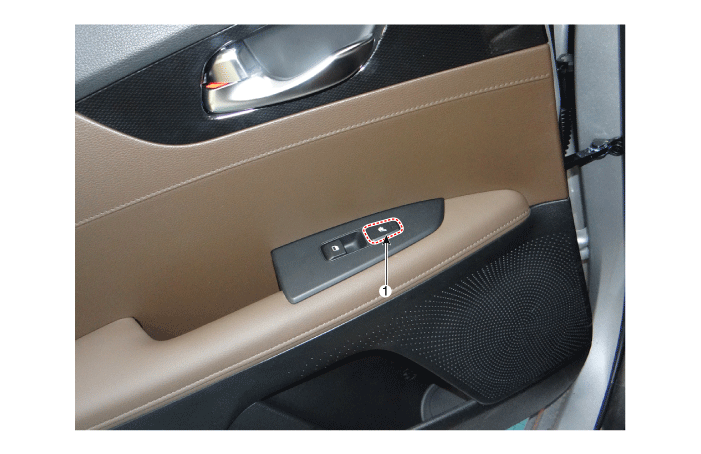
| 1. Rear seat heater switch |
Description and Operation
Description
Seat Heater Intelligent Control Technology
To prevent low-temperature burns, the seat heater temperature is automatically lowered after a certain period of time.
(Low-temperature burn condition: more than 30 minutes at 50 °C)
Seat Heater Intelligent Control Operation
[1st Row Seat]
After 30 minutes, change from "HIGH" to "MID", then after 60 minutes, change to "LOW".
Changes to "LOW" after 60 minutes in "MID".
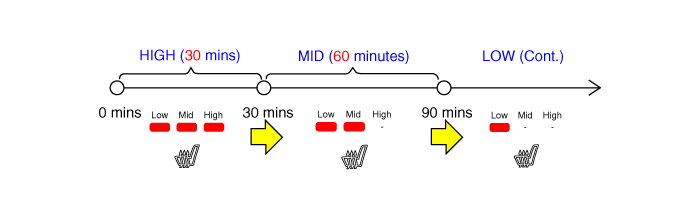
[2nd Row Seat]
After 30 minutes, change from "HIGH" to "MID", then after 60 minutes, change to "LOW".
Changes to "LOW" after 60 minutes in "MID".
Circuit Diagrams
Connector and Terminal Function
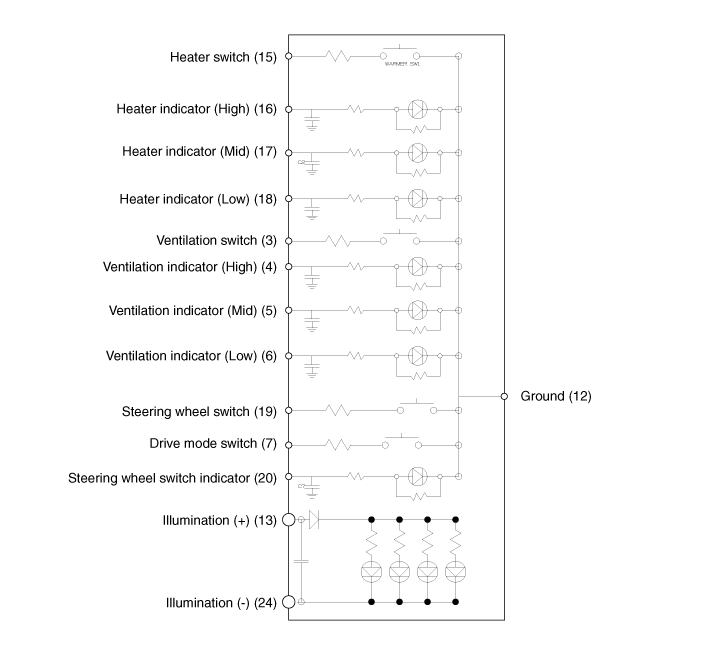
[Driver's Side Heater Switch]
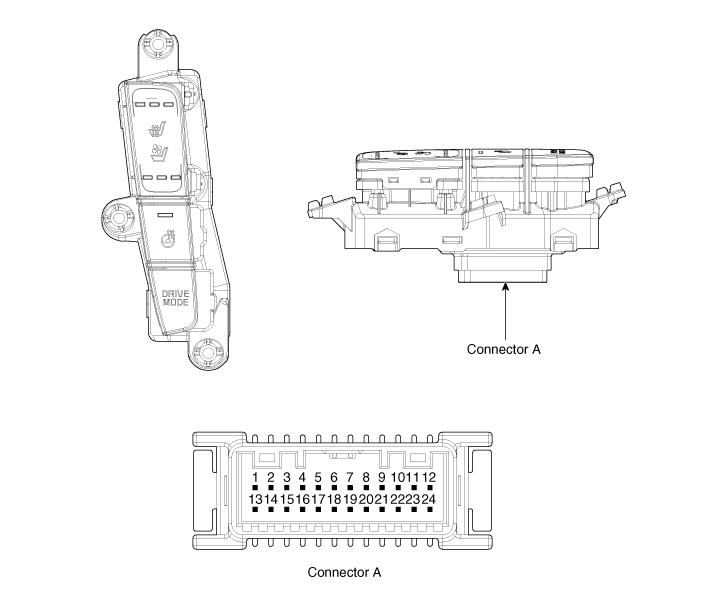
| No. | Connector A |
| 1 | - |
| 2 | - |
| 3 | Ventilation Switch Signal |
| 4 | Ventilation Indicator (High) |
| 5 | Ventilation Indicator (Mid) |
| 6 | Ventilation Indicator (Low) |
| 7 | Drive mode switch |
| 8 | - |
| 9 | - |
| 10 | - |
| 11 | - |
| 12 | Ground |
| 13 | Illumination (+) |
| 14 | - |
| 15 | Heater Switch Signal |
| 16 | Heater Indicator (High) |
| 17 | Heater Indicator (Mid) |
| 18 | Heater Indicator (Low) |
| 19 | Steering Wheel Heater Switch |
| 20 | Steering Wheel Heater Indicator |
| 21 | - |
| 22 | - |
| 23 | - |
| 24 | Illumination (-) |
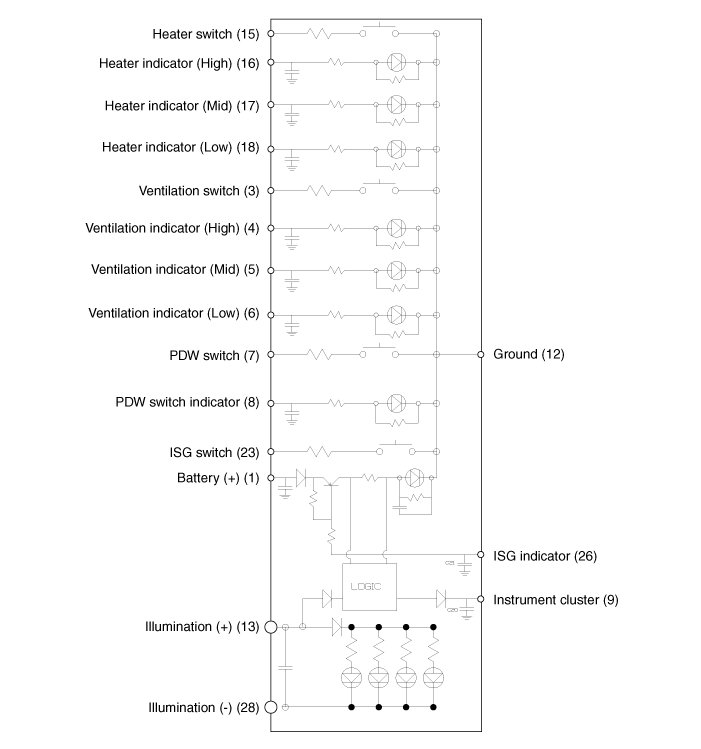
[Passenger's Side Heater Switch]
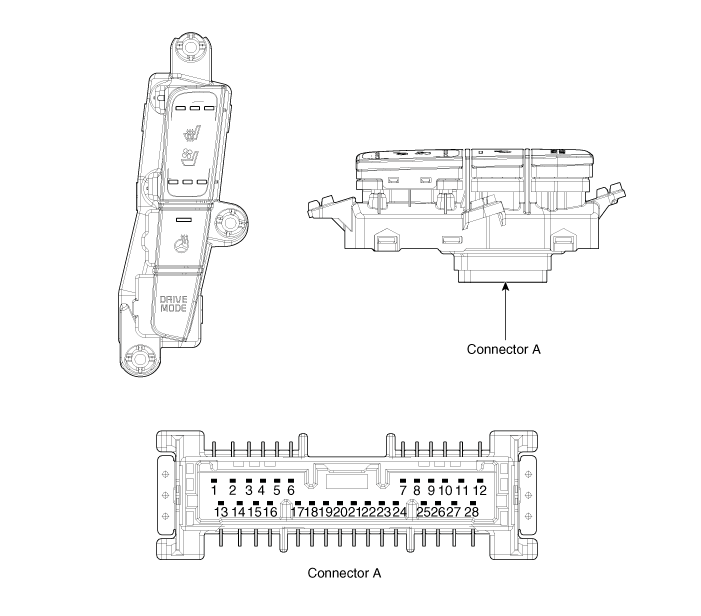
| No. | Connector A |
| 1 | - |
| 2 | - |
| 3 | Ventilation Switch Signal |
| 4 | Ventilation Indicator (High) |
| 5 | Ventilation Indicator (Mid) |
| 6 | Ventilation Indicator (Low) |
| 7 | PDW signal |
| 8 | PDW Indicator |
| 9 | Instrument Cluster |
| 10 | - |
| 11 | - |
| 12 | Ground |
| 13 | Illumination (+) |
| 14 | - |
| 15 | Heater Switch Signal |
| 16 | Heater Indicator (High) |
| 17 | Heater Indicator (Mid) |
| 18 | Heater Indicator (Low) |
| 19 | - |
| 20 | - |
| 21 | - |
| 22 | - |
| 23 | - |
| 24 | Illumination (-) |
Wiring Diagram
[Driver's Seat Heater Switch]
[Passenger's Seat Heater Switch]
Repair Procedures
Removal
Driver's / Passenger's Seat Heater Switch
Disconnect the negative (-) battery terminal.
Remove the front console upper cover.
(Refer to Body - Floor Console Assembly)
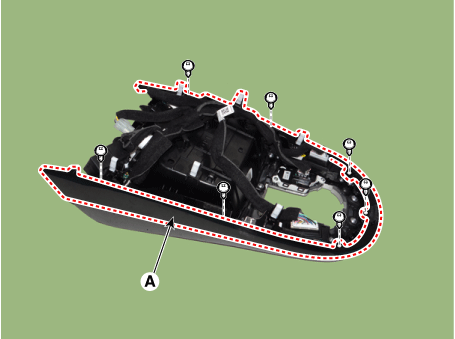
Remove the upper console cover trim (A) after loosening the screws.
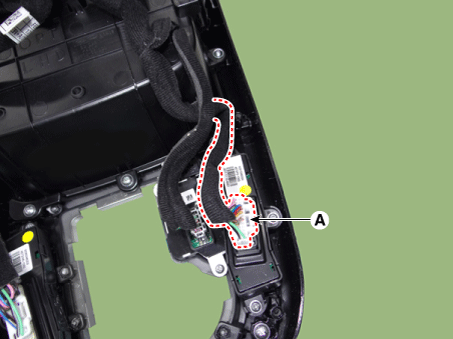
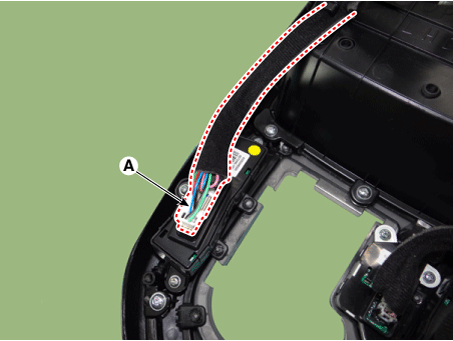
Disconnect the heater switch connector (A).
[Driver's Side]
[Passenger Side]
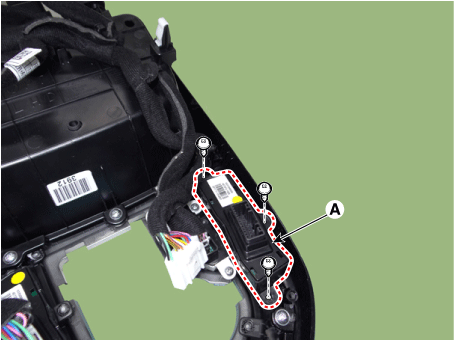
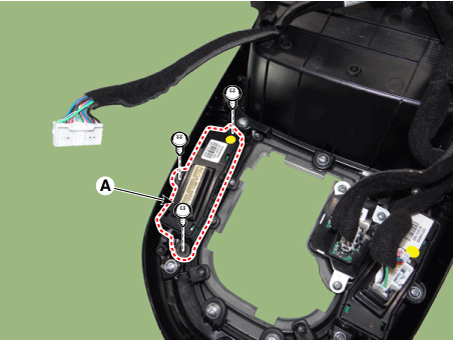
Remove the heater switch (A) after loosening the screws.
[Driver's Side]
[Passenger Side]
Rear Seat Heater Switch
Remove the rear power window switch.
(Refer to Power Window - Power Window Switch)
Installation
Install in the reverse order of removal.
Test yourself
A quick Kia Forte BD quiz: every answer comes with an explanation and a link to the manual page.