Timing Belt
Repair Procedures
Inspection
[New U 1.6 TCI]
Remove the engine cover.
(Refer to Engine Mechanical System - Engine Cover)
Remove the upper timing belt cover.
(Refer to Engine Mechanical System - "Timing Belt Cover")
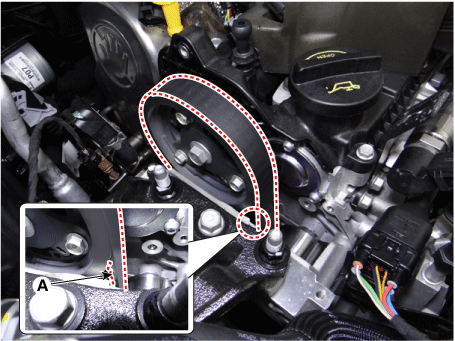
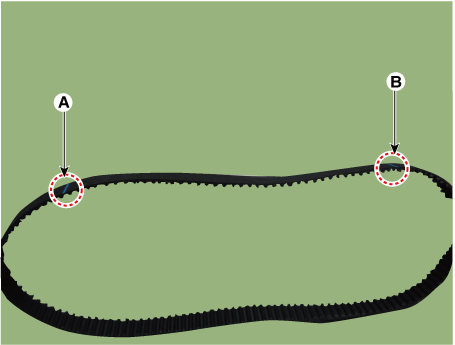
Visually inspect the timing belt (A) by turning the crankshaft pulley bolt clockwise.
Install in the reverse order of removal.
Removal
Disconnect the negative battery cable.
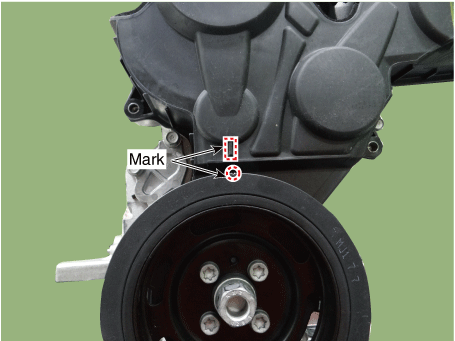
Turn the crankshaft pulley and align its groove with the "T" alignment mark on the timing belt cover. (No. 1 cylinder TDC on compression)
Remove the engine cover.
(Refer to Engine Mechanical System - Engine Cover)
Remove the upper timing belt cover.
(Refer to Engine Mechanical System - "Timing Belt Cover")
Remove the drive belt.
(Refer to Engine Mechanical System - "Drive Belt")
Set the No. 1 cylinder piston to TDC (top dead center) on compression.
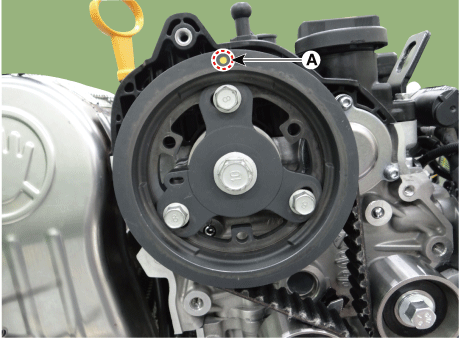
Turn the crankshaft pulley clockwise to align the camshaft sprocket alignment mark (A) at the "12 o'clock" position.
Remove the starter motor.
(Refer to Engine Control System/Fuel System - "Starter")
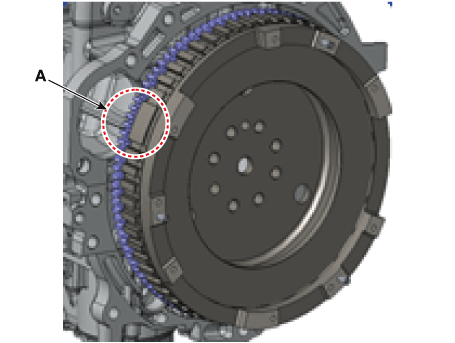
Make sure the missing tooth of the flywheel (A) is at the "10 o'clock" position with the starter removed.
Otherwise, rotate the crankshaft one full turn (360°).
Remove the lower timing belt cover.
(Refer to Engine Mechanical System - "Timing Belt Cover")
Remove the timing belt.
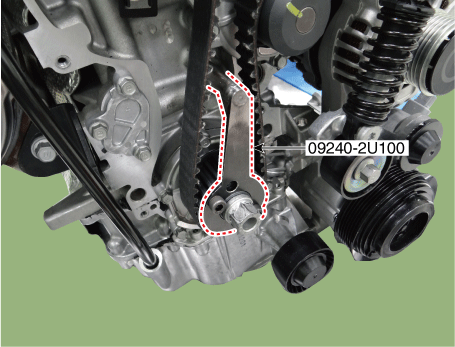
Using SST (09240-2U100), hold the crankshaft sprocket.
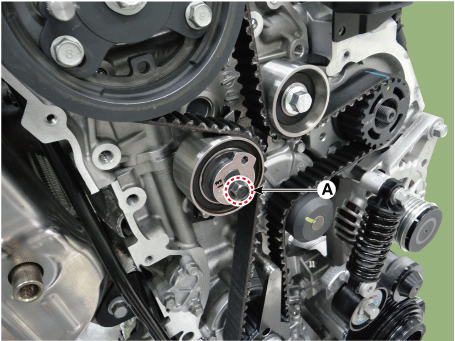
Loosen the bolt (A) on the timing belt tensioner to release the tension.
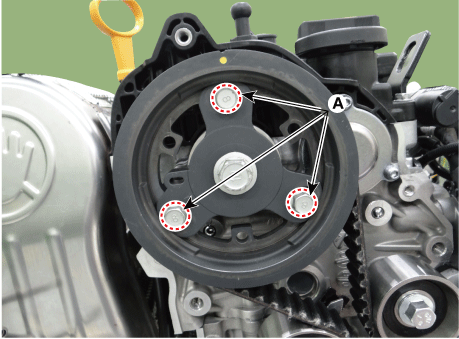
Loosen the camshaft sprocket bolts (A) to release the torque.
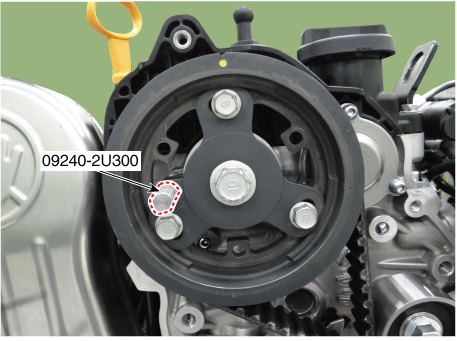
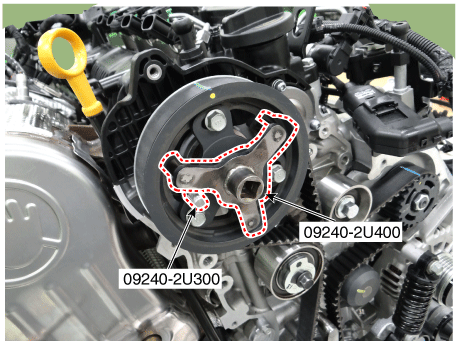
Using SST (09240-2U300), hold the integrated valve train module (IVM) hole.
Install SST (09240-2U400) on the camshaft sprocket.
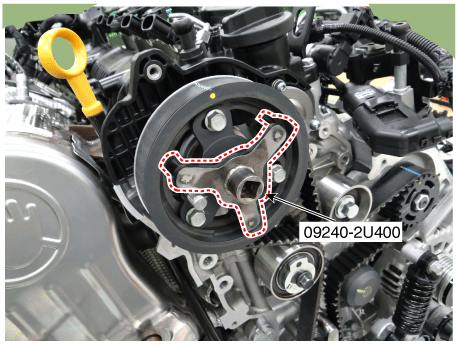
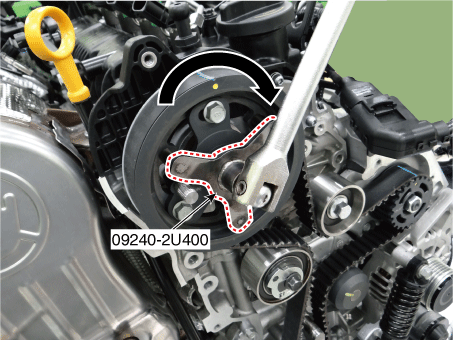
Using SST (09240-2U400), turn the camshaft sprocket slightly clockwise.
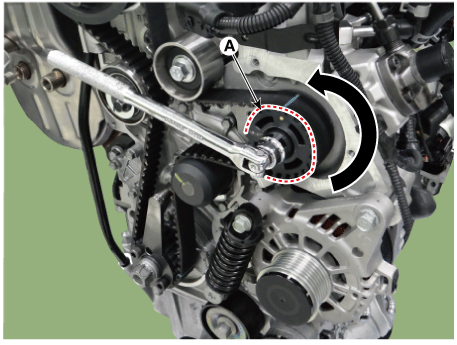
Turn the high-pressure fuel pump sprocket (A) slightly counterclockwise to loosen the timing belt at idle.
Remove the timing belt tensioner (A).
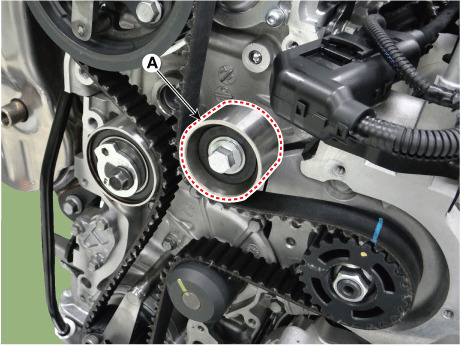
Remove the timing belt (A).
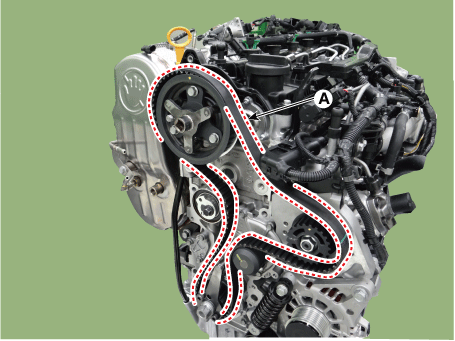
Installation
If reusing the removed timing belt, check that the three installation marks are present on it.
If there are no marks on the timing belt, mark the timing belt using a marking pen.
Mark one tooth (A) on the timing belt with a marker to indicate the timing mark (B).
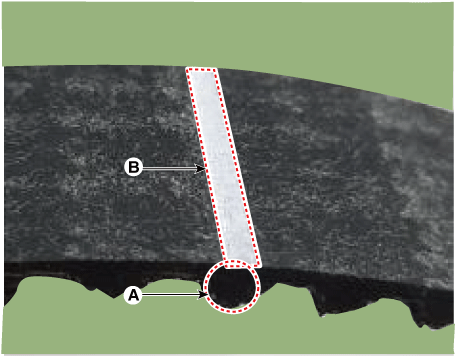
Add an arrow to the timing mark to indicate the starting point.
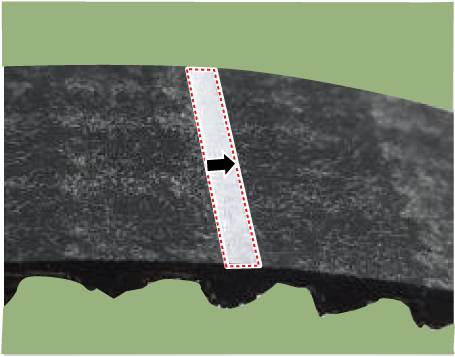
Mark the 36.5th tooth, counting from the installation mark. Mark the arrow (starting point A) with a marker to indicate the installation mark of the high-pressure fuel pump (B).
Timing belt teeth: 36.5 teeth
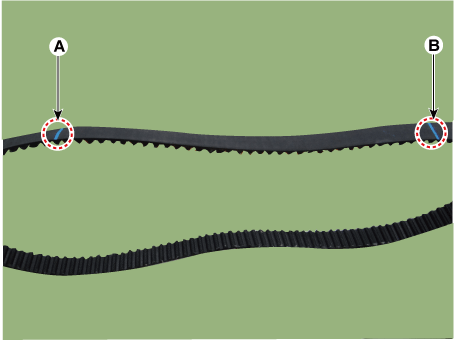
Mark the 39.5th tooth, counting from the high-pressure fuel pump installation mark (A). Mark the crankshaft timing mark (B) with a marker.
Timing belt teeth: 39.5 teeth
Align the installation marks of the sprockets. As a result, the No. 1 cylinder piston is at top dead center of the compression stroke.
Make sure that the camshaft sprocket installation mark (A) is at the 12 o'clock position.
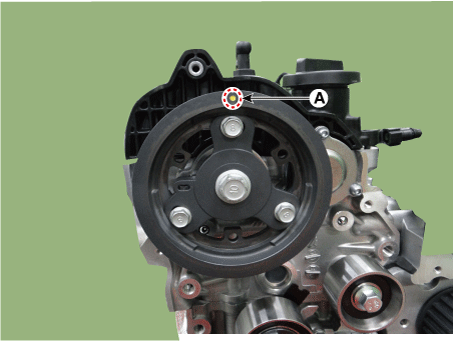
Align the installation mark on the high-pressure fuel pump bracket with the installation mark (A) and the high-pressure fuel pump sprocket (B).
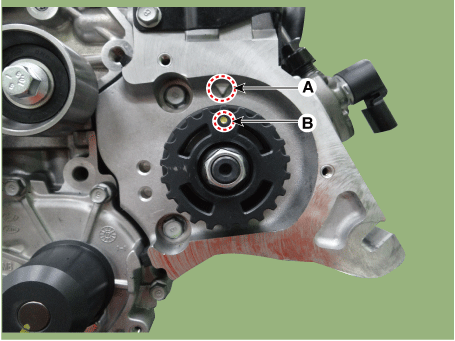
Align the installation mark with the mark on the front oil seal cover (A) and the crankshaft sprocket (B).
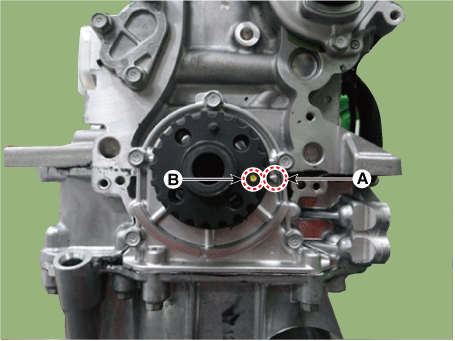
Make sure that the missing tooth of the flywheel (A) is at the 10 o'clock position.
Install the timing belt (A).
Install the tensioner.
Slightly turn the camshaft sprocket clockwise using SST (09240-2U400).
Slightly turn the high-pressure fuel pump sprocket (A) counterclockwise.
Install the idler pulley (A).
Tightening torque: 42.2–54 N·m
Tighten the camshaft sprocket bolts to the specified torque.
Using SST (09240-2U400), turn the camshaft sprocket counterclockwise (A) to the specified torque.
Tightening torque: 34.3–44 N·m
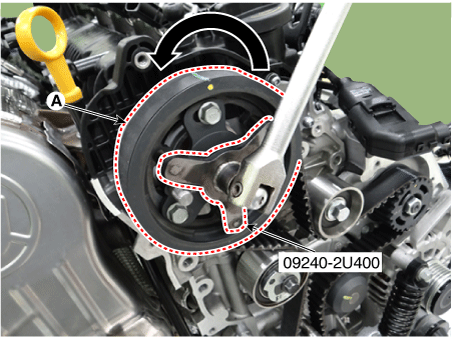
Tighten the camshaft sprocket bolts (A) to the specified torque.
Tightening torque: 19.6–24 N·m
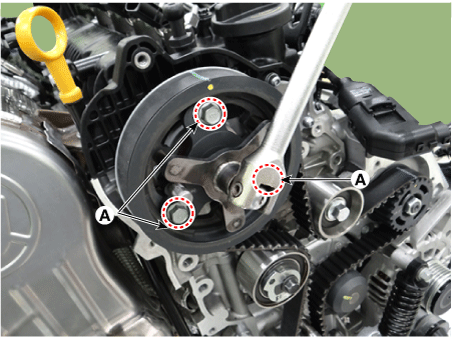
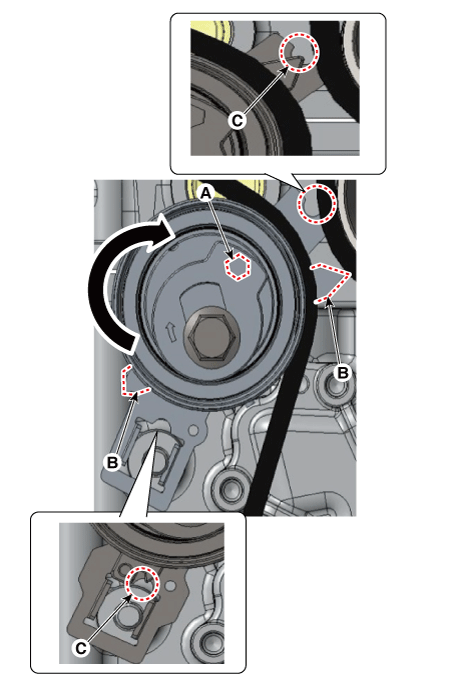
Adjust the timing belt tension.
Turn the hexagonal head (A) clockwise using a hex wrench, then make sure that the tip of the tensioner indicator (B) is at the center of the semicircular groove of the base (C).
Tighten the timing belt tensioner bolt (A) to the specified torque.
Tightening torque: 24.5–34 N·m
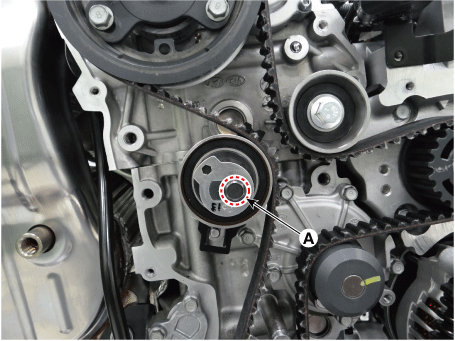
Remove the SST from the sprockets.
Remove the SST (09240-2U100) from the crankshaft sprocket.
Tightening torque: 34.3–44 N·m
Remove the SST (09240-2U300, 09240-2U400) from the camshaft sprocket.
Turn the crankshaft damper pulley bolt clockwise 2 turns.
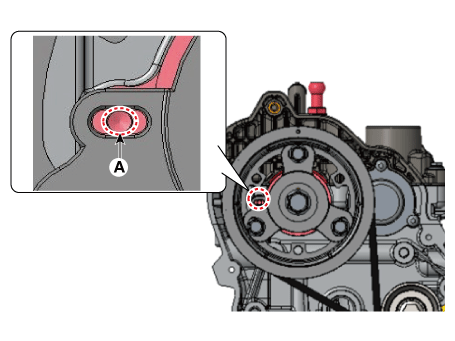
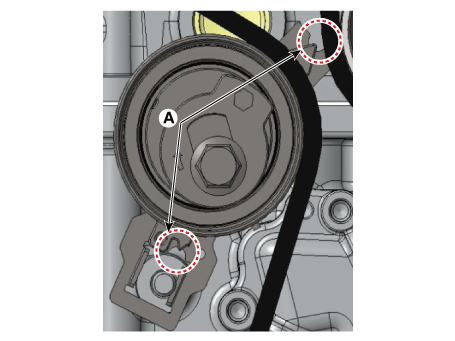
Check the position of the camshaft sprocket mounting hole and the tensioner indicator.
Check the position of the camshaft sprocket stopper pin hole (A).
Check the position of the tensioner indicator (A).
Install in the reverse order of removal.
Test yourself
A quick Kia Forte BD quiz: every answer comes with an explanation and a link to the manual page.