Steering System
Steering Wheel
In this manual: Steering System
11steps
~66min
3/5difficulty
Done 0 of 11
Contents:
Components and Components Location
Component
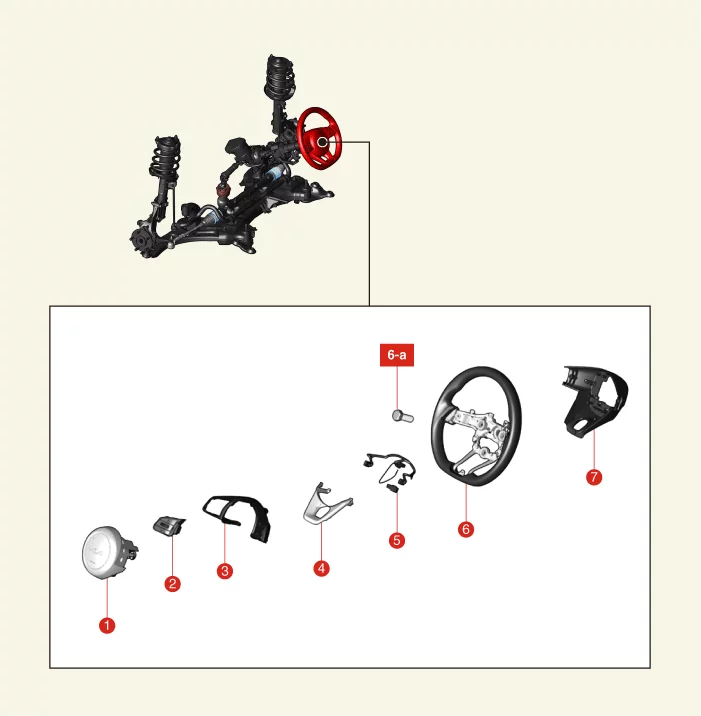
| 1. Driver Airbag (DAB) Module and Clock Spring 2. Steering Wheel Remote Control (SWRC) 3. Steering Wheel Remote Control Bezel 4. Steering Wheel Bezel 5. Extension Wire |
6. Steering Wheel Body 6-a. 44.1 - 49 N·m 7. Steering Wheel Lower Cover |
Removal and Installation
Removal
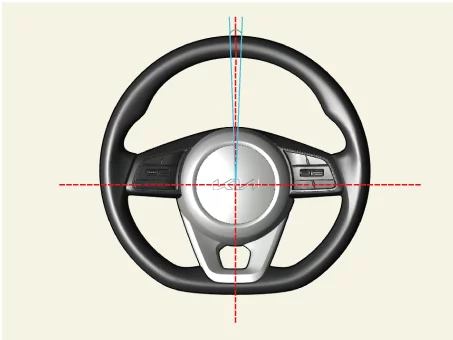
- Align the steering wheel in a straight-ahead position using a digital level or other equivalent tools.
Allowable steering wheel alignment range : 0.0 ± 0.5°
- Disconnect the negative ( - ) terminal of the battery.
- Remove the driver airbag (DAB) module and clock spring. (Refer to Restraint - "Driver Airbag (DAB) Module and Clock Spring")
- Disconnect the steering wheel connector (A).
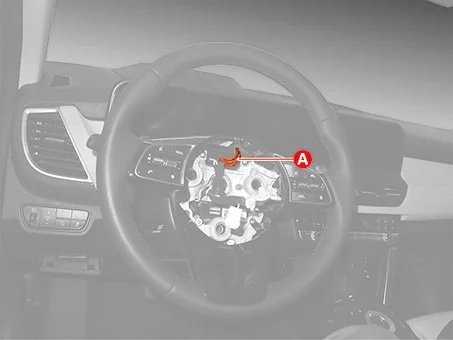
- Remove the steering wheel (A) after removing the bolt.
Tightening torque : 44.1 - 49 N·m


- Do not use a hammer when removing steering wheel, the steering column may be damaged if using a hammer.
- Do not reuse the steering wheel bolt.
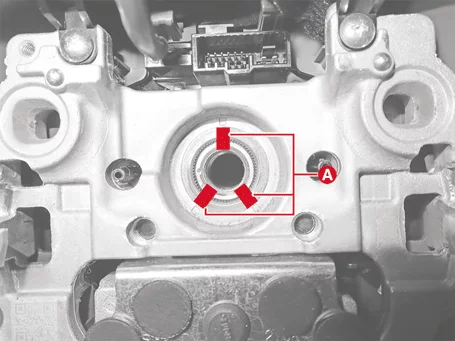
- Mark the 3 points (A) at the steering wheel and column shaft installation point.
Installation
- Install in reverse order of removal.
When installing the steering wheel, make sure that the marks (A) match.
Disassembly and Reassembly
Disassembly
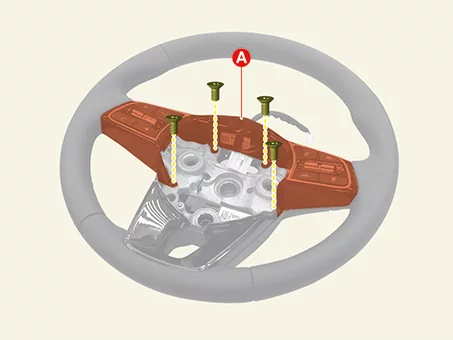
- Remove the Steering Wheel Remote Control (SWRC) switch and bezel (A).
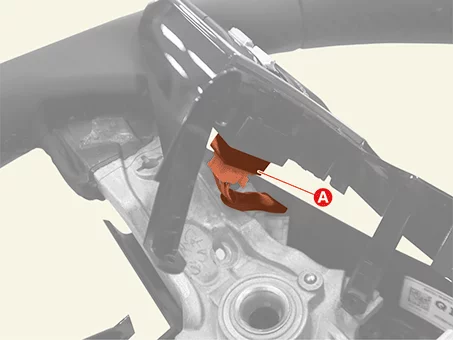
- Disconnect the SWRC switch connectors (A).
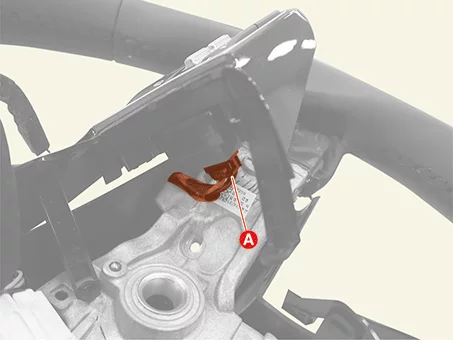
- Remove the steering wheel lower bezel (A) after removing the screws.

- Remove the steering wheel lower cover (A) after removing the screws.

- Remove the extension wire (A) from the steering wheel lower cover.
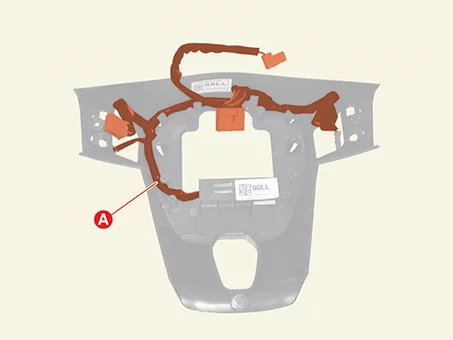
- Remove the SWRC (A) after removing the screws.
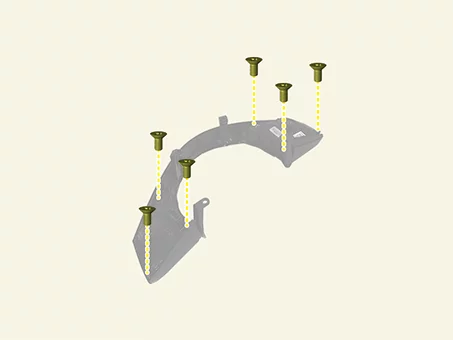
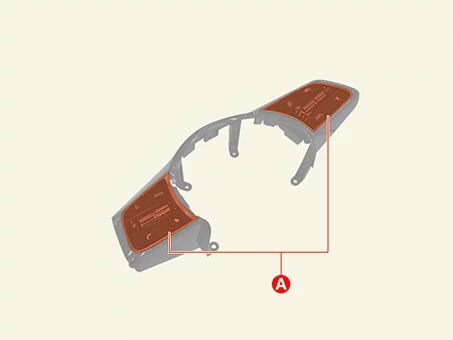
Reassembly
- Reassemble in the reverse order of disassembly.
- When assembling the steering wheel, be careful not to damage the parts by tightening with excessive torque.
- When installing the steering wheel lower cover, an open circuit or short circuit may occur if the extension wire is not secured in place.
Heated Steering Wheel Components and Components Location
Component
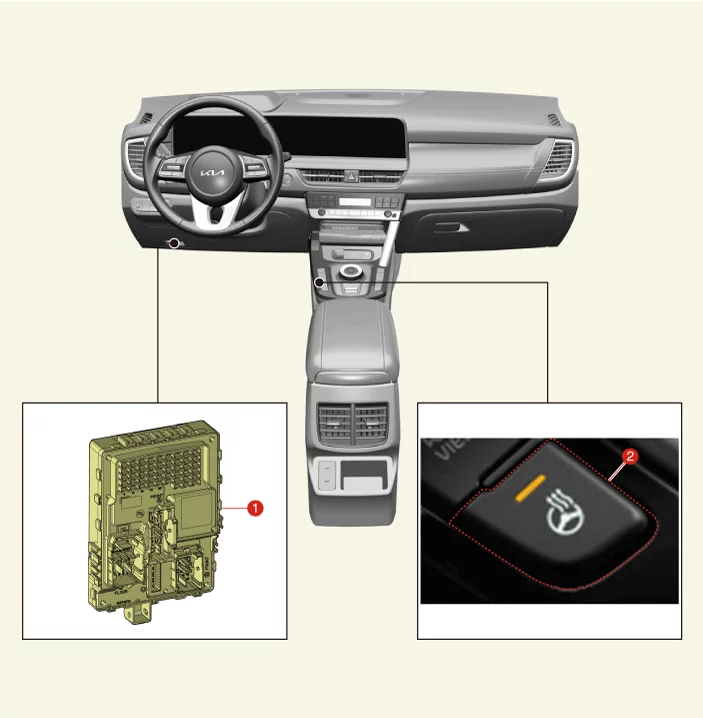
2. Heated steering wheel control switch (integrated with heater/ventilation switch)
Heated Steering Wheel Removal and Installation
Removal
Heated Steering Wheel Control Unit (Integrated with Integrated Central Control Unit, ICU)- Remove the Integrated Central control Unit (ICU). (Refer to Body Electrical System - "Integrated Central Control Unit (ICU)")
Heated Steering Switch (Integrated with Console Upper Cover)
- Remove the console upper cover. (Refer to Body - "Console Upper Cover")
Installation
- Install in reverse order of removal.
Was this page helpful?