All-Wheel Drive Control System
Components and Component Location
Component Location

1. 4WD ECU
Description and Operation
Description
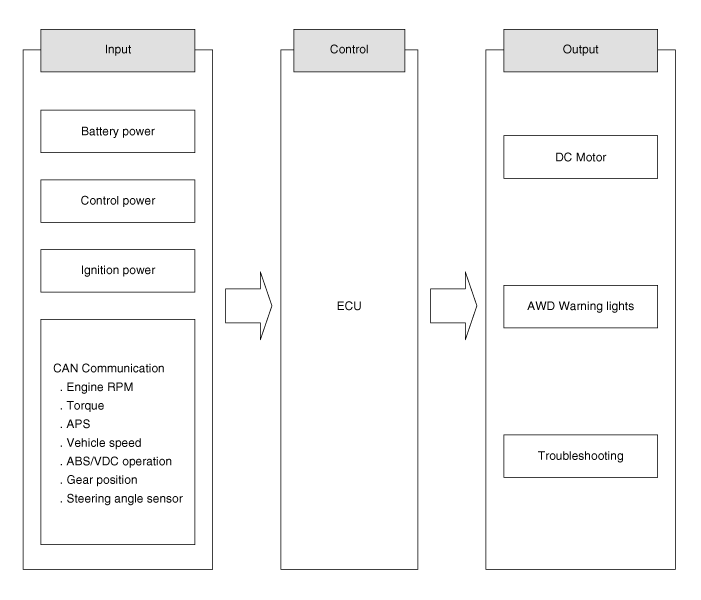
The AWD ECU distributes driving force to the front/rear wheels by controlling the multi-plate clutch in the AWD transfer case, analyzing input information, i.e., wheel speed, accelerator pedal, and steering wheel angle, according to road conditions and driving conditions. The AWD vehicle has different power transmission conditions depending on driving/road conditions. Vehicle speed is received from the ABS/ESP ECU via the CAN bus. CAN communication information includes APS, which indicates the driver's intent to accelerate, engine torque, ABS/ESP operation signal, and gear position. The AWD ECU controls the DC motor, warning lamp, and indicator lamp, and communicates with the scan tool. When the vehicle is driven above a normal speed of 60 km/h on normal roads, it operates in 2WD condition. The ECU determines the driving force for the front and rear wheels by receiving signals from all sensors according to driving conditions, i.e., sudden starts, cornering, and driving on low-friction roads, and transmits optimized torque suitable for the driving condition to the front wheels by calculating and controlling the transmitted torque data.
Flow Diagram
AWD Control Module Input/Output Diagram
Circuit Diagrams
AWD Control Module Terminal Function
[AWD ECU Connector]
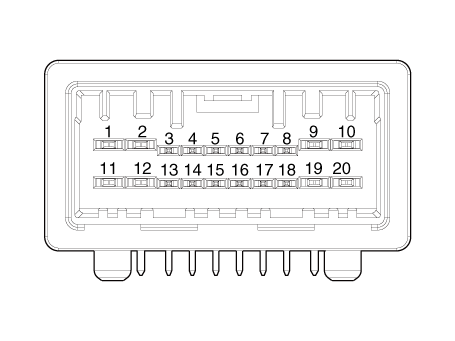
| Pin | Description |
| 1 | Motor B |
| 2 | Motor A |
| 5 | Pressure sensor power supply |
| 7 | IG1 |
| 8 | Engine shield wire ground |
| 9 | Battery ground |
| 10 | Battery |
| 14 | Pressure Sensor Signal |
| 15 | Pressure sensor ground |
| 17 | CAN HIGH |
| 18 | CAN LOW |
Repair Procedures
Removal
Turn the ignition switch OFF and disconnect the negative (-) battery cable.
Remove the airbag lower panel.
(Refer to Body - "Under Cover Panel")
Remove the knee airbag.
(See Restraint System - "Knee Airbag (KAB) Module").
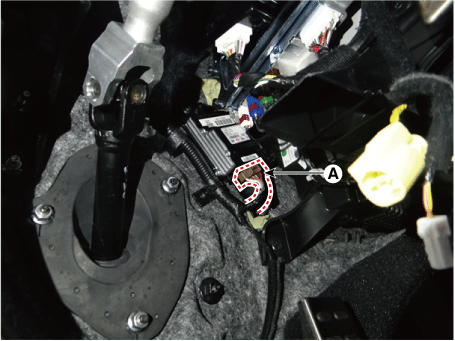
Disconnect the AWD ECU connector (A).
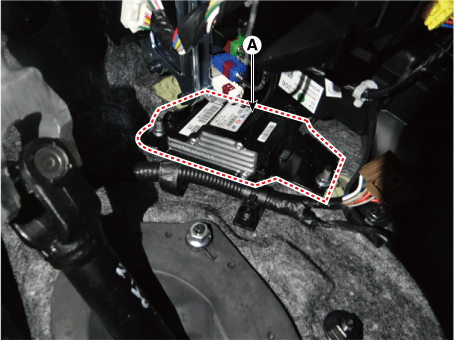
Loosen the AWD ECU bracket nuts and remove the AWD ECU (A).
Installation
Install in the reverse order of removal.
Test yourself
A quick Kia Stinger CK quiz: every answer comes with an explanation and a link to the manual page.