TPMS Sensor
Description and Operation
Description
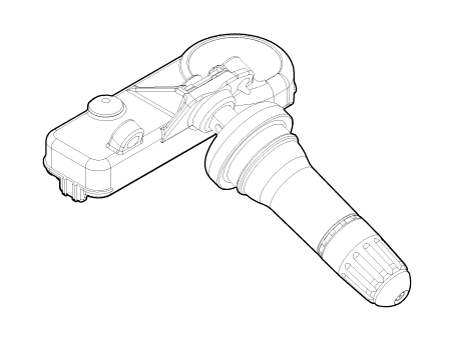
Function
The sensor measures pressure, temperature, acceleration and battery status, and transmits the information to the ECU by wireless radio frequency.
Wheel location is recognized by comparing the wheel pulse from the ECS (ABS) and the acceleration sensor value (upper line).
Structure and Features
Four (4) sensors are installed on each wheel of the vehicle.
The frequency conversion type is FSK, normally using the High Line.
TPMS Automatic Location Learning
The wheel angular speeds differ from each other in the following cases:
Slip on each axle occurs differently.
The turning radius (curve radius) for each wheel is different.
Tire wear, internal pressure, tire characteristics, etc. differ for each tire.
The TPMS sensor transmits the RF signal only at a specific phase (tire angle) in learning mode.
The TPMS receiver checks the information of each tire phase (tire tilt angle) when receiving RF signals from the sensor.
Each time RF signals are received from sensors with IDs 1, 2, 3 and 4, the ID with the highest correlation between the phases of each collected wheel is transmitted. (In other words, each time an RF signal is received, the tire phase is transmitted to the most consistent wheel.)
The TPMS sensor transmits the RF signal at 16-second intervals in learning mode.
After stopping or parking for more than 19 minutes, the automatic learning function is performed in any driving position.
The sensor switches to parking mode when stopped or parked for longer than 15 minutes. When acceleration greater than 4 g (15-20 km/h) is detected, parking mode switches to the first block mode.
Repair Procedures
Removal
Remove the tire.
(See Tires/Wheels - "Tires")
Remove the screw using a Torx screwdriver (A).

Remove the sensor body (A) from the valve (B) in the direction of the arrow.
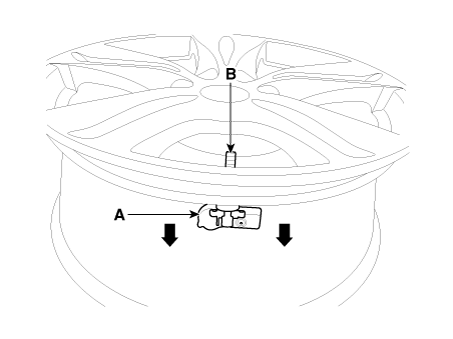
Use the valve installation tool to pull the valve until it is fully out of the lower hole.

Apply lubricant to the valve surface, then install it through the wheel valve hole.
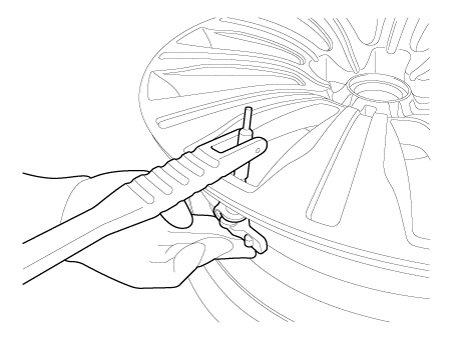
Apply soapy water or lubricant to the upper/lower bead of the tire.

To install the lower bead, position the TPMS sensor at 5 o'clock, starting from the head of the tire mounting equipment.

Rotate the rim clockwise and press the tire toward 3 o'clock to seat the lower beads.

To install the upper beads, press the tire toward 3 o'clock and rotate the rim clockwise.

Inflate the tire until the tire beads are seated properly.

Adjust the tire pressure to the recommended tire pressure for the vehicle.
If the TPMS sensor is faulty, the TPMS sensor learning must be performed. Replace all faulty sensors and perform TPMS sensor learning.
Inspection
Test Procedures After TPMS Sensor Installation
The sealing washer must be compressed against the outer edge of the hole.
The lower part of the valve must be located at the specified position (not metal brackets).
The body must contact the rim surface at at least one or more points.
The installation height of the housing bead must not exceed the height of the chin.
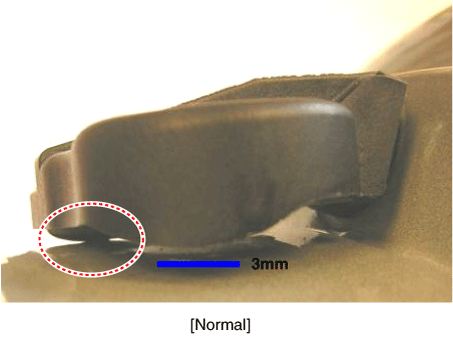

Diagnostic procedure using the diagnostic tool
The following section describes how to diagnose malfunctions using the scan tool.
Connect the diagnostic tool to the self-diagnosis connector (16-pin) under the protective cover on the driver's side, then turn the ignition on to activate the diagnostic tool.
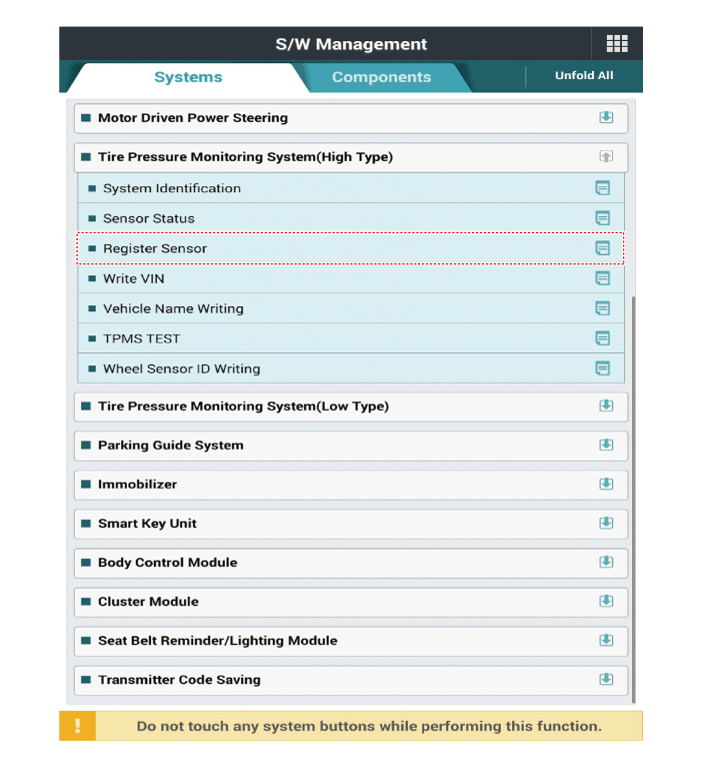
In the KDS vehicle type selection menu, select "Vehicle Type" and "TPMS System", then select "OK".
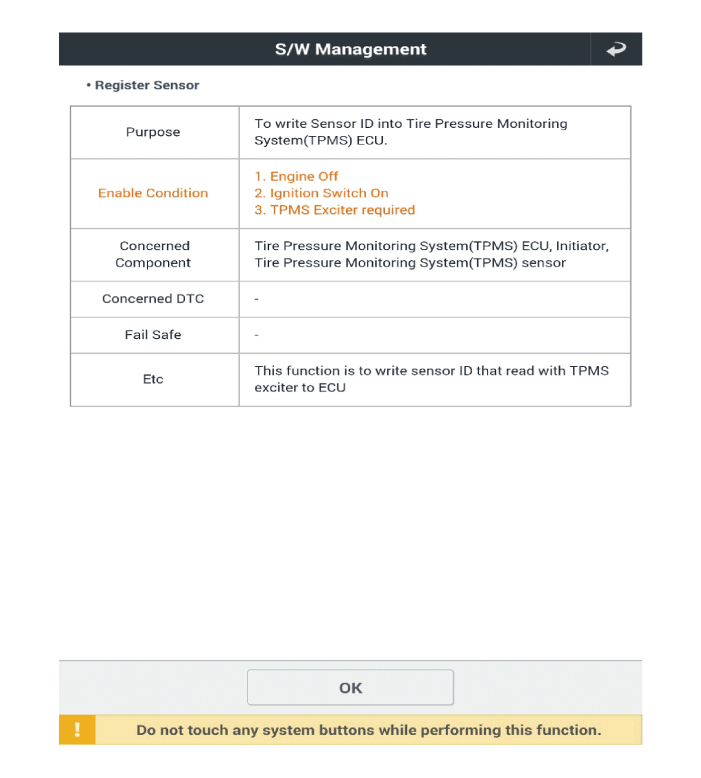
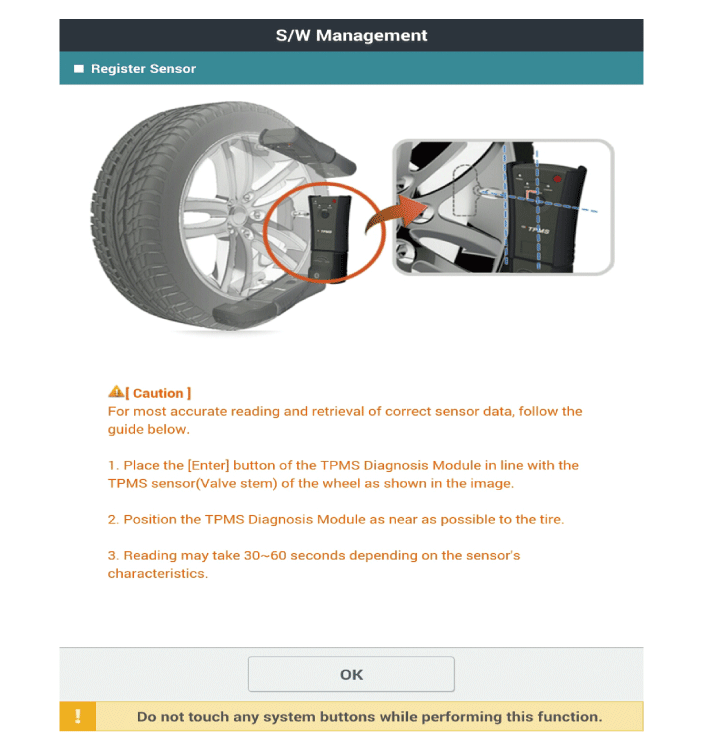
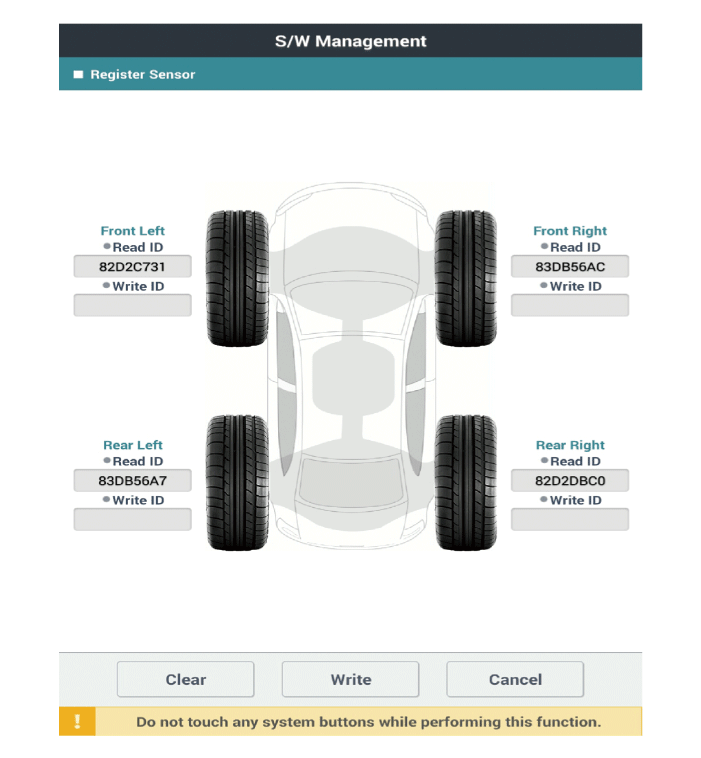
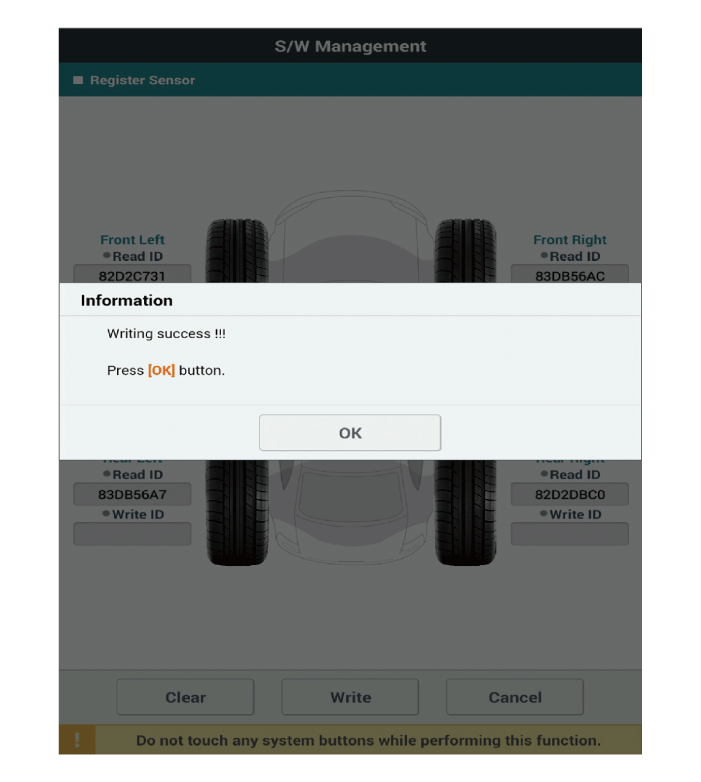
[Sensor Registration Method]


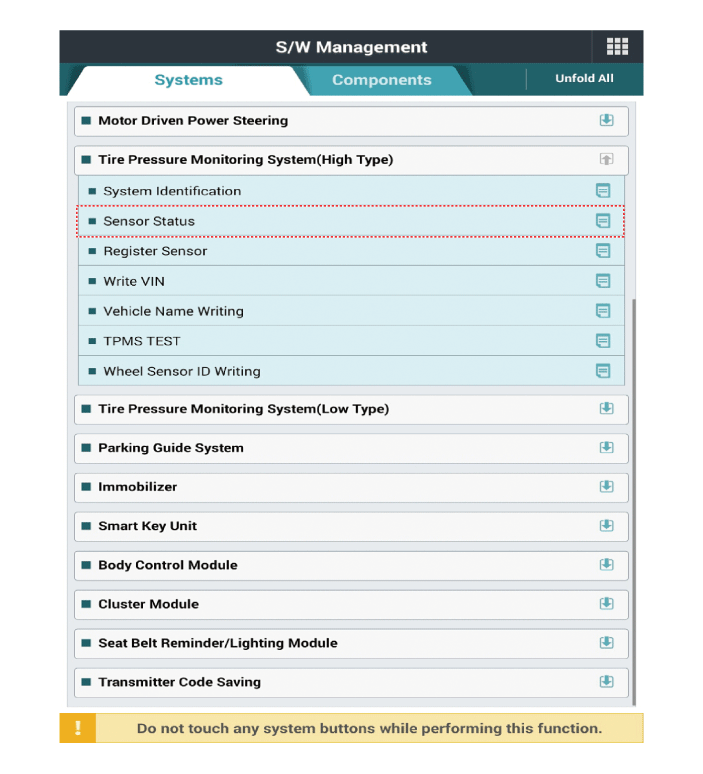
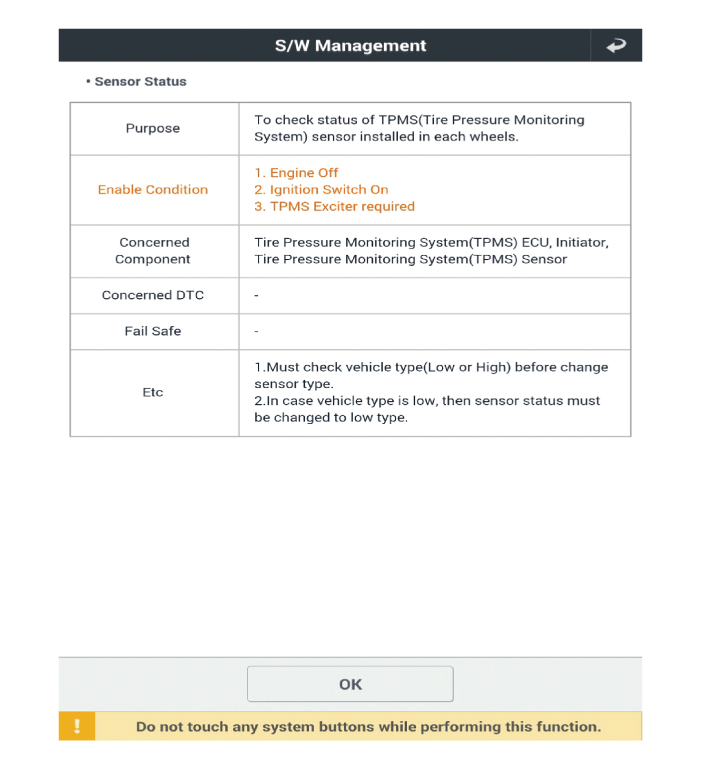
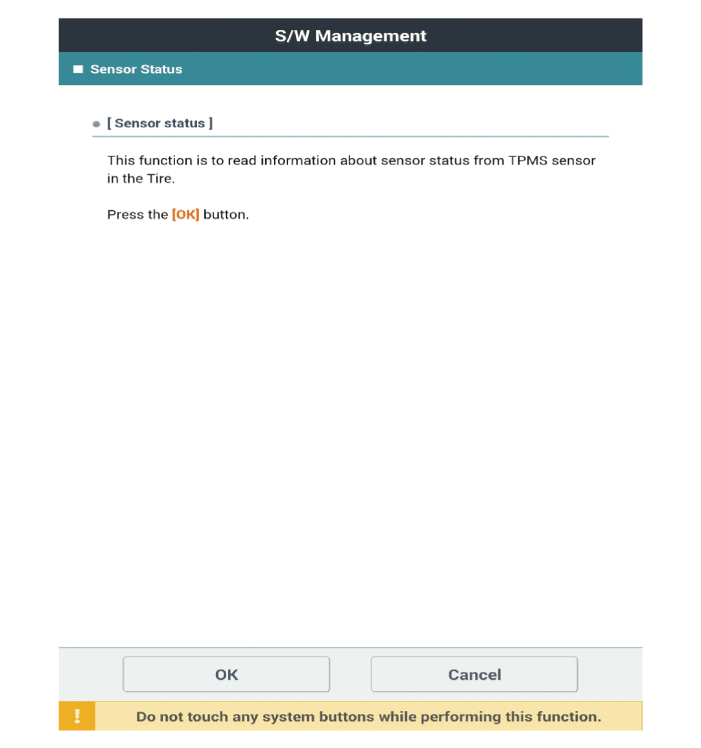
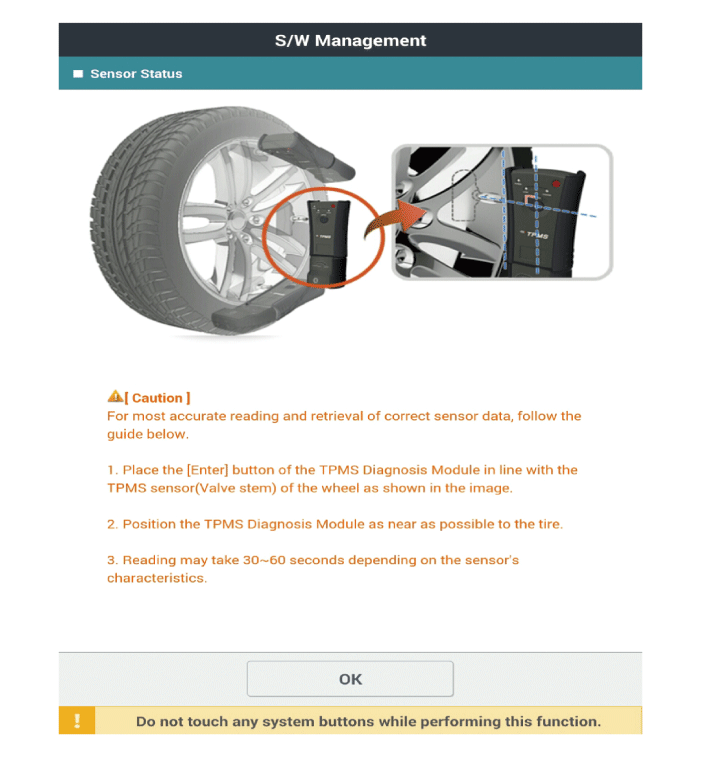
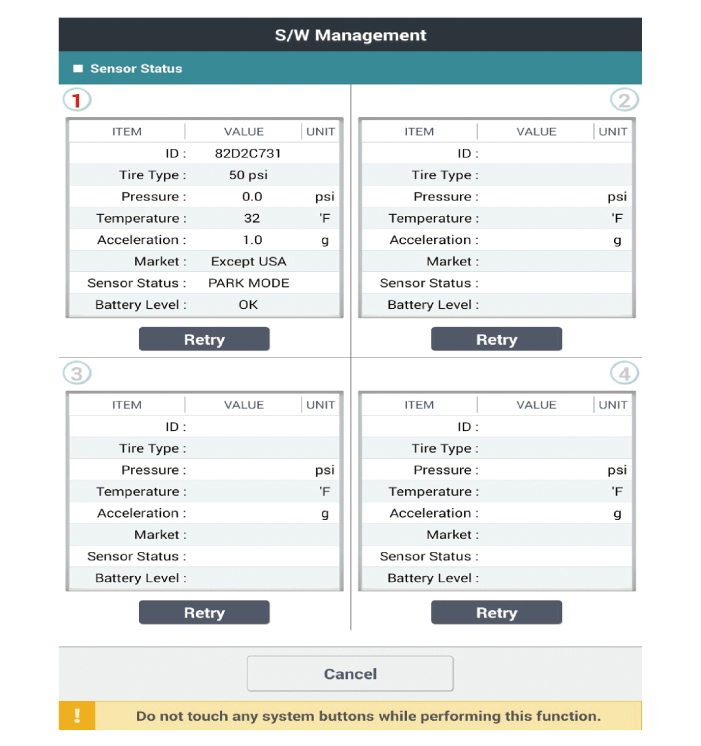
[Sensor Status Method]
Test yourself
A quick Kia Stinger CK quiz: every answer comes with an explanation and a link to the manual page.