Shift Lever
Bauteile und bauteile-Übersicht
BAUTEILE-ÜBERSICHT
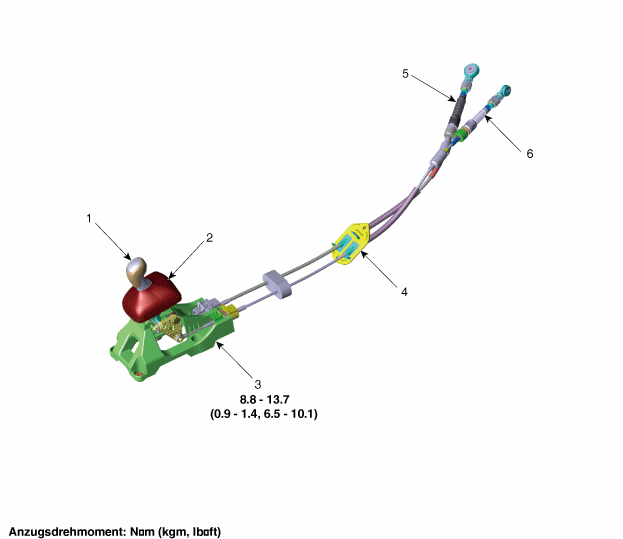
| 1. Button 2. Boot 3. Shift lever knob |
4. Bracket 5. Shift cable 6. Select cable |
Repair Procedures
Removal
Manschetten von der Oberen Konsolenabdeckung entfernen und dann den Knauf durch Ziehen nach oben entfernen.
Bodenkonsole ausbauen.
(Siehe Kapitel Karosserie - "Bodenkonsole")
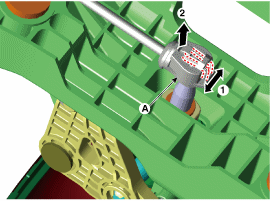
Remove the lock pin (A), then disconnect the select cable from the shift lever pin.
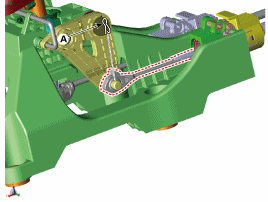
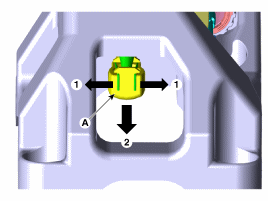
Seilzugfassung (A) vom Wählhebel entfernen.
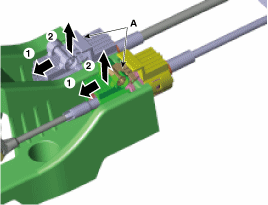
Befestigungsschrauben (A) des Schalthebels lösen.
Anzugsdrehmoment: 8,8 ~ 13.7 N·m
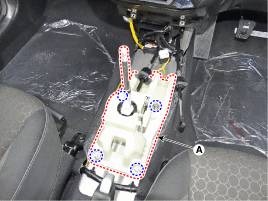
Schaltseilzug (A) vom Wählhebel abnehmen.
[Type A]
[Type B]
Installation
Der Einbau erfolgt in der umgekehrten Reihenfolge des Ausbaus.
INSPECTION
Check the shift lever operation for proper function in each gear (1st, 2nd, 3rd, 4th, 5th, 6th, Reverse).
When the shift lever is in the "R" position, check that the boot is in the correct position.
If operation is not smooth, readjust the shift cable length.
(Refer to Shift Cable - "Installation")
Test yourself
A quick Kia Stonic quiz: every answer comes with an explanation and a link to the manual page.