Engine Mechanical System
Radiator Repair Procedures
In this manual: Engine Mechanical System
24steps
~144min
4/5difficulty
Done 0 of 24
Removal and Installation
- Disconnect the negative battery cable.
- Remove the air cleaner assembly. (Refer to Air Intake and Exhaust System - "Air Cleaner").
- Remove the battery tray. (Refer to Engine Electrical System - "Battery")
- Disconnect the overflow hose (A) from the radiator.
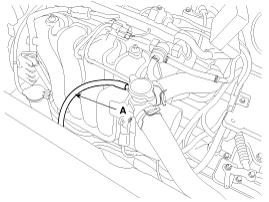
- Loosen the drain plug and drain the engine coolant. Remove the radiator cap to drain quickly.
- Disconnect the upper radiator hose (A) and lower hose (B).
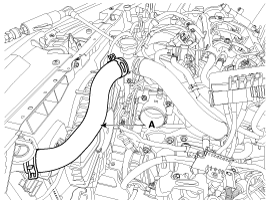
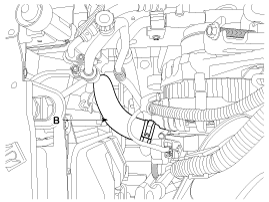
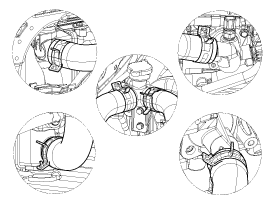
- Disconnect the ATF cooler hoses.
- Remove the front bumper. (Refer to Body - Front Bumper Cover)
- Remove the air guard (A).
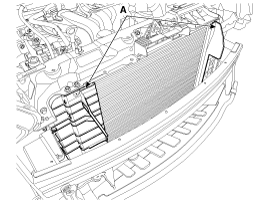
- Remove the upper mounting bracket (A).
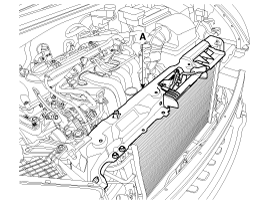
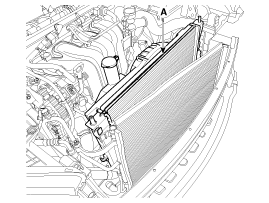
- Separate the condenser from the radiator, then remove the radiator (A) upward from the vehicle.
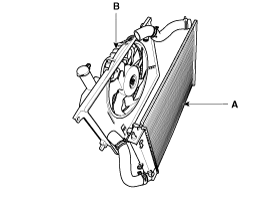
- Remove the cooling fan and the reservoir tank (A) from the radiator (B).
- Install in the reverse order of removal.
- Fill the radiator with coolant and check for leaks.
- Securely close the radiator cap, then restart the engine and check for leaks.
Inspection
Radiator Cap Inspection- Remove the radiator cap, wet its seal with engine coolant, then install it on the pressure tester.
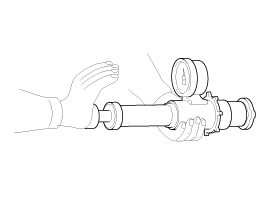
- Apply a pressure of 93.16 – 122.58 kPa (0.95 – 1.25 kgf/cm², 13.51 – 17.78 psi).
- Check for pressure drop.
- If the pressure drops, replace the radiator cap.
- Wait until the engine cools, then carefully remove the radiator cap and fill the radiator with engine coolant. Then install a radiator cap tester.
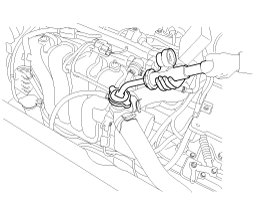
- Apply pressure of 93 ~ 123 kPa (0.95 ~ 1.25 kgf/cm², 14 ~ 19 psi).
- Check for engine coolant leaks and pressure drop.
- If the pressure drops, check the hoses, radiator and water pump for leaks. If there is no leak, inspect the heater core, cylinder block and cylinder head.
- Remove the tester and install the radiator cap.
Test yourself
A quick Kia Cee'd quiz: every answer comes with an explanation and a link to the manual page.
Was this page helpful?