Sunroof Assembly
Components and Component Location
Component Location
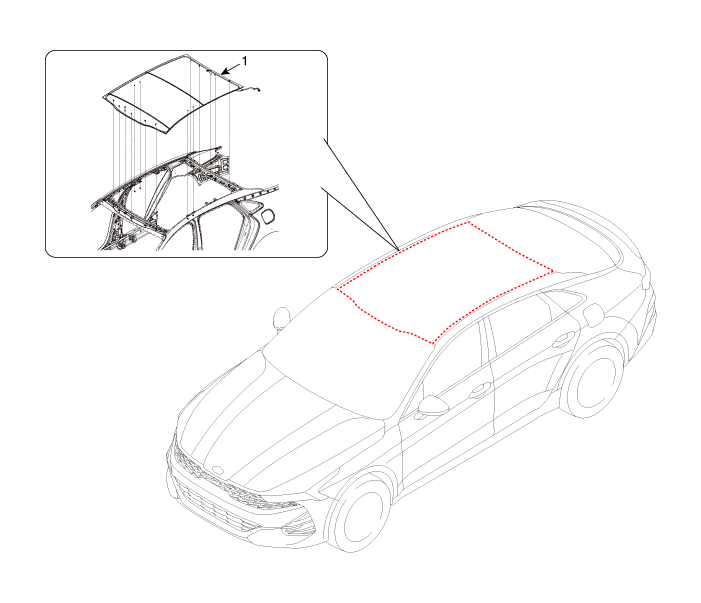
| 1. Sunroof Assembly |
Repair Procedures
Removal
Remove the roof side molding.
(Refer to Body Side Moldings - "Roof Side Molding")
Remove the windshield.
(Refer to Sunroof - "Windshield")
Remove the headliner.
(Refer to Headliner - "Headliner Assembly")
Remove the rear window glass.
(Refer to Rear Window Glass - "Repair Procedures")
Fully close the sliding glass using the sunroof switch.
Loosen the bolts on the side of the sunroof assembly.
Tightening torque: 7.8–11.8 N·m
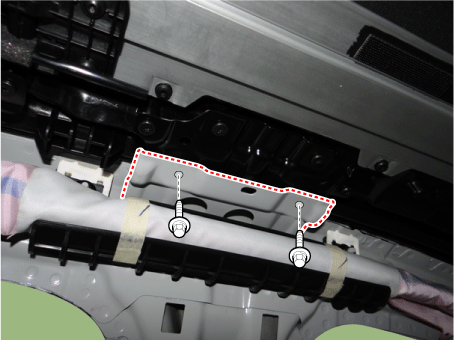
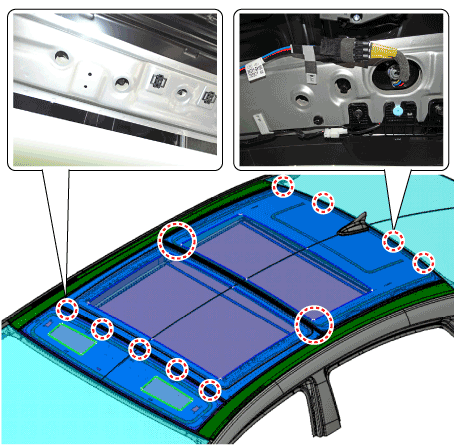
Loosen the sunroof assembly mounting nuts (A).
[Front]
Tightening torque: 7.8–11.8 N·m
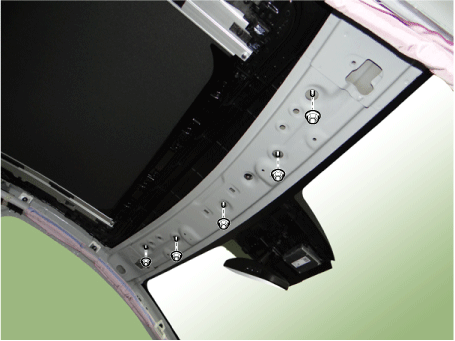
[Rear]
Tightening torque: 7.8–11.8 N·m
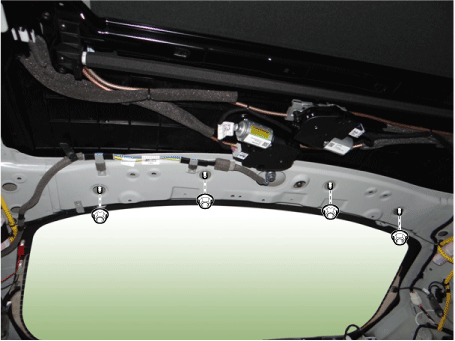
Cut the sealant at the front edge (A) by pulling the wire (B) from left to right.
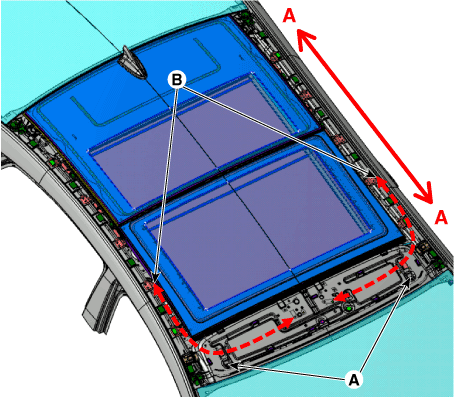
Cut the sealant between the front edge (A-A) by pulling the wire (B) from left to right.
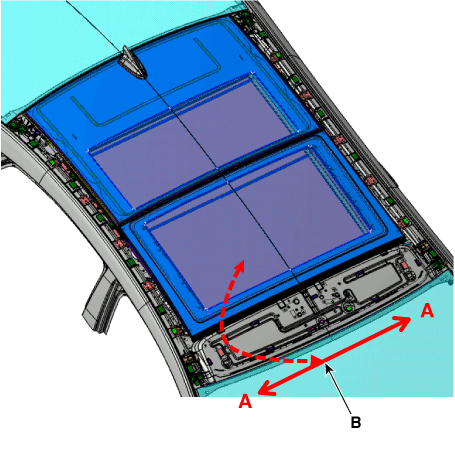
Cut the sealant between the edge (A-A) and pull the wire (B) from left to right.
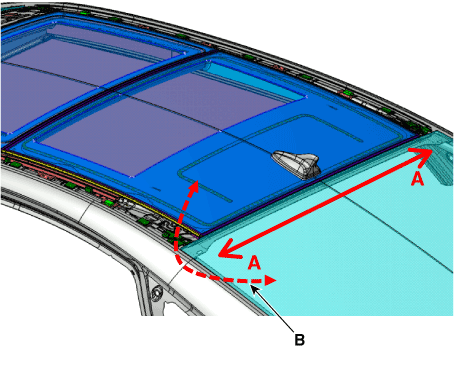
Cut the sealant between the rear edge (A-A) and the wire (B) from left to right.
After cutting the sealant on each side, remove the sunroof assembly (A).
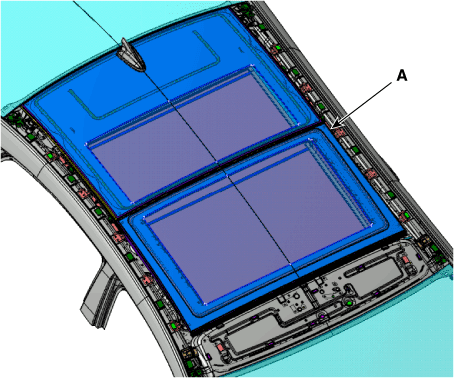
Use a blade to cut away the remaining sealant (A) around the body panel.
Installation
Clean the body panel edges and the sunroof assembly with alcohol or an air gun.
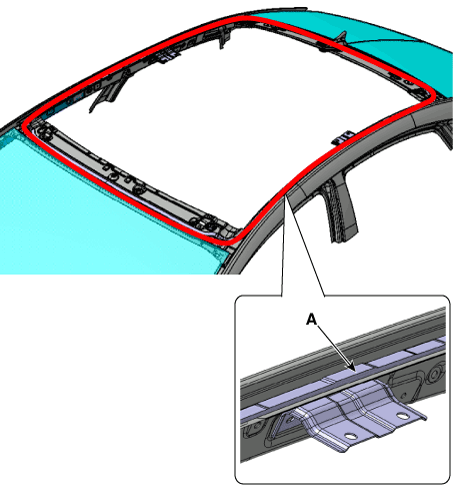
Using a sealant gun, apply sealant (B) around the body panel (A).
Suction Step Gap Front A - A 1,4 + 0,5 - -1 5,7 ± 1 Side B - B 1,7 + 1 - -0,5 5,3 ± 1 Carefully install the sunroof onto the body flange using the centering hole (A).
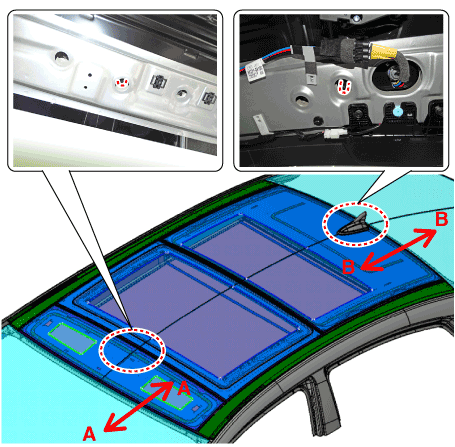
Check the gaps and flush on each side.
Suction Step Gap Front A-A 1,4 + 0,5 - -1 5,7 ± 1 Rear B-B 1,7 + 1 - -0,5 5,3 ± 1 Tighten the sunroof mounting nuts.
Tightening torque: 2.0 - 3.0 kgf·m
Perform a water leak test.
If a water leak occurs, apply sealant to the leak point.
Install the rear window glass.
(Refer to Rear Window Glass - "Repair Procedures")
Install the headliner.
(Refer to Headliner - "Headliner Assembly")
Install the windshield.
(Refer to Sunroof - "Windshield")
Install the roof side molding.
(Refer to Body Side Moldings - "Roof Side Molding")
Test yourself
A quick Kia Optima DL3 quiz: every answer comes with an explanation and a link to the manual page.