Head-Up Display
The Start/Stop button on the Lexus GS (L10) allows the engine to be started and stopped conveniently without a conventional key. In combination with the Smart Entry system, the electronic key only needs to be present inside the vehicle. This chapter explains how the system works, its safety mechanisms, and the correct procedure for starting problems. Notes on avoiding unintended engine stops or unauthorized starts complement the practical description.
Summary of Functions
The head-up display can be used to project the speed or other information onto the windshield.
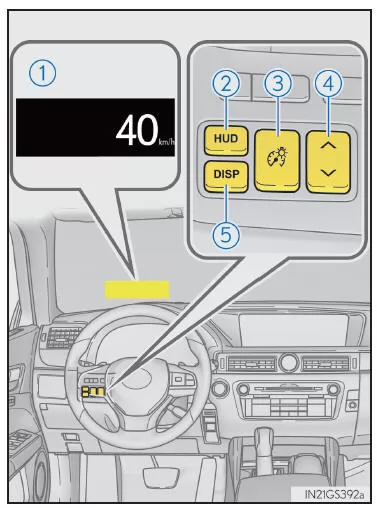
1. Head-Up Display
The display brightness changes automatically depending on the ambient light level.
2. "HUD" Button
3. Display Brightness Adjustment Switch
The display brightness can be adjusted to the desired level.
4. Display Position Adjustment Switch
5. "DISP" Button
Head-Up Display Items
● Speed ● Tachometer ● Gear position and shift range
Shows the selected shift position or shift range.
● Eco Driving Indicator (GS350/GS200t)
● Road signs recognized by the Road Sign Assist (RSA) (if equipped)
● Head-up tachometer (GS F)
● Audio display*
Displays audio information for approx. 3 seconds when the audio system is operated.
● Route guidance display (vehicles with navigation system)
When approaching an intersection while the navigation system is providing route guidance, an arrow automatically shows the direction of travel.
● Lane change warning function display (LDA [Lane Departure Alert with Steering Control], LKA [Lane Keeping Assist]) (if equipped)
● Distance warning display (Dynamic Radar Cruise Control, Dynamic
Radar Cruise Control with full-speed range distance control) (if equipped)
● Pre-Crash System (PCS [Pre-Crash Safety System]) warning message (if equipped)
*: Off in the default setting
Switching the Head-Up Display On and Off
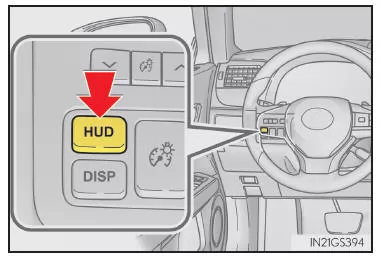
"HUD" Button
Press this switch to turn the head-up display on/off and change the speed display unit as follows:
Type A
OFF → ON (km/h) → OFF
Type B
OFF → ON (mph) → ON (km/h) → OFF
"DISP" Button
Press this button to switch the display (except speed).
GS350/GS200t
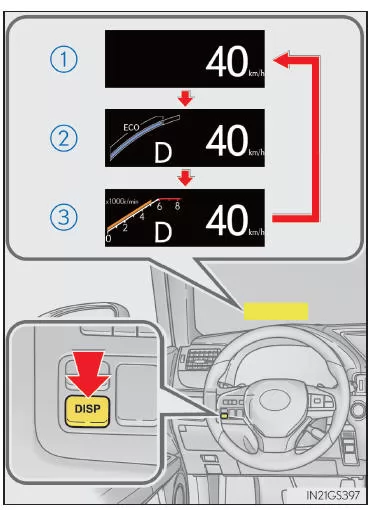
- Off
- Eco Driving Indicator
- Tachometer
GS F

- Off
- Tachometer
- Head-Up Tachometer
Shown when the vehicle is in Sport mode with the shift lever in the "M" position
Improving the Display View
Adjusting the Display Position
- Higher
- Lower
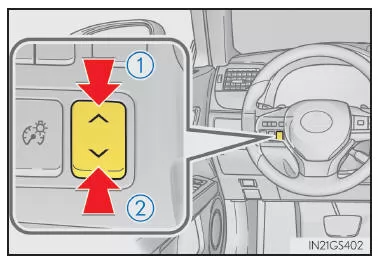
Adjusting the Brightness
The display brightness is adjusted automatically depending on the ambient light. However, the brightness can also be adjusted manually in 9 levels.
- Brighter
- Darker
Eco Driving Indicator (GS350/GS200t)
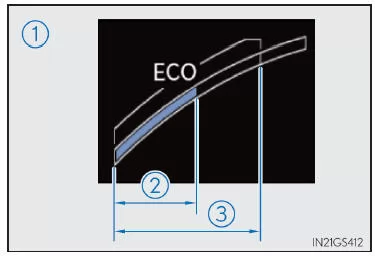
1. Eco Driving Indicator Zone Display
Shows the eco driving range zone with the current eco level based on acceleration.
2. Eco Level Based on Acceleration
When acceleration exceeds the eco driving range zone, the right side of the eco driving indicator zone display lights up.
3. Eco Driving Range Zone
The Eco Driving indicator does not operate under the following conditions:
- The shift lever is in a position other than "D".
- A shift switch is being operated.
- Neither Normal mode nor Eco mode is selected.
- The speed is approximately 130 km/h or more.
Head-up Display Tachometer (GS F)
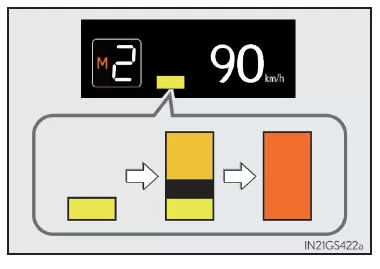
When the shift lever is in the "M" position and Sport mode is activated, the display switches among 3 levels depending on engine speed to indicate when to upshift.
Depending on engine speed, this display may also appear when downshifting.
Route Guidance Display (vehicles with navigation system)
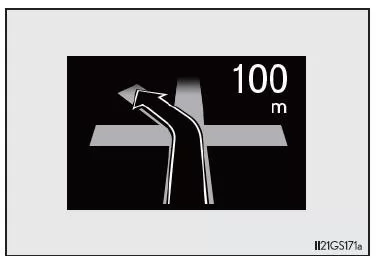
When the vehicle approaches an intersection, the arrow indicates the direction in which the vehicle should travel.
When the vehicle approaches an intersection, route guidance starts and the distance* to the intersection is also displayed.
*: The distance display decreases in 50 m steps and turns off when the vehicle passes the intersection.
Customizing the Display
You can select whether or not to display the following screens.
- Audio Display
- Route Guidance Display (vehicles with navigation system)
Changing the Settings
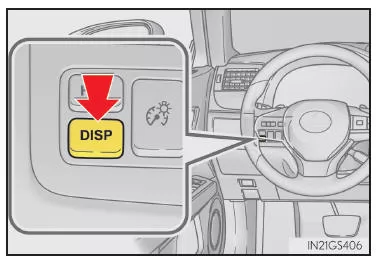
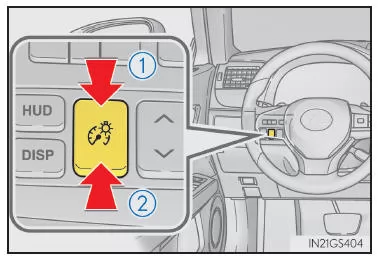
1. Press and hold the "DISP" switch until the screen changes, then repeat until the desired setting is displayed.
Adjustments can be made when the head-up display is on and the vehicle speed is below 8 km/h.
2. Press the "DISP" button to switch between on and off.
Each press switches between on and off.
If the button is not pressed for a short time, the setting mode ends automatically.
Head-Up Display
- The head-up display may appear dark and difficult to read when viewed through sunglasses, especially polarized sunglasses. Adjust the brightness of the head-up display or remove the sunglasses.
- If the head-up display is turned off, it stays off when the engine switch is set to IGNITION ON again after being switched off.
- The start-up screen is shown on the head-up display after the engine switch is set to IGNITION ON, if the head-up display switch is on.
Head-Up Tachometer
- The head-up display is linked to the tachometer in the instrument cluster.
- Using the tachometer settings in the instrument cluster, you can select whether the tachometer is shown on the head-up display and when it is shown.
When the battery is disconnected
Customized head-up display settings are reset.
Automatic Position Adjustment of the Head-up Display
When the display position has been stored, the head-up display is automatically adjusted to the stored position.
WARNING
Before Using the Head-up Display
Make sure the position and brightness of the head-up display do not impair safe driving. Incorrect settings of the display position and brightness can obstruct the driver's view and cause an accident resulting in death or serious injury.
NOTEHow to Avoid Damage to Components
- Do not place drinks near the head-up display projector. If the projector becomes wet, an electrical malfunction may occur.
- Do not place objects on the head-up display projector or attach stickers to it. This could interrupt the head-up display images.
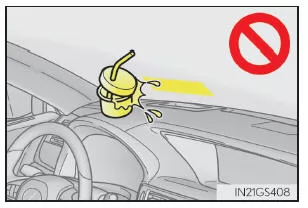
- Do not touch the inside of the head-up display projector and do not insert sharp objects or similar into the projector.
This could cause a mechanical malfunction.
The head-up display in the Lexus GS (4th generation, body code GRL1, model years 2016–2020) projects important driving information directly onto the windshield. Speed, navigation prompts and driver assistance system information are displayed clearly so you can keep your eyes on the road and improve safety.
Customizing the position and brightness provides maximum comfort. In every respect, the Lexus GS underscores its premium character.
Test yourself
A quick Lexus GS quiz: every answer comes with an explanation and a link to the manual page.