Floor shift assy (ATM)
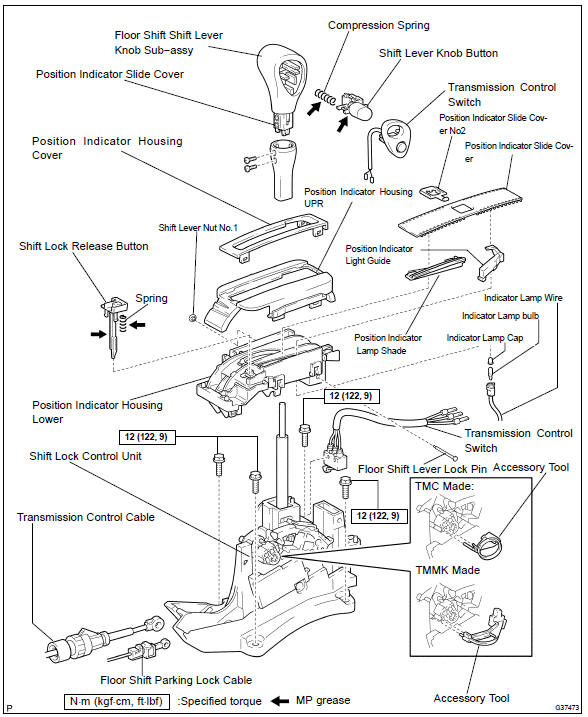
- REMOVE CONSOLE BOX CARPET
- REMOVE RR CONSOLE BOX
- REMOVE FRONT ASH RECEPTACLE ASSY (W/ ASHTRAY)
- REMOVE CONSOLE BOX FRONT
- REMOVE AIR DUCT REAR No.1
- REMOVE AIR DUCT REAR No.2
- REMOVE CONSOLE BOX DUCT No.1
- DISCONNECT FLOOR SHIFT PARKING LOCK CABLE ASSY
Disconnect the floor shift parking lock cable from the floor shift assy.
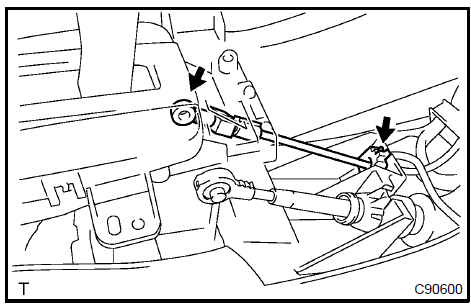
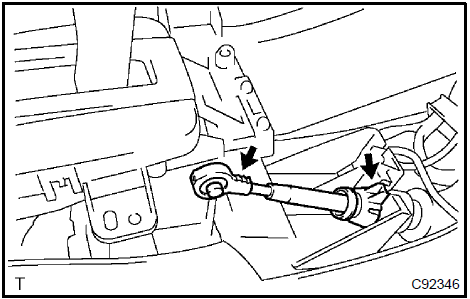
Disconnect floor shift parking lock cable assy 9. DISCONNECT TRANSMISSION CONTROL CABLE ASSY
Disconnect the floor shift cable transmission control shift from the floor shift assy.
Disconnect the shift lock control computer connector.
Disconnect the transmission control switch connector.
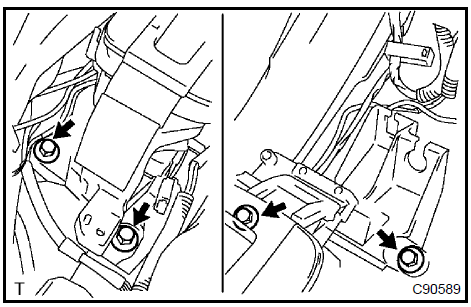
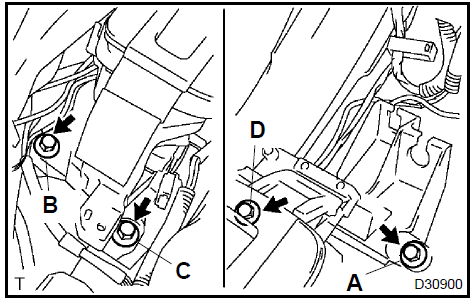
Remove the 4 bolts and transmission floor shift assy.
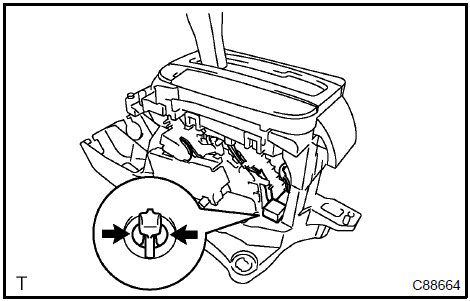
Releasing the lock by pressing the slick, disconnect the indicator lamp wire connector from the shift lever plate.
Disconnect the indicator lamp wire sub−assy from the position indicator housing.
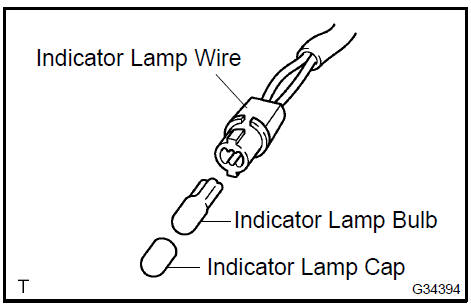
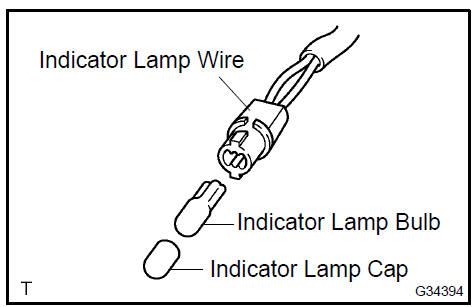
Remove the indicator lamp cap and indicator lamp bulb from the indicator lamp wire sub−assy.
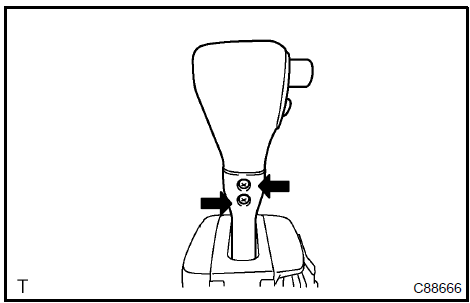
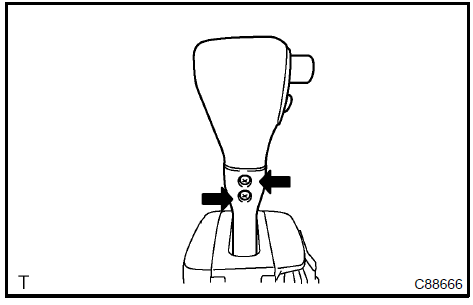
Remove the 2 screws and shift lever knob from the shift lever.
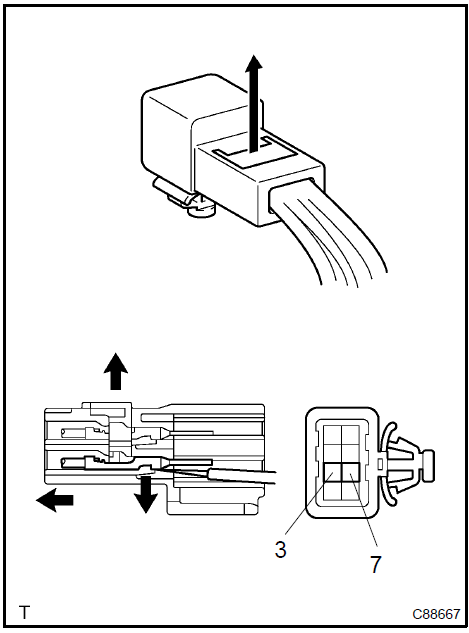
Using a screwdriver, release the stopper of the connector.
Using a small screwdriver, disengage the locking lug of the terminals 3 and 7, and pull out the terminals from the rear.
Remove the position indicator slide cover from the floor shift assy.
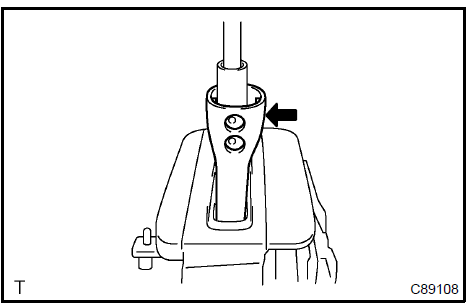 Remove position indicator slide cover 14. REMOVE TRANSMISSION CONTROL SWITCH
Using a screwdriver, remove the transmission control switch from the shift lever knob.
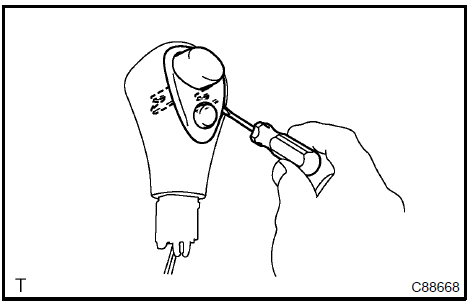
Remove transmission control switch 15. REMOVE SHIFT LEVER KNOB BUTTON
Using a screwdriver, release the claw and remove the shift lever knob button.
Remove the compression spring.
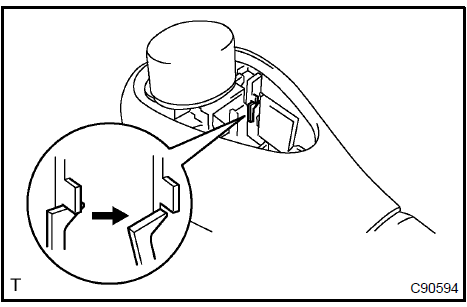
Remove shift lever knob button 16. REMOVE POSITION INDICATOR HOUSING UPPER
Using a screwdriver, disengage the 4 claws and remove the position indicator housing upper from the floor shift assy.
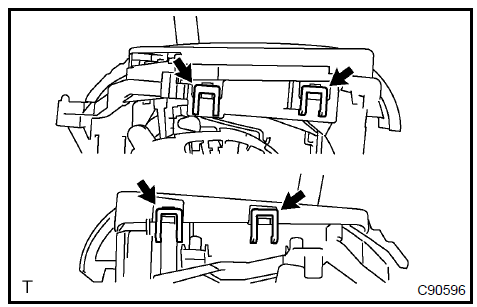
Remove position indicator housing upper 17. REMOVE POSITION INDICATOR HOUSING COVER
Using a screwdriver, remove the position indicator housing cover from the position indicator housing upper.
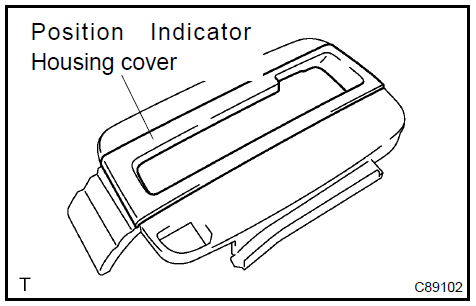
Remove position indicator housing cover 18. REMOVE POSITION INDICATOR SLIDE COVER
Remove the position indicator slide cover from the floor shift assy.
Remove the position indicator slide cover No.2 from the floor shift assy.
While pressing the 2 claws, remove the shift lock release button and shift lock release spring.
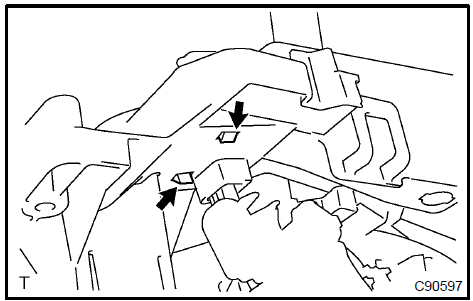
Remove position indicator slide cover 20. REMOVE POSITION INDICATOR LIGHT GUIDE
Disengage the 2 claws and remove the position indicator lamp shade from the position indicator housing lower.
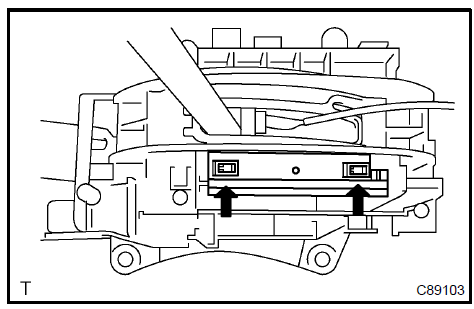
Remove the position indicator light guide from the position indicator housing lower.
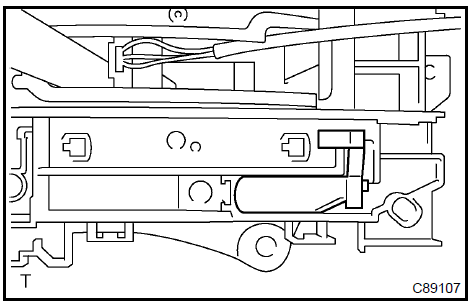
Using a screwdriver, pry up the shift lever nut No.1.
Using a screwdriver, pry up the floor shift lever lock pin.
Using a screwdriver release the 2 claws and remove the position indicator housing lower from the floor shift assy.
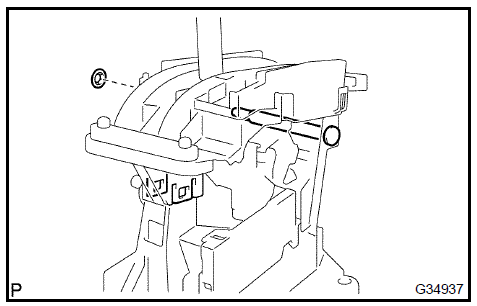
Remove position indicator housing lower 18. REMOVE POSITION INDICATOR SLIDE COVER
Remove the position indicator slide cover from the floor shift assy.
Remove the position indicator slide cover No.2 from the floor shift assy.
While pressing the 2 claws, remove the shift lock release button and shift lock release spring.

Remove shift lock release button 20. REMOVE POSITION INDICATOR LIGHT GUIDE
Disengage the 2 claws and remove the position indicator lamp shade from the position indicator housing lower.
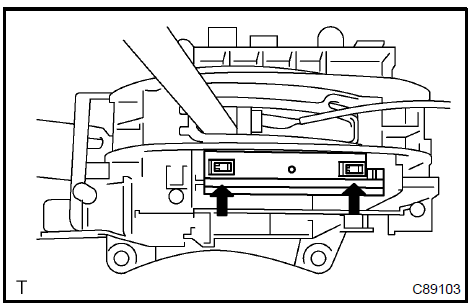
remove the position indicator light guide from the position indicator housing lower.
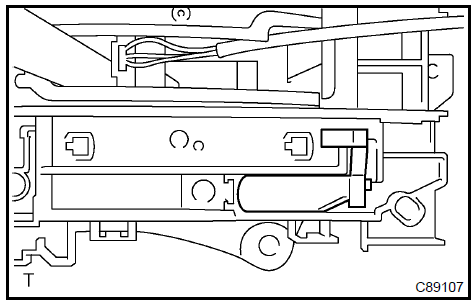
Using a screwdriver, pry up the shift lever nut No.1.
Using a screwdriver, pry up the floor shift lever lock pin.
Using a screwdriver release the 2 claws and remove the position indicator housing lower from the floor shift assy.
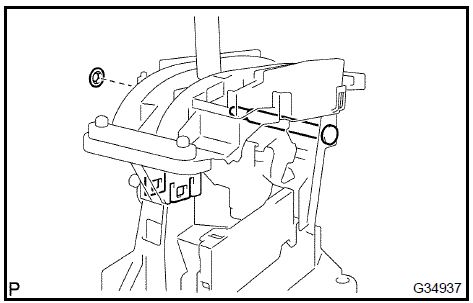
Remove position indicator housing lower 22. REMOVE TRANSMISSION CONTROL SWITCH
Using a screwdriver, remove the transmission control switch from the floor shift assy.
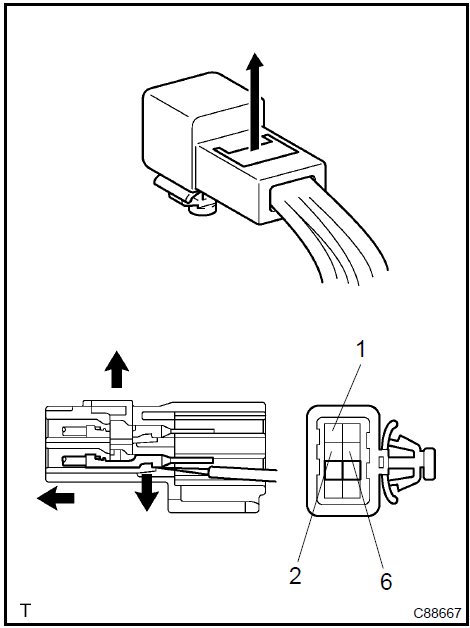
Using a screwdriver, release the stopper of the connector.
Using a small screwdriver, disengage the locking lug of the terminals 1 , 2 and 6 and pull the terminals out from the rear.
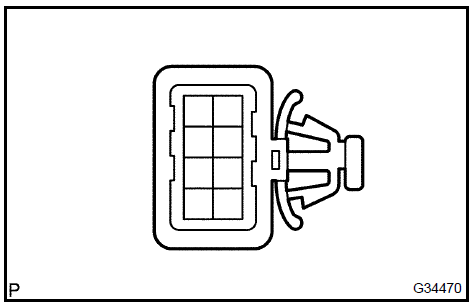
Install the 3 terminals into the indicator lamp wire connector.
Install the transmission control switch to the floor shift assy.
Install the position indicator housing lower with the shift lever lock pin and a new shift lever nut No.1.
HINT: Ensure that the claws fit tightly

Install position indicator housing lower 25. INSTALL POSITION INDICATOR LIGHT GUIDE
Install the position indicator light guide to the position indicator housing lower.
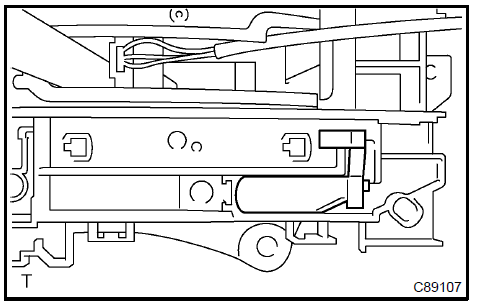
Install the position indicator lamp shade to the position indicator housing lower.
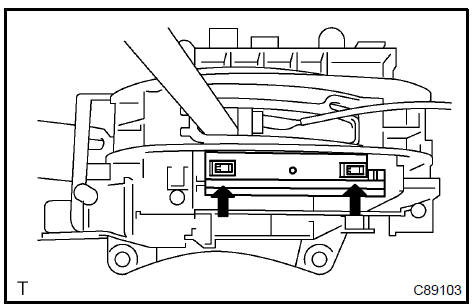
Apply MP grease to the shift lock release spring and shift lock release button.
Install the shift lock release button and shift lock release spring to the position indicator housing lower.
HINT: Ensure that the claws fit tightly.
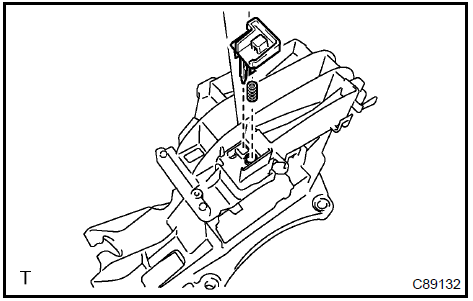 Install shift lock release button 27. INSTALL POSITION INDICATOR SLIDE COVER
Install the position indicator slide cover No.2 to the position indicator.
Install the position indicator slide cover to the floor shift assy.
Install the position indicator housing cover to the position indicator housing upper.
HINT: Ensure that the claws fit tightly.
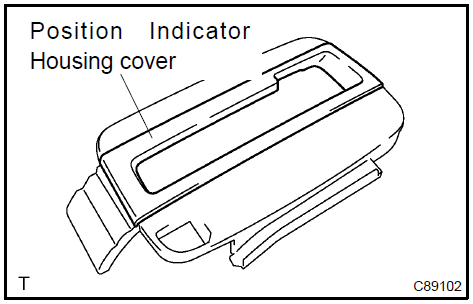
Install position indicator housing cover 29. INSTALL POSITION INDICATOR HOUSING UPPER
Install the control position indicator housing upper.
HINT: Ensure that the claws fit tightly.
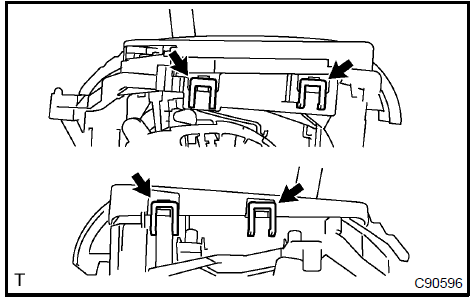
Install position indicator housing upper 30. INSTALL SHIFT LEVER KNOB BUTTON
Apply MP grease to the shift lever knob button and compression spring and install them to the shift lever knob.
HINT: Ensure that the claws fit tightly.
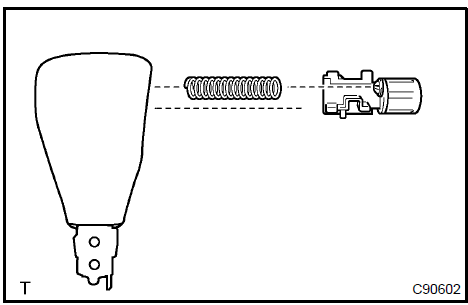
Install shift lever knob button 31. INSTALL TRANSMISSION CONTROL SWITCH
Install the transmission control switch to the shift lever knob.
HINT: Ensure that the claws fit tightly.
32. INSTALL POSITION INDICATOR SLIDE COVERInstall the position indicator slide cover to the floor shift assy.
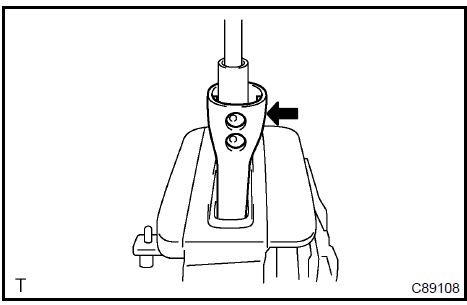
Install position indicator slide cover 33. INSTALL SHIFT LEVER KNOB SUB−ASSY
Install the 2 terminals into the indicator lamp wire connector.
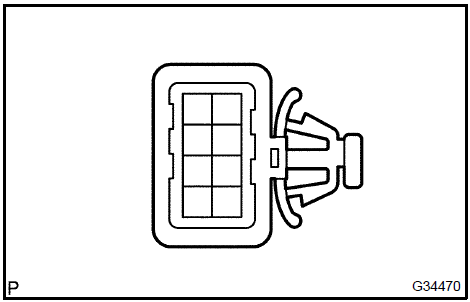
Install the shift lever knob to the shift lever with 2 screws.
Install the indicator lamp bulb and indicator lamp cap to the indicator lamp wire.
Install the indicator lamp wire to the position indicator housing lower.
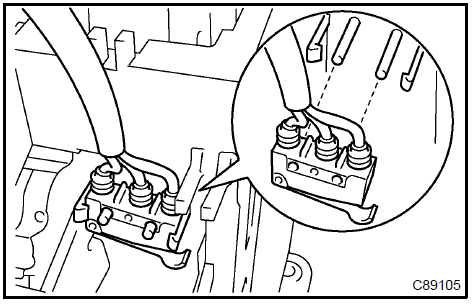
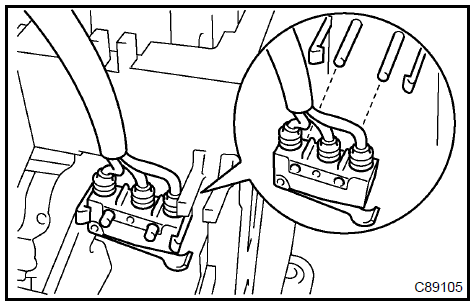
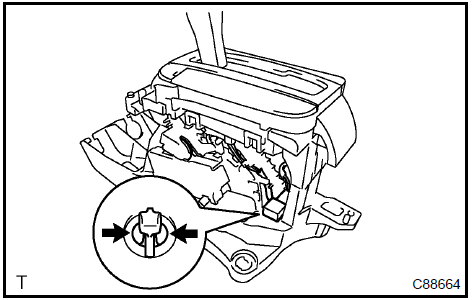
Install the indicator lamp wire harness and connector as shown in the illustration.
Install the floor shift assy to the vehicle with the 4 bolts.
Torque: 12 N·m
HINT: Tighten them in the order, A, B, C and D
Connect the transmission control switch connector.
Connect the shift lock control computer connector.
Install floor shift assy 36. CONNECT TRANSMISSION CONTROL CABLE ASSY
Connect the floor shift cable to the floor shift assy.
HINT: Install it with the uneven surface f
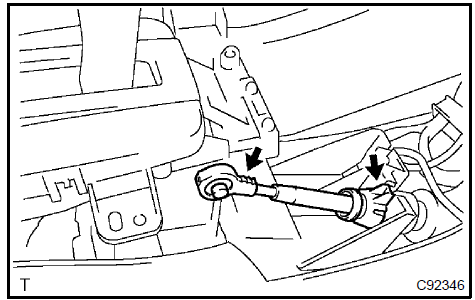
Connect transmission control cable assy 37. CONNECT FLOOR SHIFT PARKING LOCK CABLE ASSY
Set the accessory tool.
Shift the shift lever to P position and turn the ignition switch to the LOCK position. (TMC made)
Shift the shift lever to N position and turn the ignition switch to the ACC. position (TMMK made)
Set the accessory tool to the shift lock control unit assy as shown in the illustration.
HINT: Only in the case of reusing the shift lock control unit assy.
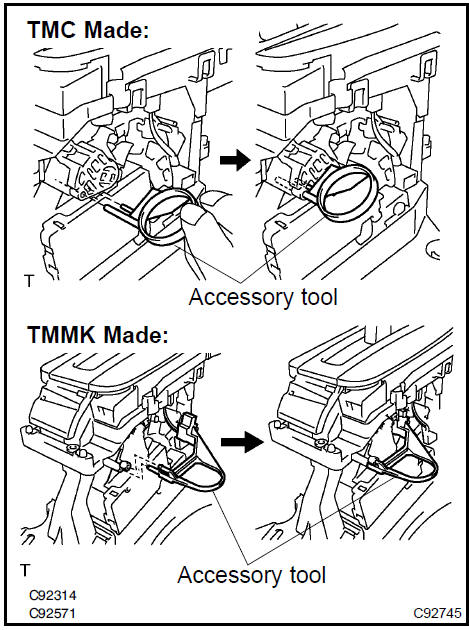
Using a screwdriver, unlock the claw of the lock key of automatic adjustment part.
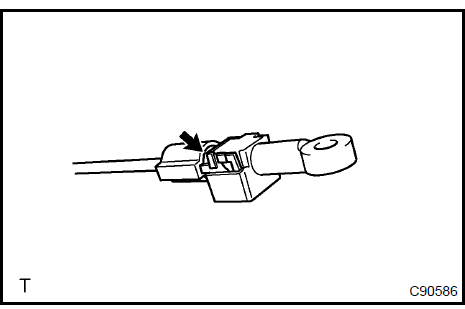
Insert the lever pin into the hole in the floor shift parking lock cable.
HINT: Ensure that the claws fit tightly.
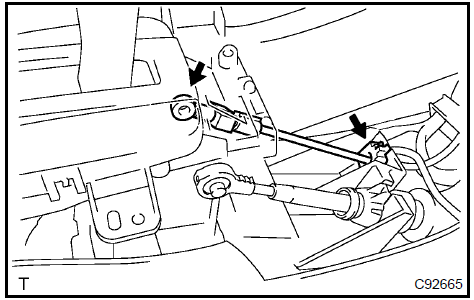
Lock the lock key.
HINT:
At this time, the shift lever should be in P position and the ignition key should be set to LOCK position. (TMC Made)
At this time, the shift lever should be in N position and the ignition key should be set to ACC position. (TMMK Made)
Remove the accessory tool.
Accessory tool parts No.: TMC Made: 33693−33010 TMMK Made: 33693−06010
- CHECK KEY INTERLOCK OPERATION
- CHECK SHIFT LOCK OPERATION
- CHECK SHIFT LOCK RELEASE BUTTON OPERATION
- INSTALL CONSOLE BOX DUCT No.1
- INSTALL AIR DUCT REAR No.2
- INSTALL AIR DUCT REAR No.1
- INSTALL CONSOLE BOX FRONT
- INSTALL FRONT ASH RECEPTACLE ASSY (W/ ASHTRAY)
- INSTALL RR CONSOLE BOX
- INSTALL CONSOLE BOX CARPET
Test yourself
A quick Toyota Camry quiz: every answer comes with an explanation and a link to the manual page.