Removal
1. DISCHARGE REFRIGERANT FROM REFRIGERATION SYSTEM
HINT: At the time of installation, first evacuate air from refrigeration system.
Then, charge the system with the refrigerant and inspect for leaks of the refrigerant.
Specified amount: 1,050 +- 50 g (37.04 +- 1.76 oz.)
2. DISCONNECT LIQUID AND SUCTION TUBES
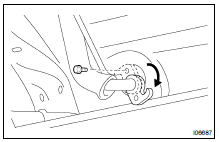
Remove the bolt and slide the plate, then disconnect both tubes.
Torque: 10 N·m
NOTICE: Cap the open fittings immediately to keep moisture or dirt out of the system.
HINT: At the time of installation, lubricate 2 new O-rings with compressor oil and install them to the tubes.
3. REMOVE REAR DOOR SCUFF PLATE RH
4. REMOVE REAR FLOOR MAT SUPPORT PLATE
5. REMOVE ROOF HEADLINING REAR TRIM
6. REMOVE QUARTER TRIM PANEL RH
7. REMOVE ROOF SIDE INNER UPPER GARNISH (BO-97 )
8. REMOVE NO. 1 COOLER AIR DUCT

(a) Remove the 3 roof headlining set clips.
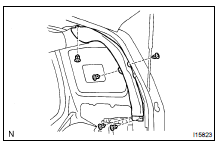
(b) Remove the 5 clips and the No. 1 cooler air duct.
9. REMOVE REAR COOLING UNIT
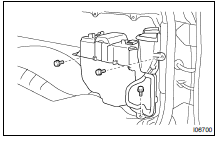
(a) Disconnect the connectors.
(b) Remove the 3 bolts and the rear cooling unit.
Test yourself
A quick Toyota Land Cruiser quiz: every answer comes with an explanation and a link to the manual page.