Disassembling and assembling the transmission
Schematic overview - Transmission
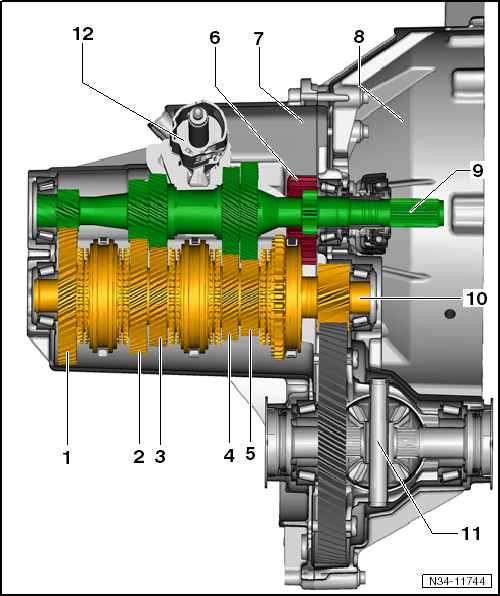
- 1st gear
- 2nd gear
- 3rd gear
- 4th gear
- 5th gear
- Reverse idler gear
- Transmission housing
- Clutch housing
- Input shaft
- Output shaft
- Differential
- shift mechanism
Assembly overview - Transmission
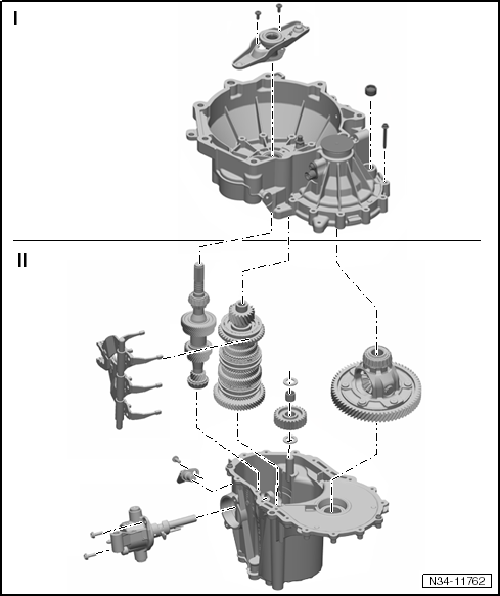
- I - "Assembly overview - Clutch housing"
- II - "Assembly overview - Shift unit"
- II - "Assembly overview - Shafts, differential, shifting"
- II - "Replacing sleeve for shift shaft"
- II - "Replacing seal ring for shift shaft"
Assembly overview - Clutch housing
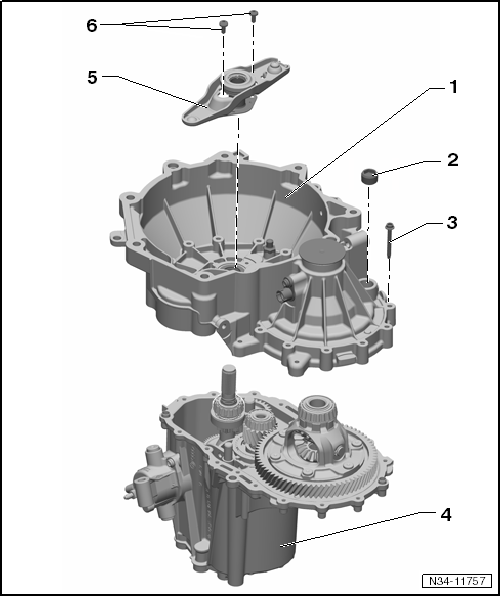
- Clutch housing
- Assignment → Electronic Parts Catalog (ETKA)
- Repair
- Oil drain plug
- 30 N·m
- Bolt
- replace after removal
- 5 N·m and continue turning 90º
- Transmission housing
- Assignment → Electronic Parts Catalog (ETKA)
- Repair
- Clutch release lever
- with guide sleeve and release bearing
- To remove and install, remove transmission
- Remove and install
- Bolt
- Remove and install
Assembly overview - Shift unit
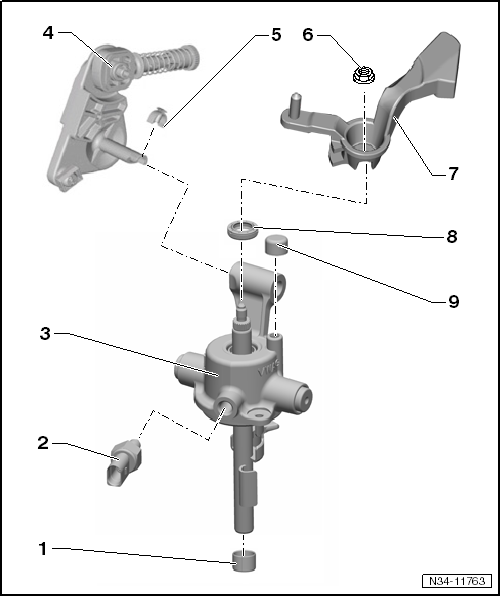
- Sleeve
- for shift shaft
- replace after removal
- Reversing light switch -F4-
- Tighten to 20 N·m
- Coat lug lightly with MoS 2 grease
- Shift shaft with shift cover
- replace together
- Deflection lever
- install
- Clip
- Hex nut
- Self-locking
- replace after removal
- 25 N·m
- Gear shift lever
- Illustration may differ from original part
- Install so that the interrupted tooth pitch matches the shift shaft
- can be replaced with shift mechanism installed
- Installation position
- Sealing ring
- Replace
- Cap
- for gearbox breather
Assembly overview - shafts, differential, shift mechanism
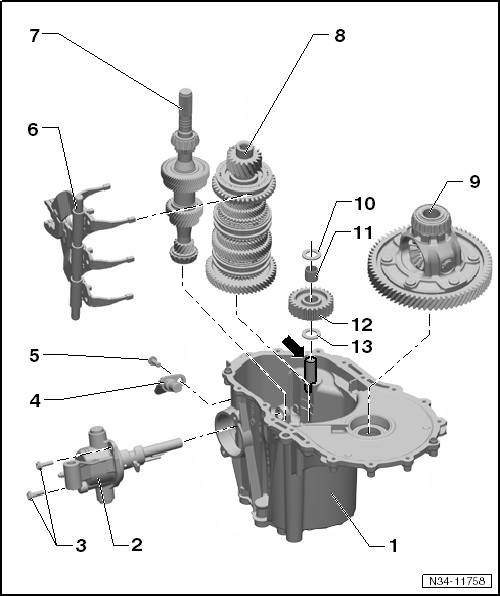
- Transmission housing
- with reverse shaft -arrow-
- Removing the reverse shaft is not necessary for removing the reverse gear
- Repair gearbox housing
- Assignment → Electronic Parts Catalog (ETKA)
- Shift shaft with shift cover
- (shift unit)
- Repair
- Bolt
- Self-locking
- replace after removal
- 5 N·m and continue turning 90º
- Transmission neutral position sensor -G701-
- installed depending on production status
- Assignment → Electronic Parts Catalog (ETKA)
- Bolt
- 6 N·m
- shift mechanism
- (shift forks)
- Input shaft
- disassemble and assemble
- Output shaft
- disassemble and assemble
- Differential
- disassemble and assemble
- Thrust washer
- Needle bearing
- Reverse idler gear
- Thrust washer
Replace bushing for shift shaft
Required Special Tools, Test and Measuring Equipment and Auxiliary Items
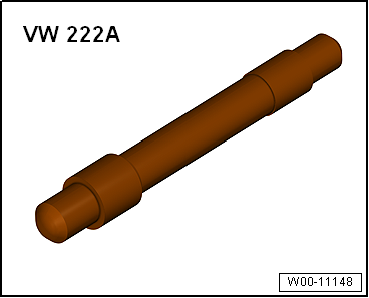
- Mandrel -VW 222 A-
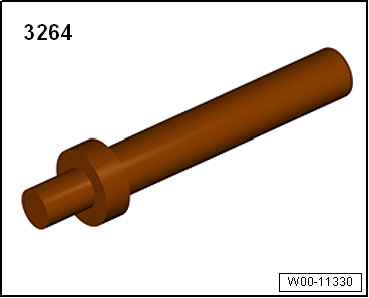
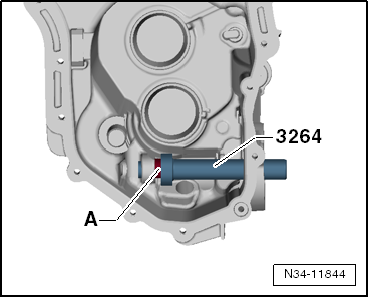
- Drift punch -3264-
- Remove shift shaft with shift cover, input shaft, output shaft, differential and shift actuation
Drive out bushing -A- for shift shaft
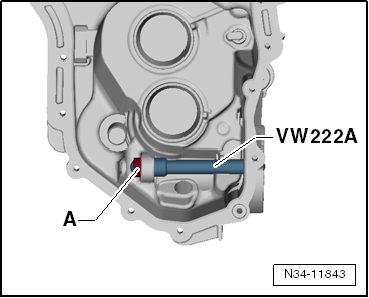
Drive in bushing -A- for shift shaft up to stop
- Assemble gearbox
Disassembling and assembling the transmission
Remove and install clutch housing, differential, shift shaft with shift cover, reverse gear, input shaft, output shaft and shift forks
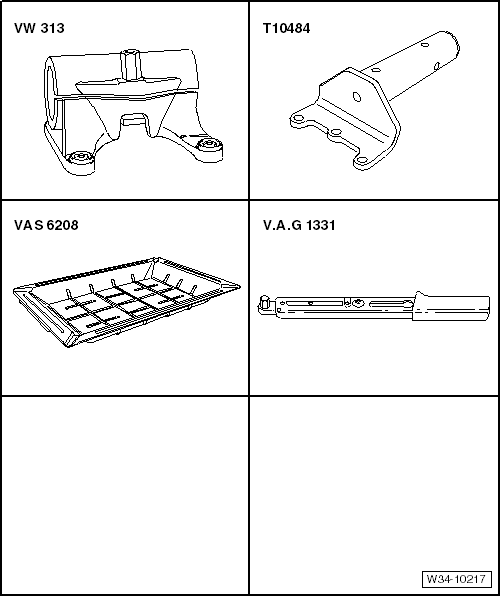
Required Special Tools, Test and Measuring Equipment and Auxiliary Items
- Clamping block -VW 313-
- Gearbox holder -T10484-
- Torque Wrench -V.A.G 1331-
- Drip pan for workshop crane -VAS 6208-
Disassemble gearbox
- Secure gearbox to gearbox holder.
- Place drain pan under gearbox.
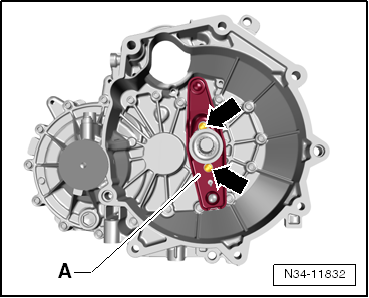
- Remove clutch release lever -A- together with release bearing and guide sleeve -arrows-.
- Unscrew mounting bolts of clutch housing from gearbox housing.
- Carefully pry clutch housing off alternately at the housing ribs protruding all around; do not damage sealing surfaces.
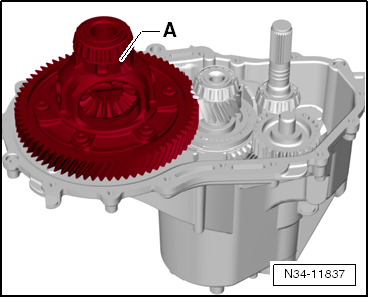
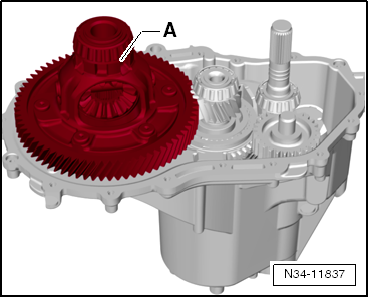
- Remove differential -A- from gearbox housing.
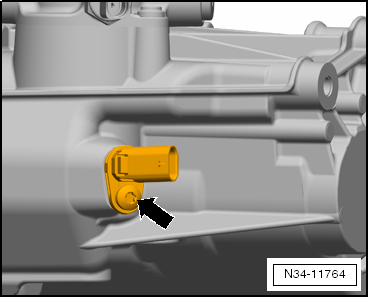
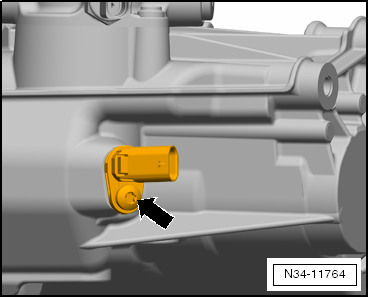
- If fitted: remove gearbox neutral position sensor -G701- -arrow-.
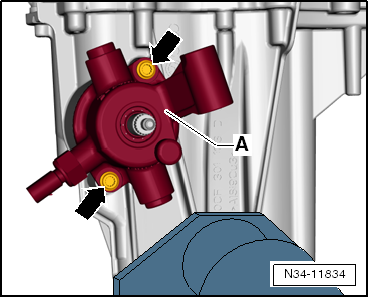
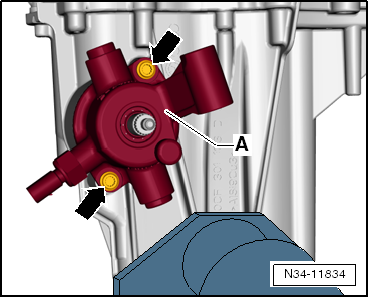
- Remove shift shaft with shift cover -A-. To do so, bring shift shaft to neutral position. Then unscrew bolts -arrows- and pull shift shaft out of gearbox housing.
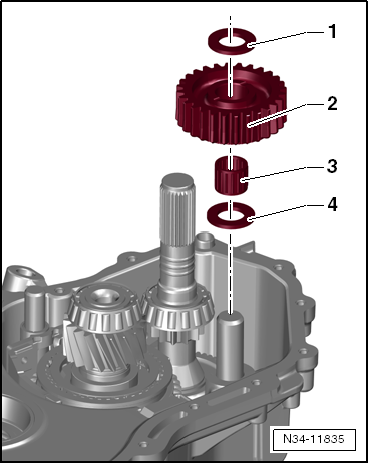
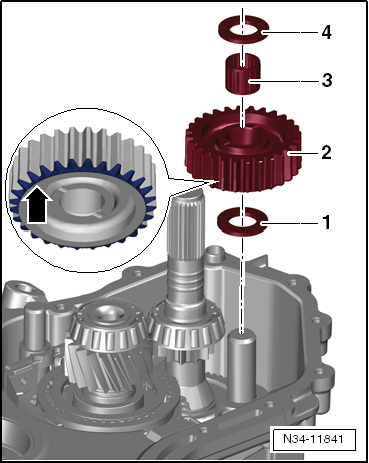
- Remove thrust washer -1-, reverse gear -2-, roller bearing -3- and thrust washer -4- one after another.

Note
To remove reverse gear, lift input shaft slightly and press it away from reverse gear.
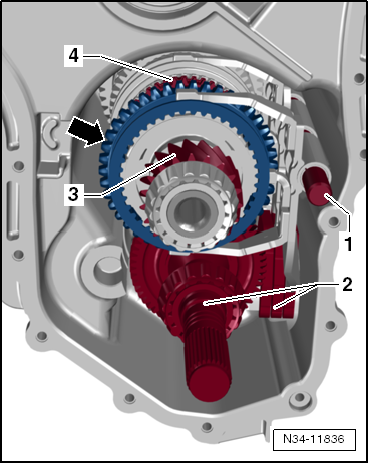
Input shaft and output shaft with shift forks are removed together from gearbox housing as follows:
- Swivel gearbox housing in assembly stand as shown.
- Pull out shaft -1- for shift forks slightly.
- Right hand grips input shaft and shift forks -2-.
- With left hand, pull output shaft out at toothing -3-.
- Later grip output shaft in area -4- behind sliding sleeve -arrow-.

Note
Do not press off sliding sleeve -arrow-. Detent pieces will be pushed out and spring away uncontrolled.
Assemble gearbox
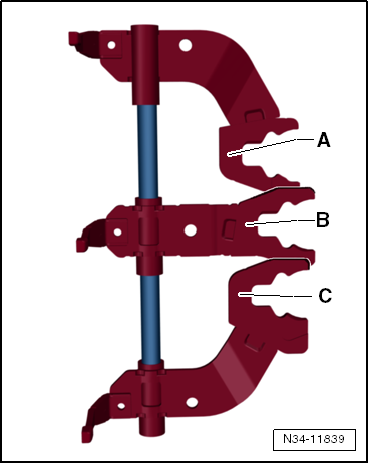
- Slide shift forks -A-, -B- and -C- onto shaft.
Installation position:
- Arrange shift fork 1st/2nd gear -A- below shift fork 3rd/4th gear -B-.
- Arrange shift fork 5th/R gear -C- above shift fork 3rd/4th gear -B-.
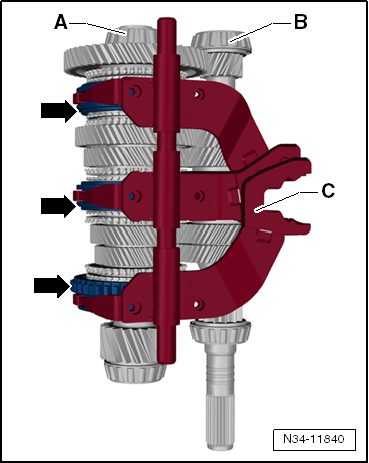
- Complete output shaft -A- and input shaft -B- with shift forks -C-.
- The individual shift forks are located in the sliding sleeves -arrows-.
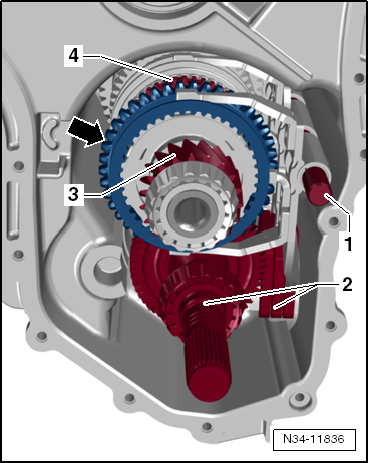
Input shaft and output shaft with shift forks are installed together into gearbox housing as follows:
- Swivel gearbox housing in assembly stand as shown.
- Right hand grips input shaft and shift forks -2-.
- With left hand, grip output shaft in area -4- behind sliding sleeve -arrow-.

Note
Do not press off sliding sleeve -arrow-. Detent pieces will be pushed out and spring away uncontrolled.
Later grip output shaft at toothing -3-.
- Set gearbox housing upright again in assembly stand.
- Press input shaft, output shaft and shaft -1- for shift forks into their seats.
- Fit thrust washer -1-, reverse gear -2-, roller bearing -3- and thrust washer -4- one after another.
Installed position of reverse gear:
- The chamfer -arrow- points toward gearbox housing.
- Bring shift rails to neutral position.
- Apply sealant -AMV 188 200- evenly to sealing surface of shift cover.
- Install shift shaft with shift cover -A-. Then tighten bolts -arrows- to specified torque.
- Gearbox for vehicles with start-stop system: install gearbox neutral position sensor -G701- -arrow- and tighten mounting bolt to specified torque.
- Fit differential -A-.
- Apply sealant -AMV 188 200- evenly to sealing surface for clutch housing.
- Bolt clutch housing to gearbox housing.
- Install clutch release lever together with release bearing and guide sleeve.
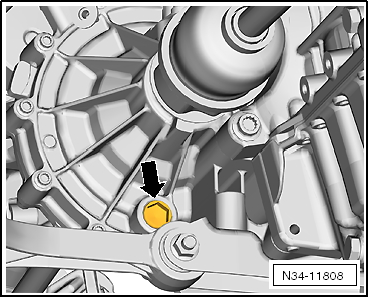
- Tighten drain plug -arrow-. (Shown here with gearbox installed.)
Tightening torques
- "Assembly overview - shafts, differential, shift mechanism"
- Gearbox housing to clutch housing "Assembly overview - clutch housing"