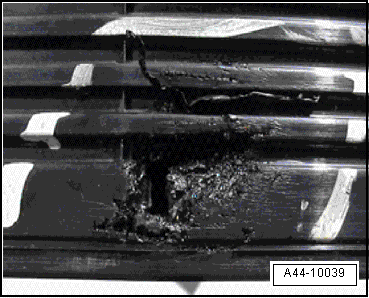
Information on wheels
Wheel construction
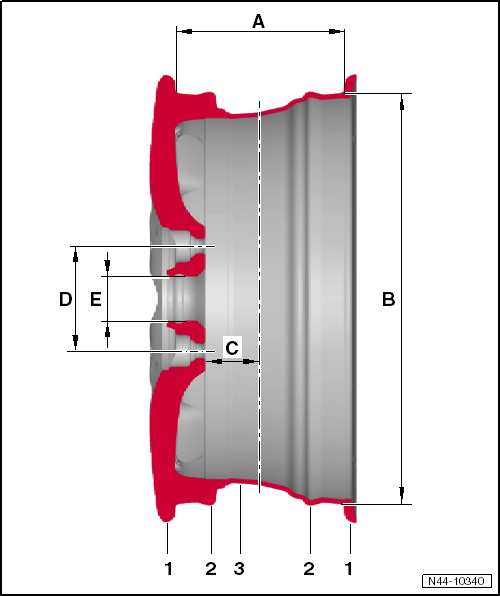
- Rim flange
- Stop for the lateral tyre bead
- Hump (H2) on both rim shoulders
- prevents the tyre from slipping off the rim shoulder during hard cornering
- raised hump (EH2) required when using tyres with run-flat properties
- Drop centre
- Makes the tyre easier to fit
- Rim width
- Distance between the tyre seating surfaces of the two rim flanges
- Dimension given in inches
- Rim diameter
- Distance between the tyre seating surfaces of the opposite tyre shoulders
- Dimension given in inches
- Offset (ET)
- Distance between the vertical wheel centre line and the inner wheel mounting surface
- Dimension given in mm
- Bolt circle diameter (PCD)
- Pitch circle diameter (bolt circle) on which the wheel bolt holes are located
- Dimension given in mm
- Center bore
- serves as centering
- Dimension given in mm
Identification
The rim has several markings. Identification markings for the rim, shown in the following example:
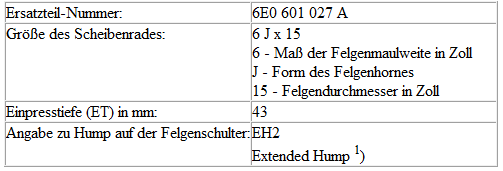
1) Raised round hump on both rim flanges. It keeps the tyre from slipping off the rim flange when running flat. Rims with EH2 are only required when run-flat tyres are fitted!
Multi-piece wheels
Multi-piece wheels consist of several components.
The main components are the rim and the wheel disc. These components are bolted together with special bolts and a special procedure. This ensures function, leak-tightness, safety and exact concentricity of the wheel. Workshop equipment and workshop conditions cannot guarantee these important requirements.

WARNING!
Do not disassemble or repair multi-piece wheels!
Care and treatment of alloy wheels
Regular care is required to keep the decorative appearance of the alloy wheels over a long period.
Road salt and brake dust must be thoroughly washed off at least every two weeks, otherwise the paint of the alloy wheel will be attacked.
Cleaning agents
Suitable cleaning agents are:
- Water or water and soft soap
- Water and vinegar essence
- Alloy wheel cleaner without acids or harsh solvents
Do not exceed the contact times of the cleaning agents.
The shorter the specified contact time, the harsher and more aggressive the cleaning agent.
Paint damage
If the paint is damaged, e.g. by stone chipping, the paint damage must be repaired immediately.
Removing adhesive residue from adhesive balance weights on alloy wheels
- Harsh solvents and acids attack the paint of alloy wheels; the wheel surface becomes dull and milky. For this reason, these agents must not be used.
- To remove adhesive residue from alloy wheels, special alloy wheel cleaners or white spirit can be used. Do not exceed the contact time of the cleaning agent.
- After cleaning or removing adhesive residue from the wheels, rinse them again with water.
Refinishing alloy wheels

WARNING!
- Repairing a damaged rim or disc by heating, welding, or adding or removing material is strictly prohibited.
- Damaged or deformed rims, as well as rims with cracked or deformed bolt holes, must not be repaired.
- Refinishing may only be carried out with the approved and specified original paint materials.
- After wheel refinishing, no warranty claims can be made against the manufacturer.
Rims with cracks in their edges must not be repaired and must be replaced immediately.
Machining by material removal, heat input and weld build-up of any kind are not permitted.
Material reshaping is not permitted.
Radial and lateral runout before refinishing must not exceed the manufacturing tolerance of 0.8 mm.
Only cast alloy wheels may be filled. These wheels are marked with the material designation AlSi xx on the inside.
Forged wheels may only be painted.
Refinishing is limited to painted surfaces.
Diamond-cut rims that only have a clear coat are excluded from repair.
Only surface damage on the visible side of the wheel (design face) may be refinished.
The damage depth must not exceed 1 mm for refinishing.
Filler may only be applied up to 50 mm from the outer rim flange.
Removing and installing the hub cover for alloy wheels with open bolt-on fastening
Removing
- Wheel removed

Note
Hold cover cap -1- when driving it out with the hammer.
Installing
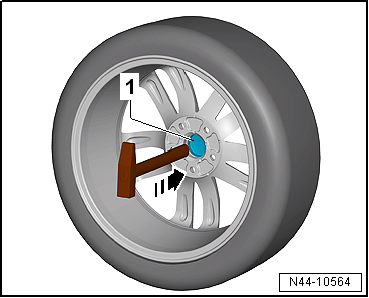
- Hold cover cap -1- flush against the opening of the aluminium rim.
- Align the Volkswagen logo of the cover cap to the valve so that the logo is centered above valve -2-.
- Apply light pressure by hand to secure the cover cap in the opening of the aluminium rim.
- Check that the cover cap has no play and sits correctly in the aluminium rim.

Replacing trim elements
Replacing trim elements, bonded trim elements
Required Special Tools, Test and Measuring Equipment and Auxiliary Items
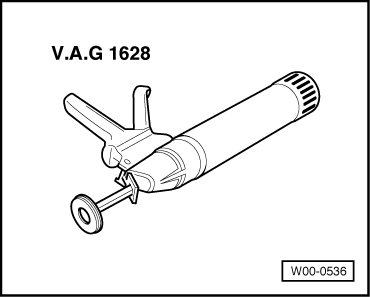
- Manual cartridge gun -V.A.G 1628-
- Release Wedge -3409-

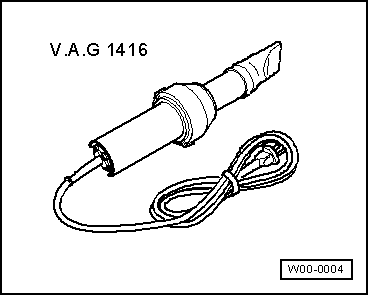
- Hot air blower -V.A.G 1416-
Materials
- 1K window adhesive
-DH 009 100 A2-
- Silicone remover
-LSE 020 100 A3-
Removing trim element

Note
The trim element cannot be removed without damage.
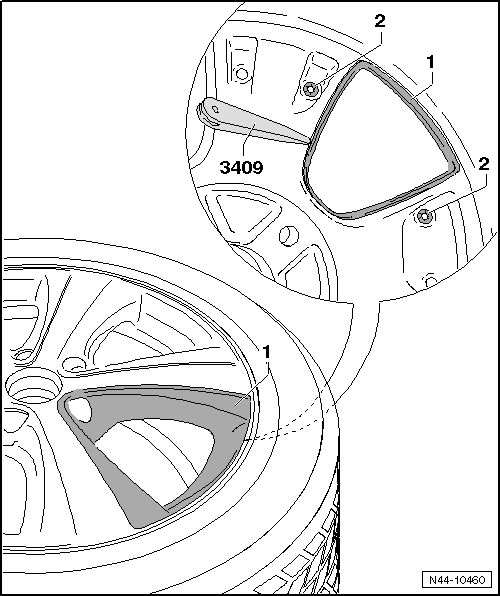
- On the inside of the alloy wheel, loosen clamping washers -2-.
- Heat trim element -1- from the outside with hot air blower -V.A.G 1416-.

Caution!
Do not overheat the tyre and alloy wheel.
- Using release wedge -3409-, release trim element -1- on the inside of the alloy wheel.
- From the outside, grip one corner and pull trim element -1- firmly off the alloy wheel.

Note
- Cut off the adhesive dots of the PUR adhesive on the alloy wheel.
- The remaining material serves as an adhesion base for the new trim element.
- The new trim element can then be installed immediately.
Installing trim element
These alloy wheels are fitted with replaceable trim elements. Observe the following notes when fitting.
- Make sure the bonding areas on the alloy wheel and trim element are free of dust and grease.
- Clean the bonding areas with silicone remover -LSE 020 100 A3-.

- Apply 1K window adhesive -DH 009 100 A2- to the bonding surface -arrows- with the manual cartridge gun -V.A.G 1628-.
- Adhesive dot: length = approx. 25 mm and diameter = approx. 10 mm
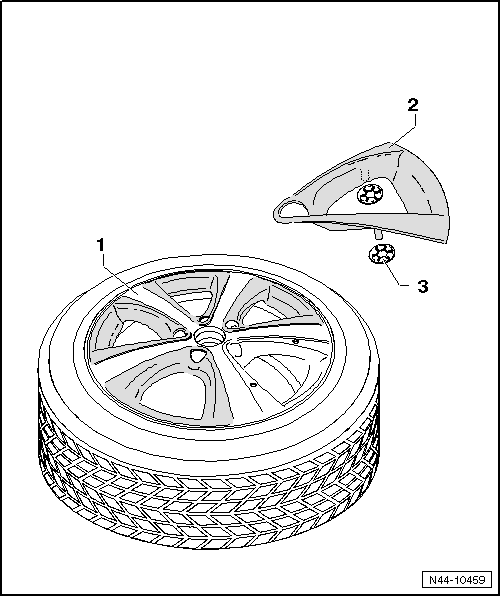
- Press trim element -2- into alloy wheel -1- with firm pressure.
- Secure trim element -2- on the inside of the alloy wheel with clamping washers -3-.
Minimum curing time 3 hours at a room temperature of at least 15 ºC.

WARNING!
Alloy wheel must be rebalanced.
Replacing trim elements, bolted trim elements
These disc wheels are fitted with replaceable trim elements. Observe the following notes during installation.
- Clean the thread in the disc wheel before screwing in the new bolts.
- Always use new bolts!
- Trim element
- Hex socket bolts
Tightening torque for the self-locking hex socket bolts: 5 N·m

Removing and installing valve
Removing and installing valve, valve explanations
1. Valve body
- Valve body
- Valve insert
- Valve cap
The rubber valve for tubeless tires is designed to seal airtight in the wheel hole. The elastic material of the rubber body presses firmly into the bore of the rim.
On screw-in metal snap-in valves, a rubber seal provides the seal to the rim. The edge surfaces of the valve hole are sealing zones. These must therefore be free of rust, dirt and damage.
2. Valve insert
The valve insert has the most important function in the valve. It seals and allows the air pressure to be adjusted. The small disc seal on the valve insert can only perform its function if it is free of contamination, dirt and moisture. Air filling systems must be free of water and oil!
3. Valve cap
A valve cap must always be screwed onto the valves. It prevents dirt from entering the valve. Any dirt in the valve would reach the seal of the valve disc when the tire is inflated and cause leaks.
The valve must be replaced every time a tire is remounted.
Operating the vehicle with valves without valve caps risks dirt entering. This leads to gradual air loss and can thus lead to tire failure:
- Carcass separating from the rubber
- wide circumferential indentations in the bead area
- torn-out tread or torn-out tread block

WARNING!
An airtight seal is only ensured with a firmly seated valve cap.
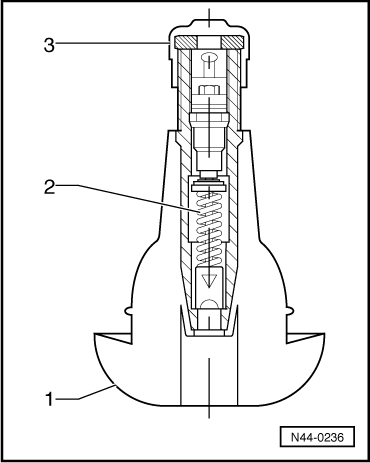
Removing and installing valve, rubber valve
- Make sure that the rim is clean.
- Use the -VAS 6459--1- to fit a new tyre valve.
- Unscrew the valve core.
- Inflate the tyre to approx. 3...4 bar; the tyre bead must audibly slide over the safety hump of the rim.
- Screw in the valve core.
- Check the tire pressure and adjust it to the specified pressure.
- Balance the wheel.
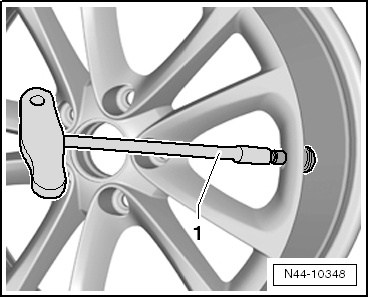
Removing and installing valve, metal valve
Required Special Tools, Test and Measuring Equipment and Auxiliary Items
- Torque wrench -V.A.G 1410-
Carry out the following work:
Removing
- Remove the tire pressure sensor.

- Unscrew nut -1- from the metal valve.
- Counterhold the metal valve with a counterhold tool (for example a 2 mm twist drill) -arrow-.
Installing

Caution!
Tighten the nut for the metal valve only to the specified tightening torque. Retightening is not permitted, as this damages the seal.

- Tighten nut -1- on the metal valve.
- Counterhold the metal valve with a counterhold tool (for example a 2 mm twist drill) -arrow-.
- Install the tire pressure sensor.
Tightening torques
- "Assembly overview - Tire pressure sensor, tire pressure sensor without valve"

PAX run-flat system
PAX run-flat system, support ring
Dimensions
The most important dimensions at a glance:
Designations
Example: 90-500(35) CLI A 1 876107
- 90 - Nominal width in millimeters
- 500 - Nominal diameter in millimeters
- 35 - Height in millimeters
- CLI - Support ring variant: CLI - clip-in support ring / FL - standard support ring
- A - Construction type index, asymmetrical. Indicates wheels with run-flat capability (PAX)
- 1 - Support ring variant
- 876107 - CAI, international article code
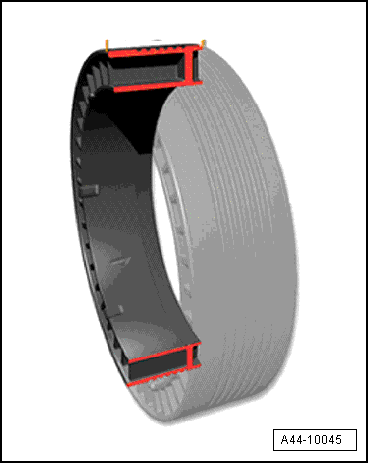
PAX run-flat system, dimensions and designations for PAX rims
Example: 235 x 500 A - 5 - 41
- 235 - Nominal width in millimeters
- x - One-piece
- 500 - Nominal diameter of the standardized rim seat in millimeters
- A - Asymmetrical
- 5 - Number of bolt holes
- 41 - Offset in millimeters
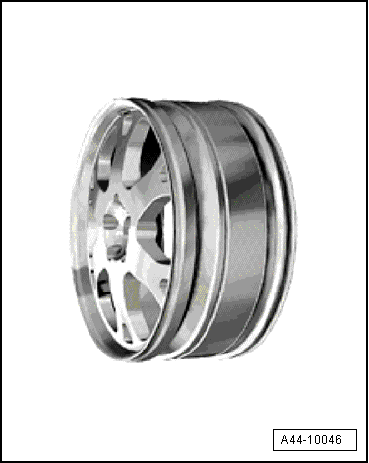
PAX run-flat system, inspecting support ring
As with the tire, the support ring does not necessarily have to be replaced after every flat-tire drive.
The support ring must be replaced if the following damage is found:
- chipping or missing parts
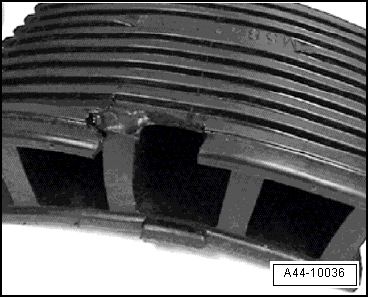
- cracks in the partition walls
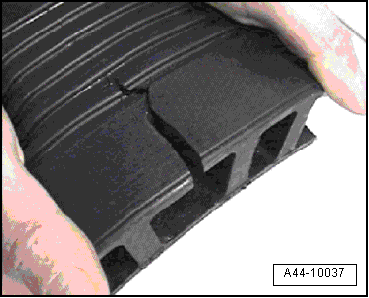
- puncture injuries and holes
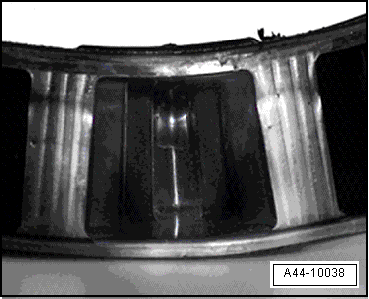
- blistering and discoloration caused by overheating
Tire repairs

Note
- Patch repairs using a cut-in patch must not be carried out on tires with run-flat capability (PAX).
- Tire sealant sprays must not be used on tires with run-flat capability (PAX), as these products are not compatible with the gel in the tire.