Engine air cleaner element (for gasoline engine vehicles)
Replace the air cleaner element at the intervals specified in the maintenance schedule, which depends on the vehicle's age and mileage.
Cleaning
For dry-type elements only
Clean the air cleaner element at the intervals specified in the maintenance schedule.
To clean the air cleaner element, blow compressed air through it in the direction opposite to the airflow into the engine.
If you do not have a compressor, have an authorized Honda dealer perform this operation.
Follow all instructions for removing and installing the air cleaner element.
Replacement procedure
Vehicles with 2.0L engine
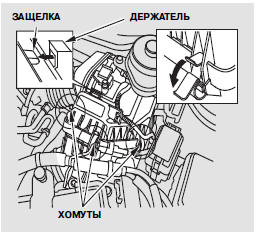
The air cleaner element is located in the air cleaner housing in the engine compartment. To replace it, proceed as follows:
1. Release the three clips and remove the air cleaner cover.
Release the two latches of the air cleaner housing cover.

2. Remove the old air cleaner element from the air cleaner housing.
3. Thoroughly wipe the inside of the air cleaner housing with a damp cloth.
4. Install a new air cleaner element in the air cleaner housing.
Make sure the latches are securely engaged.
5. Install the air cleaner cover and secure it with the clips. Make sure they are securely fastened.
Vehicles with 2.4-liter engine

The air cleaner element is located in the air cleaner housing in the engine compartment.
To replace it, proceed as follows:
1. Release the five clips and remove the air cleaner cover.
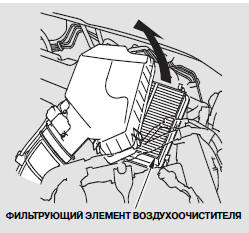
2. Remove the old air cleaner element from the air cleaner housing.
3. Thoroughly wipe the inside of the air cleaner housing with a damp cloth.
4. Install a new air cleaner element in the air cleaner housing.
5. Install the air cleaner cover and secure it with the five clips.
Make sure they are securely fastened.
Test yourself
A quick Honda CR-V quiz: every answer comes with an explanation and a link to the manual page.