Front Stabilizer Bar
Removal
PROCEDURE
1. Remove the front wheel.
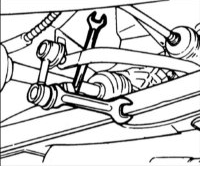
2. Remove the stabilizer link.
3. Remove the stabilizer bar bracket and bushing
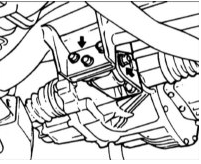
4. Remove the rear engine mount.
5. Remove the stabilizer bar.
Inspection
PROCEDURE
1. Check the stabilizer bar for loss of elasticity and damage.
2. Check the condition of all bolts.
3. Check the stabilizer link dust boot for cracks or damage.
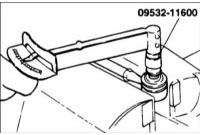
4. Check the torque required to turn the ball joint stud of the stabilizer link.
If the dust boot is cracked, replace it and add grease to the joint.
Rock the ball joint stud of the stabilizer link back and forth several times.
Torque: 1.7–3.2 N·m
If the torque exceeds the specified value, replace the stabilizer link.
If the torque is significantly lower than the specified value, the ball joint can be reused if it does not bind and has no excessive play.
Installation
PROCEDURE
1. Install the bushing on the stabilizer bar.
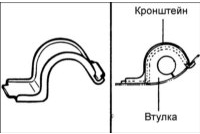
2. Align the bracket with the bushing. Make sure the bracket fully covers the bushing.
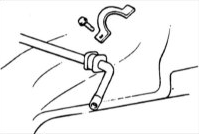
3. Temporarily secure the bushing bracket and install the bushing on the other side of the stabilizer bar.
4. Hold the stabilizer link with a 14 mm open-end wrench and install the new self-locking nut.
Test yourself
A quick Hyundai Accent quiz: every answer comes with an explanation and a link to the manual page.