Engine Mechanical System
Drive Belt
In this manual: Engine Mechanical System
3steps
~18min
2/5difficulty
Done 0 of 3
Repair Procedures
Removal and Installation
|

- Remove the engine cover. (Refer to Engine and Transaxle Assembly - Engine Cover)
- To loosen the tension, turn the drive belt tensioner counterclockwise, then remove the drive belt (A).
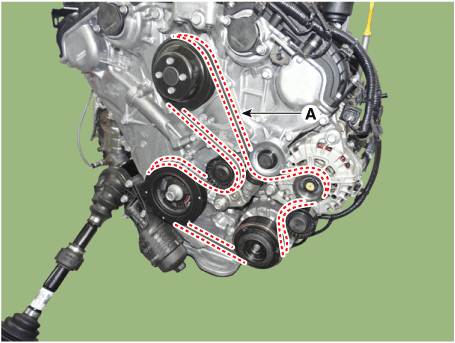

- Install the drive belt in the following order: Crankshaft damper pulley → A/C compressor pulley → Idler pulley → Generator pulley → Tensioner pulley → Water pump pulley → Automatic belt tensioner pulley. Turn the automatic tensioner arm boss (A) counterclockwise with a wrench. After installing the drive belt on the automatic tensioner pulley, slowly release the tensioner arm.
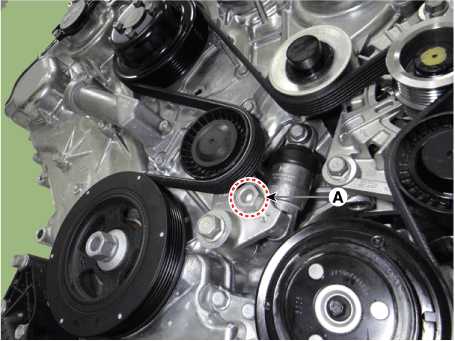
- Install the drive belt in the following order: Crankshaft damper pulley → A/C compressor pulley → Idler pulley → Generator pulley → Tensioner pulley → Water pump pulley → Automatic belt tensioner pulley. Turn the automatic tensioner arm boss (A) counterclockwise with a wrench. After installing the drive belt on the automatic tensioner pulley, slowly release the tensioner arm.
- Install in the reverse order of removal.
Inspection
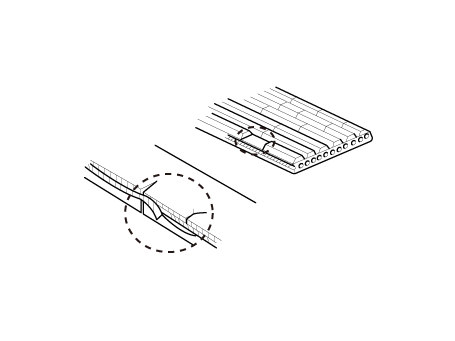
Inspect the belt for maintenance and the V-ribbed section for abnormal wear. Replace if necessary.
|

|

Test yourself
A quick Hyundai Palisade quiz: every answer comes with an explanation and a link to the manual page.
Was this page helpful?