Be careful not to damage parts located under the vehicle (floor under cover, fuel filter, fuel tank, and canister) when lifting the vehicle with a lift. (Refer to General Information - Jack Lifting Points and Support Points)
Set the No. 1 cylinder to TDC/compression.
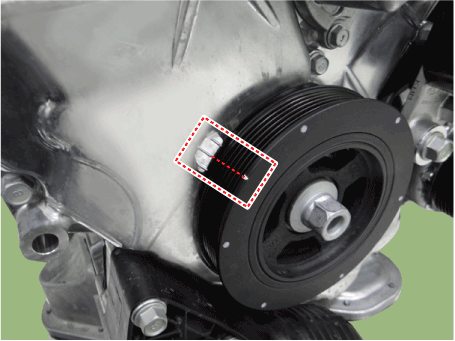
Turn the crankshaft damper pulley clockwise and align its groove with the "T" alignment mark on the lower timing chain cover.
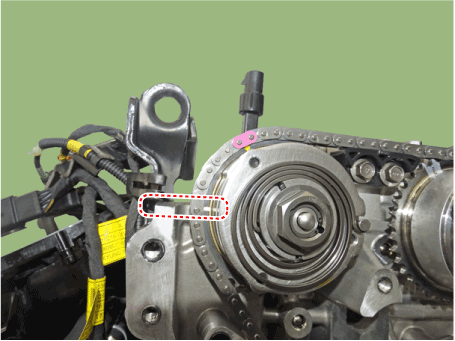
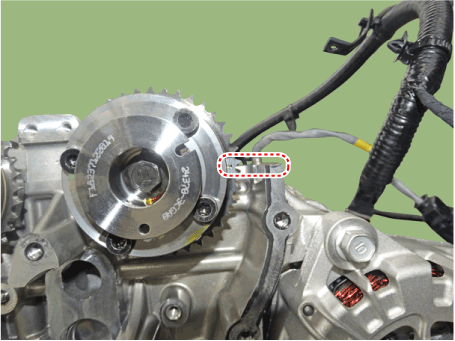
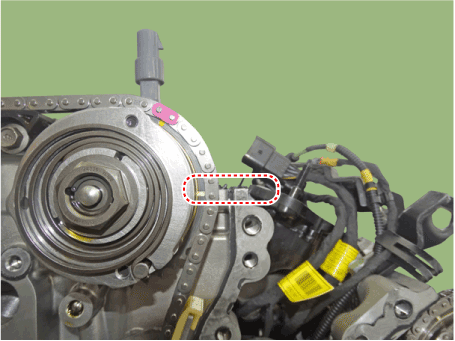
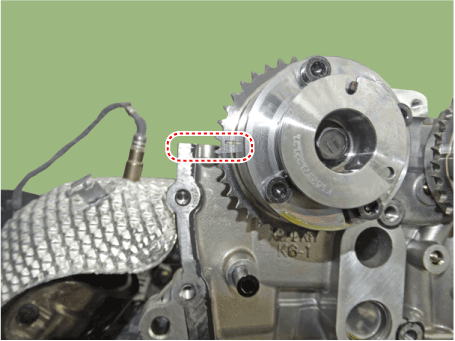
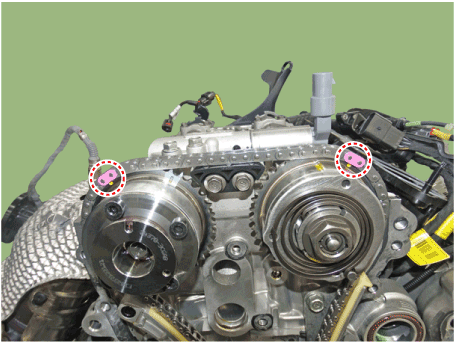
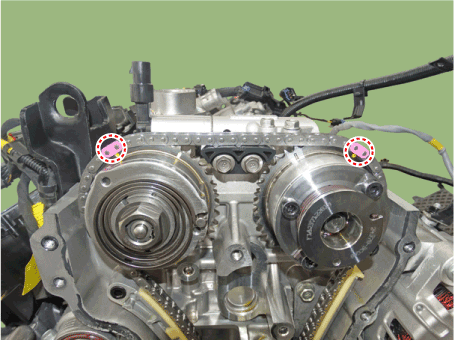
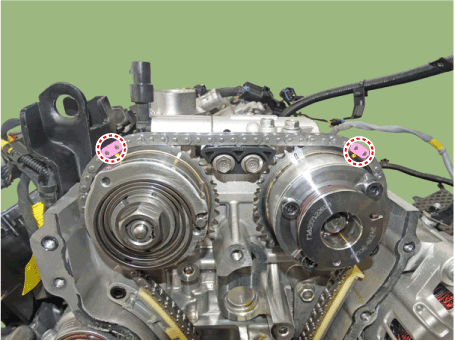
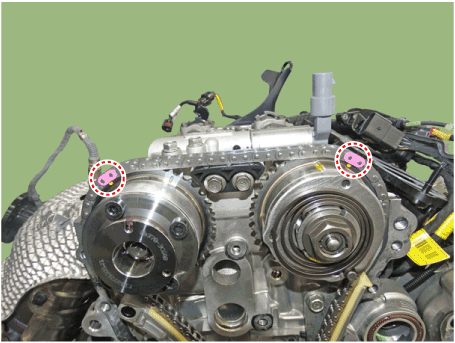
Check that the camshaft sprocket mark is in a straight line with the cylinder head surface, as shown in the illustration. If not, turn the crankshaft clockwise one full turn (360°). [LH exhaust][LH exhaust][intake RH][RH exhaust]
Do not turn the engine counterclockwise.
Remove the timing chain cover. (Refer to Valve Timing - Timing Chain Cover)
Be careful not to damage the mating surfaces of the cylinder block, cylinder head and timing chain cover.
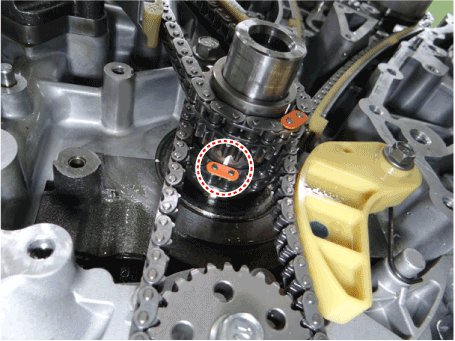
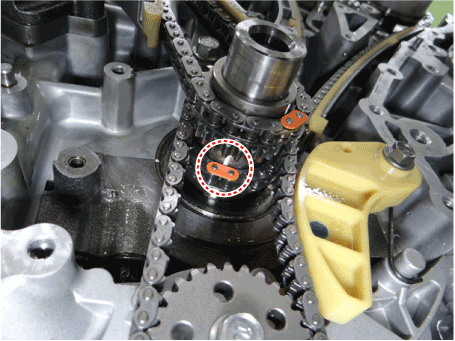
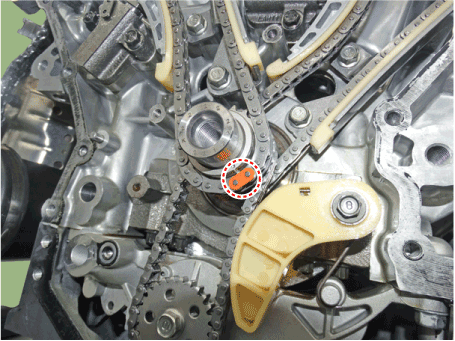
Before removing the timing chain, mark the RH/LH timing chain and sprockets with location identification, because the TDC identification mark on the chain may be worn away.
[RH][LH]
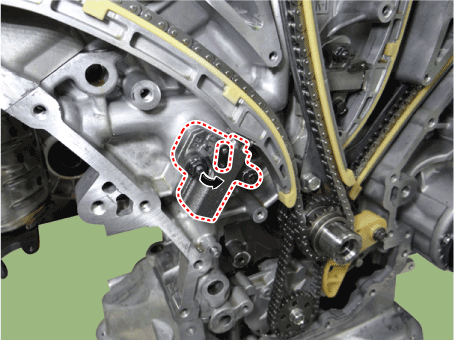
Release the ratchet by pulling the lever down with a thin rod. Compress the piston, then insert the stopper pin into the ratchet hole to hold the compressed piston.
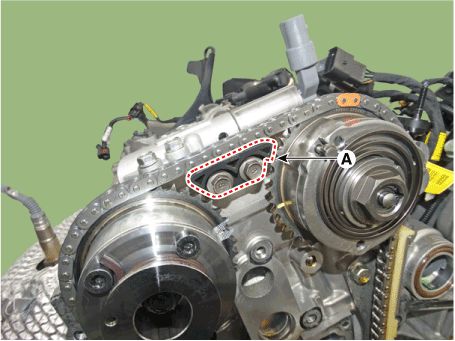
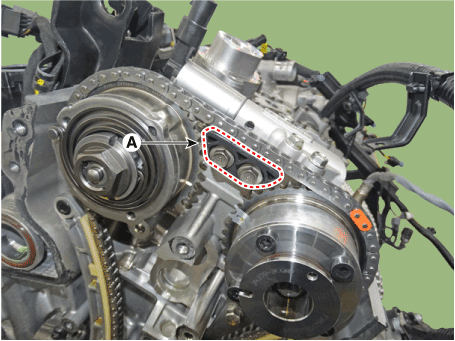
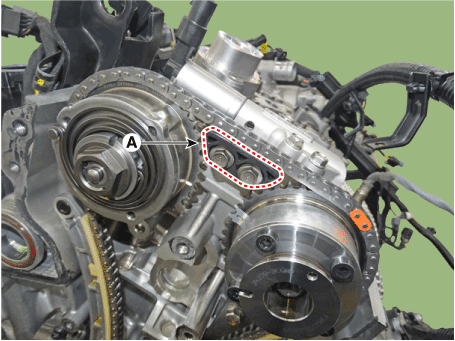
Remove the RH timing chain cam guide (A).
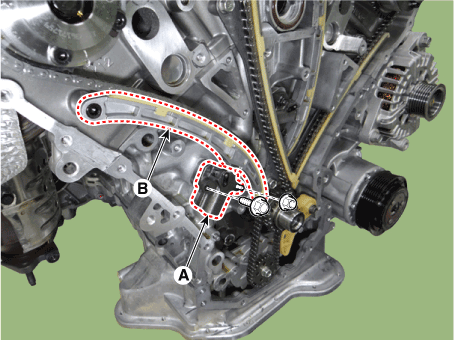
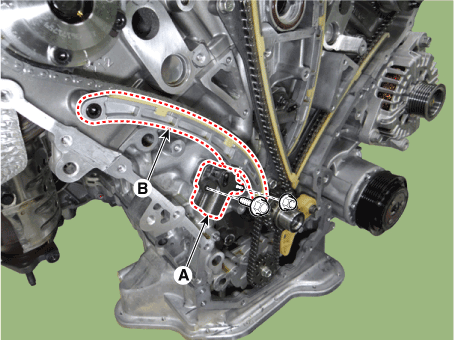
Remove the RH timing chain automatic tensioner (A) and the RH timing chain tensioner arm (B).
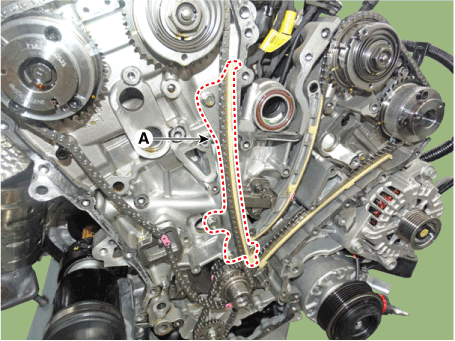
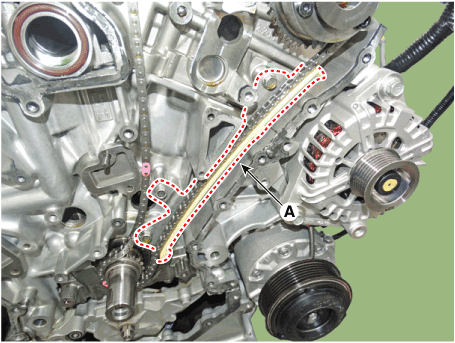
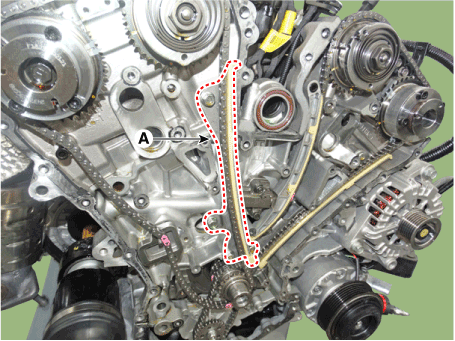
Remove the right timing chain guide (A).
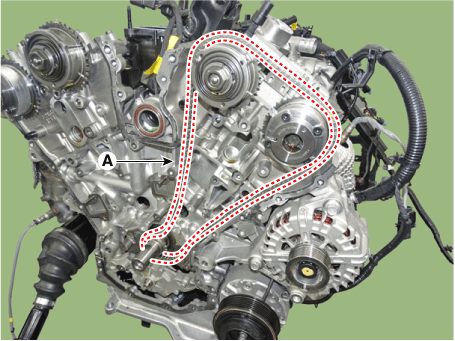
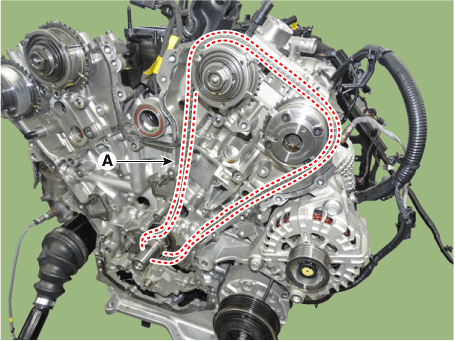
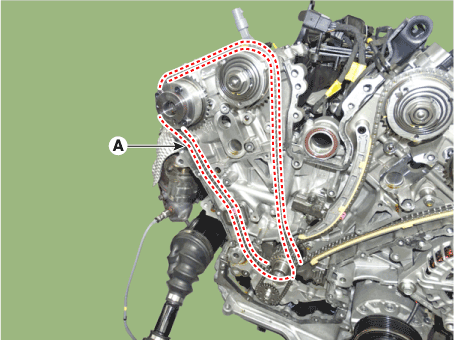
Remove the right timing chain (A).
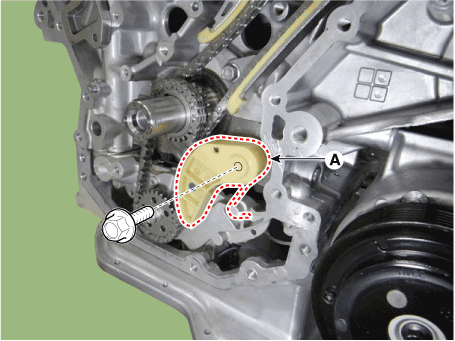
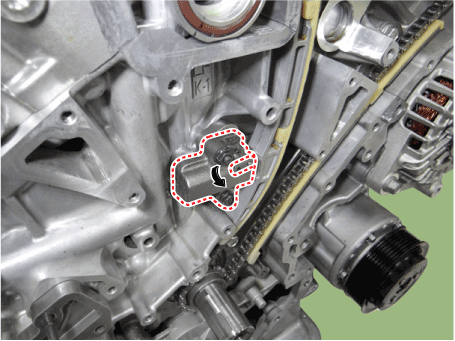
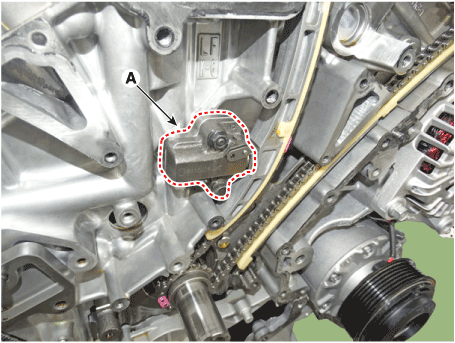
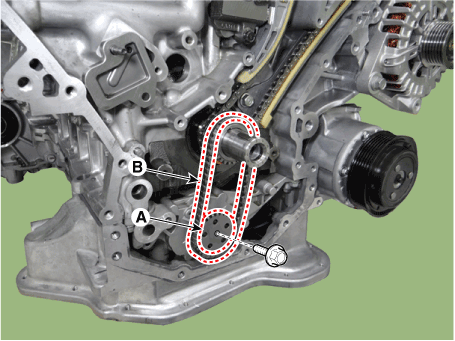
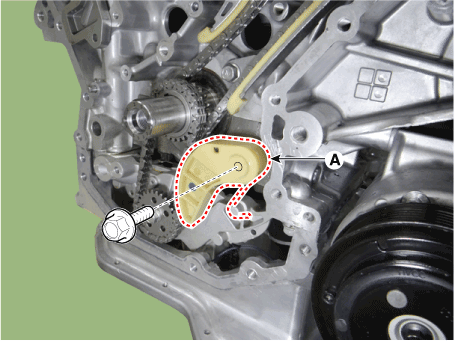
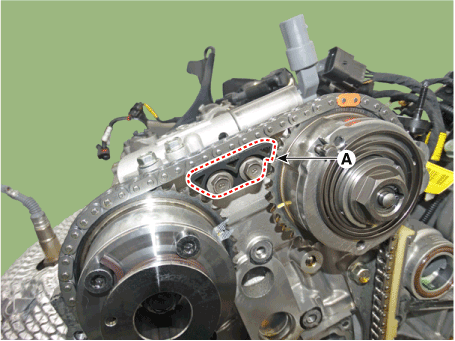
Remove the oil pump chain tensioner assembly (A).
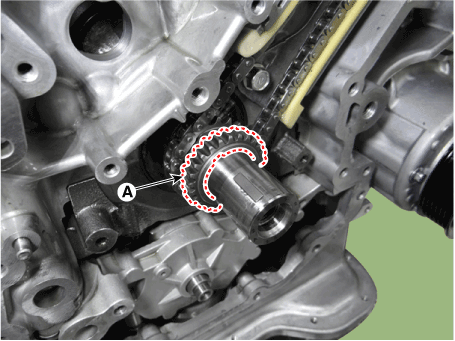
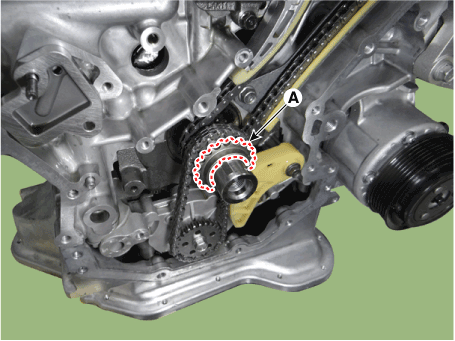
Remove the crankshaft sprocket (A) (RH camshaft drive).
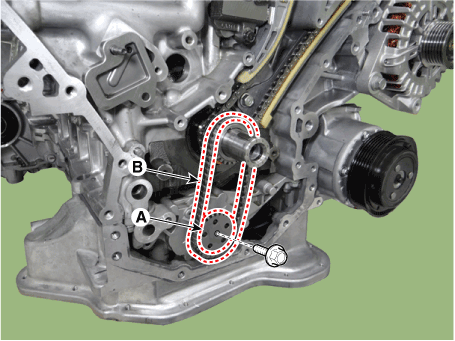
Remove the oil pump chain sprocket (A) and the oil pump chain (B).
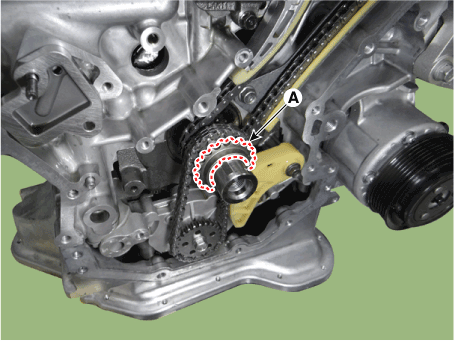
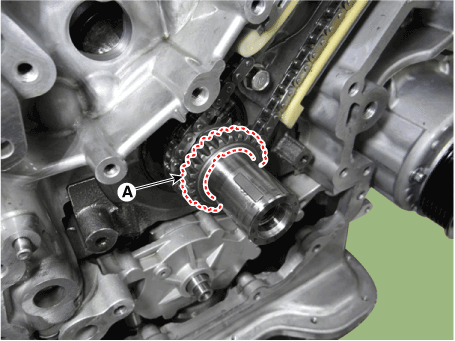
Remove the crankshaft sprocket (A) (oil pump drive).
Release the ratchet by pulling the lever down with a thin rod. Compress the piston, then insert the stopper pin into the ratchet hole to hold the compressed piston.
Remove the left timing chain cam guide (A).
Remove the LH timing chain automatic tensioner (A).
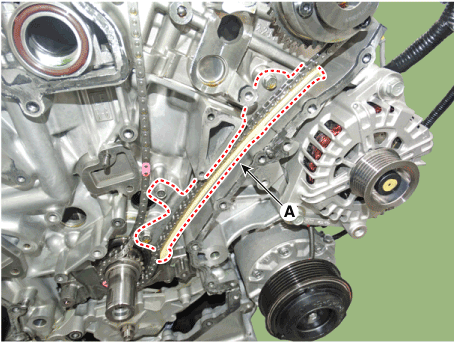
Remove the LH timing chain tensioner arm (A).
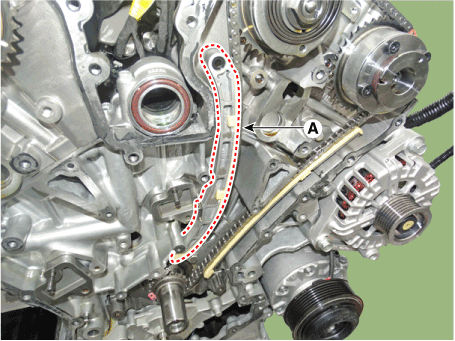
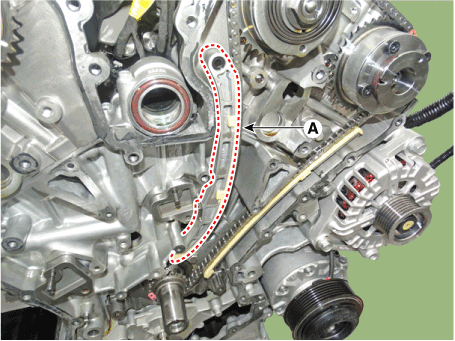
Remove the left timing chain guide (A).
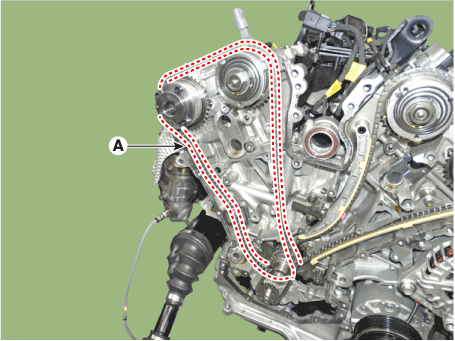
Remove the left timing chain (A).
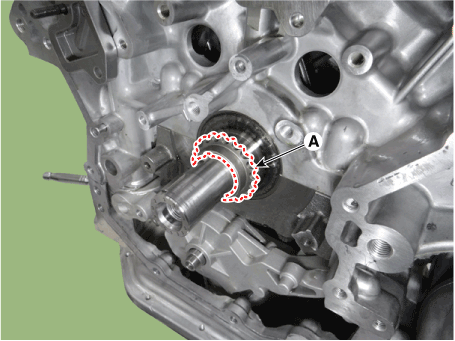
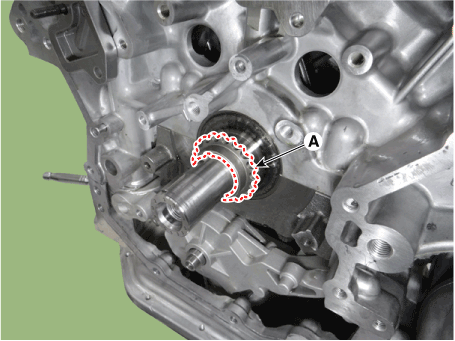
Remove the crankshaft sprocket (A) (LH camshaft drive).
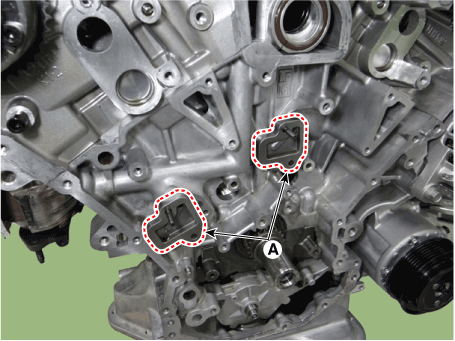
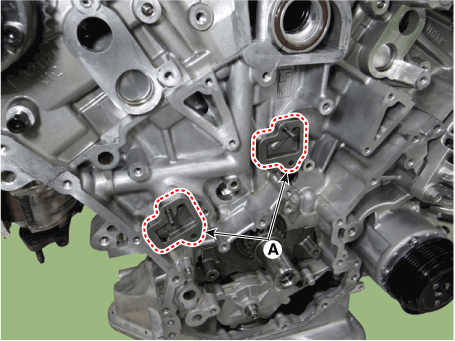
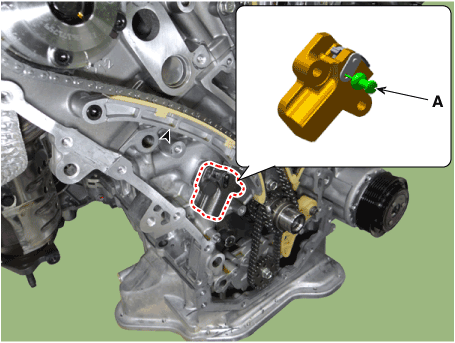
Remove the tensioner adapter assembly (A).
Inspection
Sprockets, Chain Tensioner, Chain Guide, Chain Tensioner Arm
Inspect the camshaft sprocket and crankshaft sprocket for excessive wear, cracks, or damage. Replace if necessary.
Inspect the tensioner arm and chain guide for excessive wear, cracks, or damage. Replace if necessary.
Check that the tensioner plunger moves smoothly when the ratchet pawl is released with a thin rod.
Installation
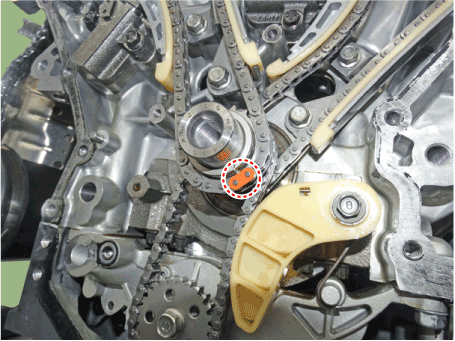
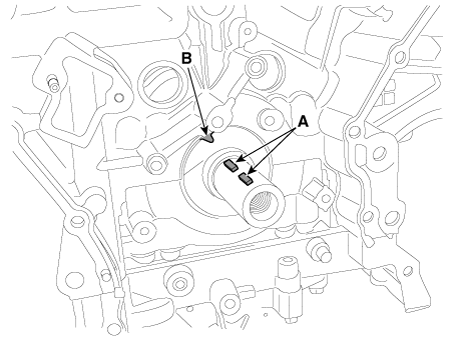
The crankshaft key (A) must be aligned with the alignment mark (B) on the block. This places the No. 1 cylinder piston at top dead center on the compression stroke.
Install the tensioner adapter assembly (A).
Install the crankshaft sprocket (A). (Left camshaft drive)
Install the left timing chain (A).
To install the timing chain without slack, perform the following for each shaft (cam, crank): Crankshaft sprocket → Exhaust camshaft sprocket → Intake camshaft sprocket.
When installing the timing chain, make sure the mark on each sprocket aligns with the timing mark (colored link) on the timing chain.
Install the left timing chain guide (A).
Tightening torque: 19.6–24 N·m
Install the LH timing chain tensioner arm (A).
Tightening torque 18.6–22 N·m
Install the LH timing chain automatic tensioner (A).
Tightening torque 9.8–11.8 N·m
Install the LH timing chain cam guide (A).
Tightening Torque: 9.8–11.8 N·m
Pull out the pin (A) of the LH timing chain automatic tensioner.
Install the crankshaft sprocket (A) (oil pump drive).
Install the oil pump chain sprocket (A) and the oil pump chain (B).
Tightening torque: 19.6–24 N·m
Install the oil pump chain tensioner assembly (A).
Tightening Torque: 9.8–11.8 N·m
Install the camshaft sprocket (A) (RH camshaft drive).
Install the right timing chain (A).
To install the timing chain without slack, perform the following for each shaft (cam, crank): Crankshaft sprocket → Intake camshaft sprocket → Exhaust camshaft sprocket.
When installing the timing chain, make sure the mark on each sprocket aligns with the timing mark (colored link) on the timing chain.
Install the right timing chain guide (A).
Tightening torque 19.6–24 N·m
Install the RH timing chain automatic tensioner (A) and the RH timing chain tensioner arm (B). Tightening torque A: 9.8–11.8 N·m B: 18.6–22 N·m
Install the right timing chain cam guide (A) onto the cam guide.
Tightening Torque: 9.8–11.8 N·m
Pull out the pin (A) of the RH timing chain automatic tensioner.
After turning the crankshaft 2 turns in the normal direction (clockwise when viewed from the front), check the alignment mark.
Always rotate the crankshaft clockwise.
Turning the crankshaft counterclockwise before assembly may cause the timing chain to disengage from the sprocket teeth due to oil pressure in the hydraulic timing chain tensioner.
Install the timing chain cover. (Refer to Timing System - "Timing Chain Cover")
Install the remaining parts in the reverse order of removal.
Fill the engine oil.
Clean the battery terminal posts and cable clamps with sandpaper. Assemble, then apply grease to prevent corrosion.
Inspect for fuel leaks.
After assembling the fuel line, turn the ignition switch ON (do not crank the engine) so that the fuel pump operates for about two seconds and pressurizes the fuel line.
Repeat this operation two or three times, then check for fuel leaks at all points of the fuel line.
Fill the radiator and the coolant reservoir with engine coolant.
Bleed air from the cooling system.
Start the engine and let it run until it warms up (until the radiator fan operates 3 or 4 times).
Stop the engine and let it cool down. Check the coolant level in the radiator and add coolant if necessary. This will allow trapped air to be bled from the cooling system.
Securely install the radiator cap, then restart the engine and check for leaks.
?
Test yourself
A quick Hyundai Palisade quiz: every answer comes with an explanation and a link to the manual page.